

My First Infused Oil
Let me tell you about my first time. I tried the garlic one. My whole kitchen smelled like an Italian restaurant. I still laugh at that. My cat, Whiskers, wouldn’t leave the kitchen floor.
It felt like magic. Plain oil became something special. That’s why this matters. Simple changes make cooking feel creative. Which flavor do you think you’d try first?
Why We Do This
Store-bought flavored oils can be pricey. And you never know what’s really in them. Making your own is different. You control every single ingredient.
It connects you to your food. You made that. You understand it. That feeling is worth more than money. Have you ever made a gift from your kitchen?
The Simple How-To
Just warm, don’t cook. That’s the big secret. Put your oil and flavors in a pan. Keep the heat low and gentle for 20 minutes. Doesn’t that smell amazing?
You must not let it smoke or simmer. Then strain it into a clean bottle. Fun fact: a clean glass jar from pickles works just fine! Label it right away. Trust me, you will forget.
Flavor Friends
Think of these like best friends for your oil. Lemon and thyme love each other. They taste like a sunny garden. Tomato and basil are classic pals.
The chili one is for brave hearts. The Italian mix is like a pizza in a bottle. Which two flavors do you think would be best friends on a piece of bread?
Your Secret Kitchen Helper
This is why this matters, too. A spoonful of your oil can lift up simple meals. Drizzle garlic oil on soup. Use lemon thyme oil on fish or roasted veggies.
It makes a plain piece of bread a treat. It turns a simple salad into a star. Your food will taste like you care. Because you do. What’s the first simple meal you’d add your oil to?
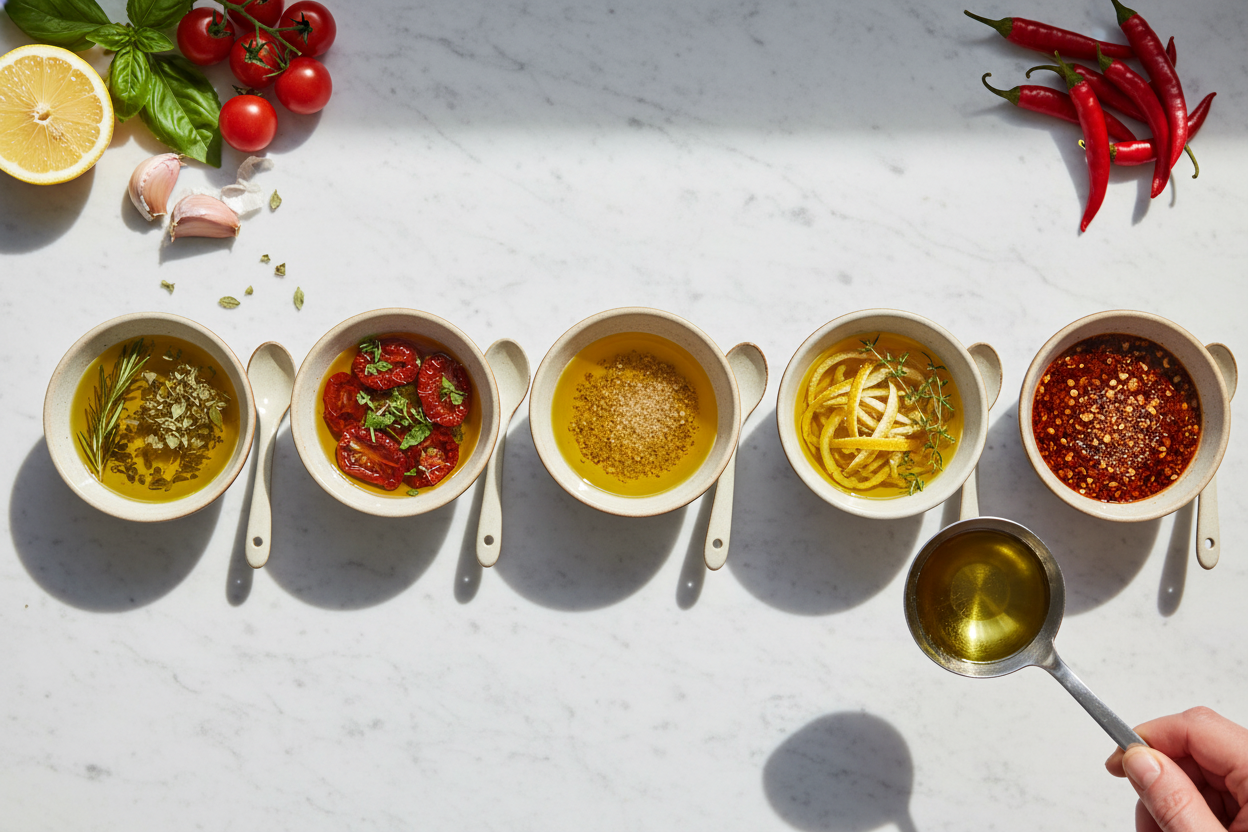
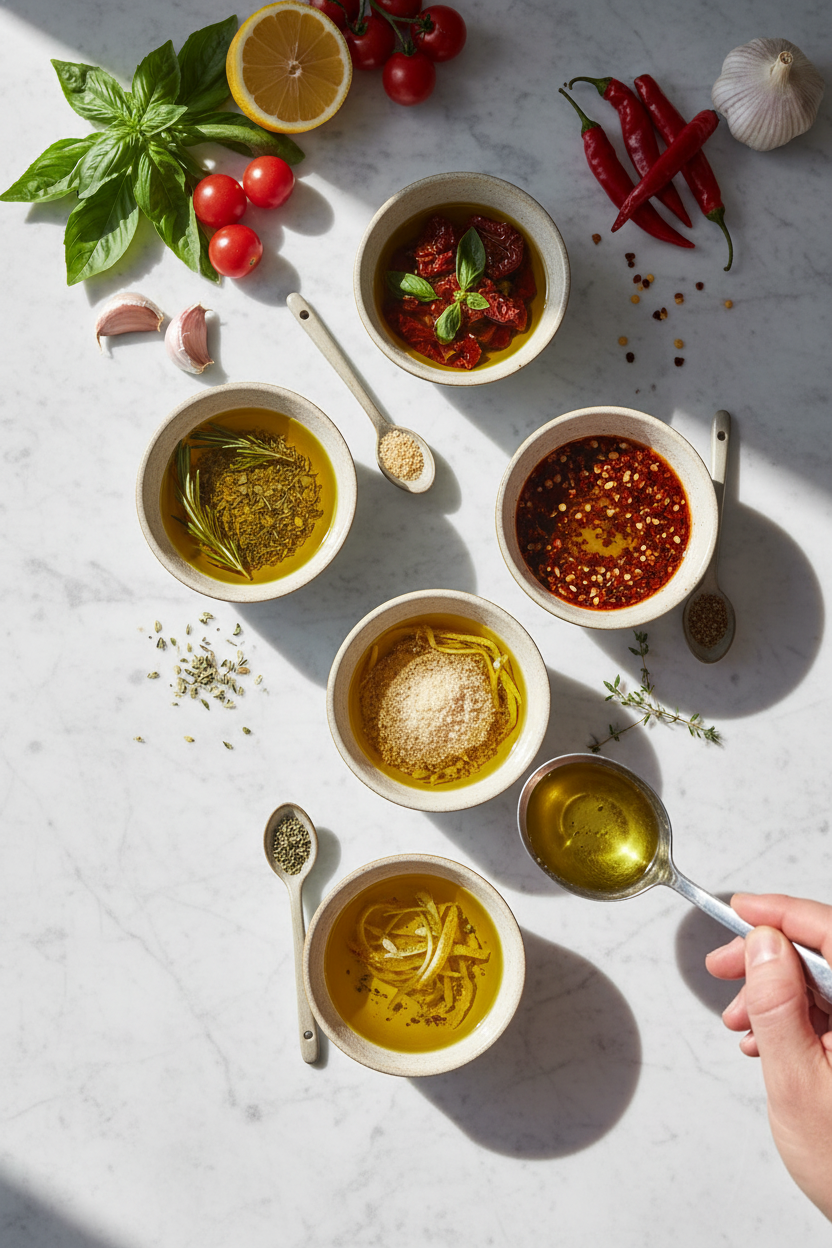
Ingredients:
| Ingredient | Amount | Notes |
|---|---|---|
| extra virgin olive oil | 1 cup (236 mL) | Base for all infusions |
| dried basil | 1 tsp | For Italian flavor option |
| garlic powder | ½ tsp | For Italian flavor option |
| dried thyme | ½ tsp | For Italian flavor option |
| dried oregano | ½ tsp | For Italian flavor option |
| dried rosemary | ½ tsp | For Italian flavor option |
| crushed red pepper | ¼ tsp | For Italian flavor option |
| sundried tomatoes (chopped) | 3 | For Sundried Tomato & Basil option |
| dried basil | 2 Tbsp | For Sundried Tomato & Basil option |
| garlic powder | 2 Tbsp | For Garlic flavor option |
| lemon peel (sliced) | 1 | For Lemon Thyme flavor option |
| dried thyme | 2 Tbsp | For Lemon Thyme flavor option |
| crushed red pepper | 2 Tbsp | For Chili flavor option |
My Magic Kitchen Potions: Infused Olive Oil
Hello, my dear! Come sit at the table. Let’s make some magic. We are making flavored olive oil today. I call them my kitchen potions. They make simple food taste special. A little drizzle can change everything. I learned this from my own grandma, you know.
She always had a bottle of garlic oil on her counter. It made her kitchen smell like heaven. We would dip our bread in it. Doesn’t that smell amazing? Today, I will show you how to make your own. You can choose your favorite flavor. It is so easy and fun.
Here is how we do it. Just follow these simple steps. Remember, we are not in a hurry. Good things take a little time.
Step 1: Pick your favorite flavor from the list. Get your ingredients ready. I love the lemon thyme one for summer. It smells so fresh and sunny. Pour one cup of olive oil into a small pot.Step 2: Add all your flavor bits to the oil. Stir them gently with a spoon. Now, turn the stove to medium/low heat. We need to be very patient here. (My hard-learned tip: Never let the oil get too hot! If it smokes, it turns bitter. We just want it warm and happy.)
Step 3: Let the potion cook for 20 minutes. You will see little bubbles sometimes. That’s the flavor moving into the oil! Stir it once or twice. I use this time to wash my bottles. It’s a peaceful little wait.
Step 4: Time to strain! Place a fine sieve over a bowl. Carefully pour your warm oil through it. This catches all the herbs and spices. Look at that beautiful, clear, flavored oil! I still laugh at the time I forgot this step. We had crunchy garlic powder oil!
Step 5: Pour your new oil into clean, dry bottles. Put a label on it right away. Write the date and flavor. Trust me, you will forget which is which! Store your bottle in a cool, dark cupboard. Which flavor do you think your family would love most? Share below!
Cook Time: 20 minutes
Total Time: 30 minutes
Yield: About 1 cup
Category: Condiment, Kitchen Basic
Your Flavor Adventure Awaits!
My favorite part is getting creative. Once you know the basic trick, you can try anything! Here are three fun twists I dreamt up in my kitchen. They make lovely gifts, too.
Orange & Rosemary: Use strips of orange peel and fresh rosemary. It’s wonderful on roasted carrots.
Mushroom & Sage: Add a few dried mushrooms and rubbed sage. Perfect for cozy fall dinners.
Everything Bagel: Use sesame seeds, garlic, and onion powder. Drizzle it over your morning eggs!
Making these always feels like a little science experiment. But a tasty one! Which one would you try first? Comment below!
Let’s Drizzle & Sip!
Now, how do we use our beautiful oil? The ideas are endless. It’s your secret ingredient. Here are my favorite ways to enjoy it.
Drizzle your garlic oil over hot popcorn. It’s a movie night game-changer. Try the Italian herb oil on a simple plate of pasta. Just add a little cheese. Or, use the sundried tomato oil as a dip for warm, crusty bread. My mouth is watering just thinking about it!
What should we drink? For a fancy dinner, a light Italian red wine pairs nicely. For a cozy night, I love sparkling lemonade with a twist. It feels so celebratory. Which would you choose tonight?
Keeping Your Infused Oil Just Right
Let’s talk about storing your special oil. Always keep it in a cool, dark cupboard. Never put it in the fridge. The cold can make it cloudy and thick.
I remember my first garlic oil. I stored it on the sunny windowsill. It lost its fresh flavor so fast! A dark bottle in the pantry is best. It keeps the taste bright for months.
Making a big batch saves time. You can gift small bottles to friends. This matters because good food is for sharing. Have you ever tried storing it this way? Share below!
Simple Fixes for Common Hiccups
Sometimes the oil gets too hot. You see little bubbles. Turn the heat down right away. Gentle warmth is the secret.
I once let my chili oil smoke. It tasted bitter. Low heat protects the delicate flavors. This matters for a smooth, tasty result.
Another issue is a weak flavor. Use fresh, dried herbs for the best taste. Stale spices won’t work well. Straining well keeps your oil clear and pretty. Which of these problems have you run into before?
Your Quick Questions, Answered
Q: Is this gluten-free? A: Yes, all the ingredients are naturally gluten-free.
Q: Can I make it ahead? A: Absolutely! The flavors get better after a few days.
Q: What if I don’t have dried thyme? A: Try another dried herb you love, like rosemary.
Q: Can I double the recipe? A: You can! Just use a bigger saucepan.
Q: Any optional tips? A: Add a fresh herb sprig to the bottle for looks. *Fun fact: Olive oil has been made for over 6,000 years!* Which tip will you try first?
From My Kitchen to Yours
I hope you love making these oils. Drizzle them on pasta or bread. They make simple meals feel special.
I would love to see your creations. Sharing food stories connects us all. Have you tried this recipe? Tag us on Pinterest! Use @EmmasCozyKitchen so I can find you.
Happy cooking!
—Emma Caldwell.
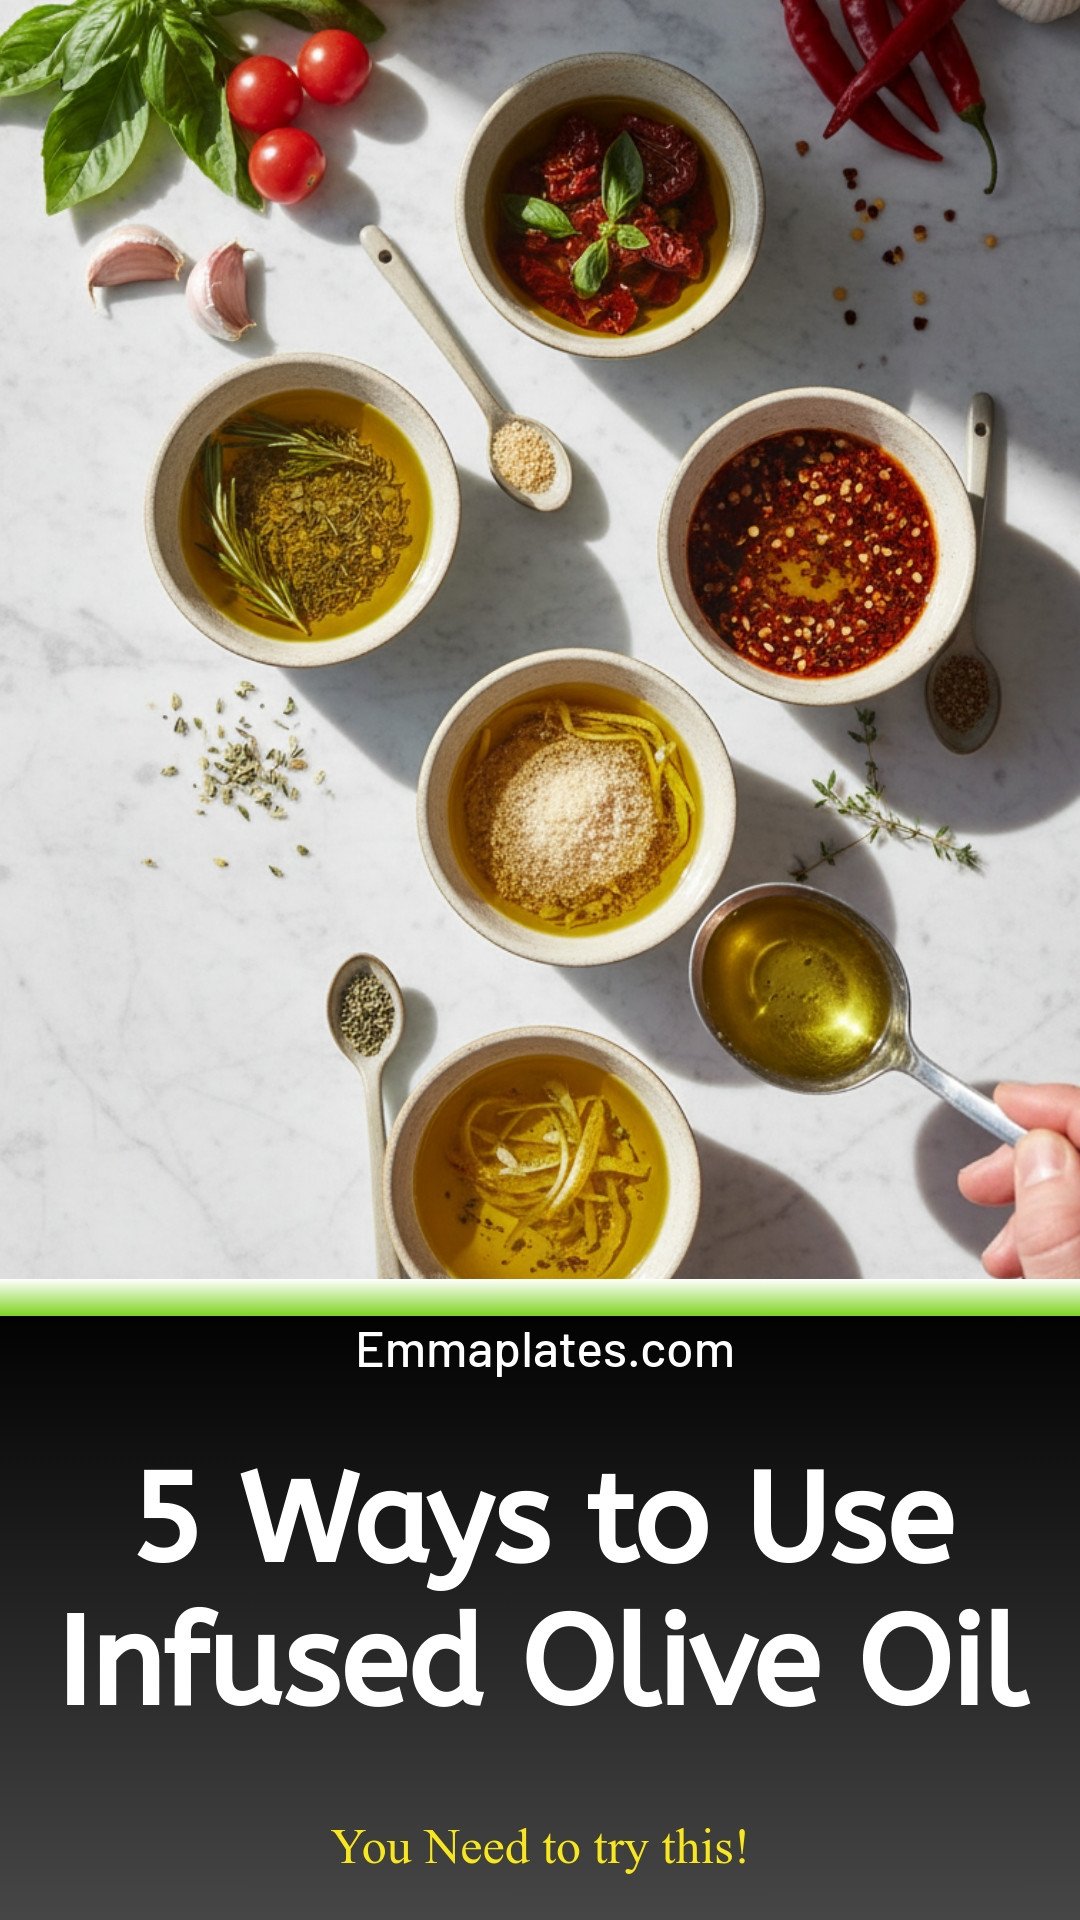
Infused Olive Oil (5 Ways!): 5 Ways to Use Infused Olive Oil
Description
Discover 5 simple infused olive oil recipes to elevate your cooking! Easy DIY flavors perfect for gifts, dressings, and gourmet meals at home.
Ingredients
Flavor options (choose one):
Instructions
- Steep: Combine oil and chosen flavor ingredients in a small saucepan. Set over medium/low heat and cook for 20 minutes to infuse the flavors into the oil (do not let it simmer or smoke).
- Strain: Using a fine mesh sieve, strain flavor ingredients from the oil, then transfer oil to clean bottles.
- Store: Label and store somewhere cool and dark until ready to serve.
Notes
- Nutrition information is not provided in the text.


Leave a Reply