
My First Spring Cookie Mess
I first tried these cookies with my grandson, Leo. We wanted to make something for spring. He was so excited to use the pastel M&Ms.
We got a little carried away. We added the whole bag! The cookies spread into one giant, colorful blob in the oven. I still laugh at that. It tasted great, but looked silly. Now I measure carefully.
Why The Little Steps Matter
This recipe has a few special steps. They make a big difference. First, cream the butter and sugar well. It makes the cookie light.
Second, do not overmix the flour. Just mix until you see no white streaks. This keeps them soft. Finally, take them out early! They look underdone. Trust me, they finish cooking on the hot pan.
The Magic of a Warm Cookie
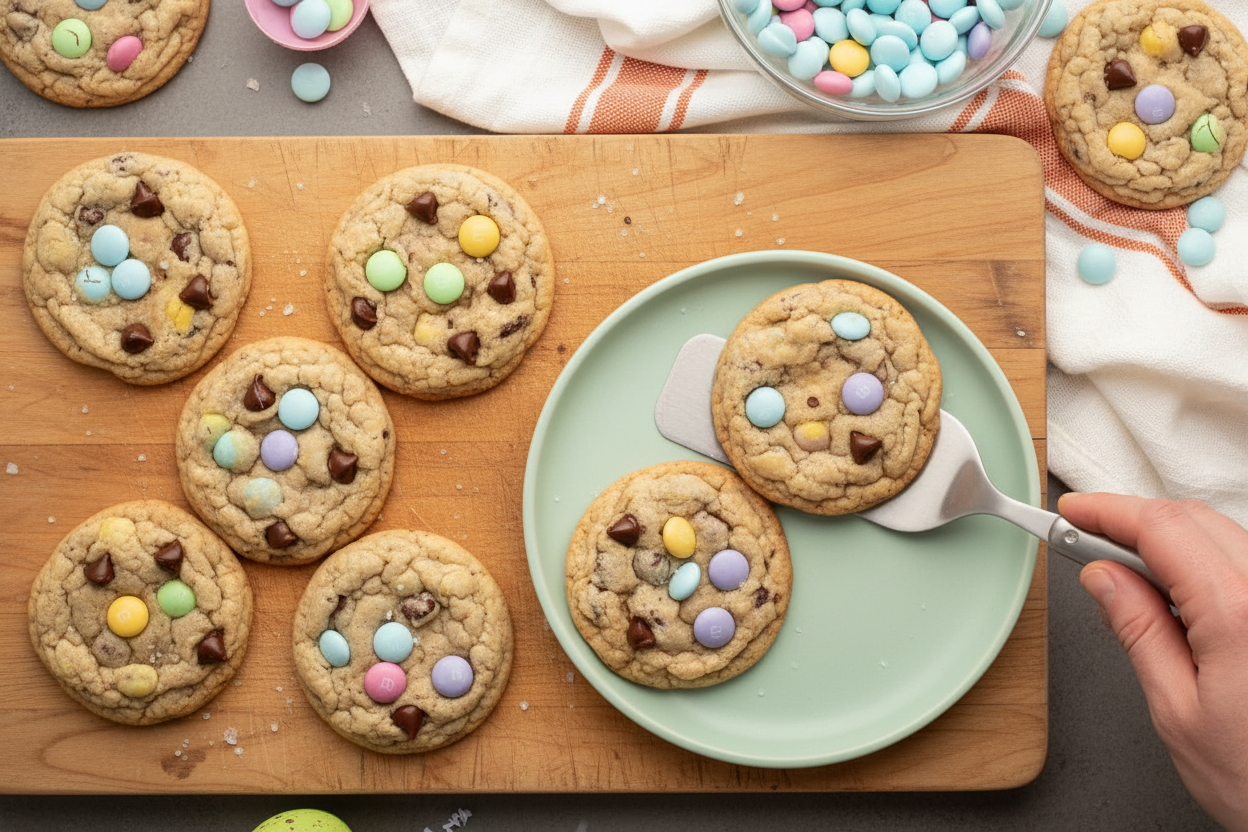
My favorite part is right after baking. You get to shape them. Use a cup to swirl each cookie into a perfect circle. Doesn’t that smell amazing?
Then, you press in the extra chocolate. The warm dough acts like glue. This step matters because it makes every cookie look loved. Food should be fun to look at, not just eat.
Making the Sweet Little Bunnies
Here is the really fun part. You turn M&Ms into bunnies! Place one whole candy for the face. Then, carefully cut another in half for ears. Press them on top.
Fun fact: The “M” on the candy is printed with edible ink. So you can hide it facing down! What other animals could you make with candies? I would love to hear your ideas.
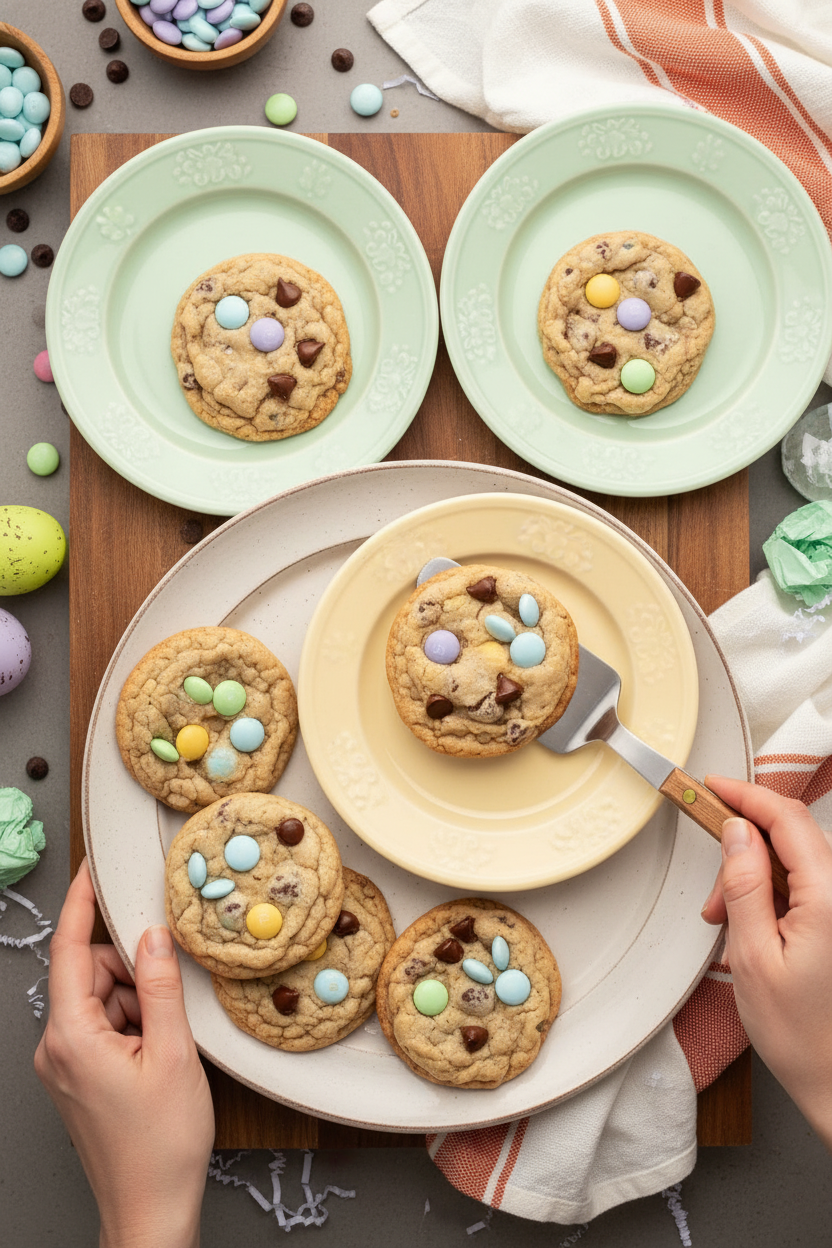
A Treat to Share
These cookies are pure joy. The sea salt sprinkle is my secret. It makes the sweet chocolate taste even richer. Try it once.
Baking is about sharing happiness. Who will you make these for? A neighbor, a teacher, or your family? Tell me who gets your first batch. And do you prefer chewy or crunchy cookies? I am always curious.

Ingredients:
| Ingredient | Amount | Notes |
|---|---|---|
| all purpose flour | 1 ½ cups | spooned and leveled |
| cornstarch | ½ tsp. | |
| baking powder | ½ tsp. | |
| baking soda | ½ tsp. | |
| salt | ½ tsp. | |
| unsalted butter | ½ cup | softened |
| light brown sugar | ½ cup | |
| granulated sugar | ½ cup | |
| egg | 1 large | room temperature |
| vanilla extract | 1 tsp. | |
| pastel M&Ms | ½ cup | plus more for garnish |
| semi sweet chocolate chips | ½ cup | plus more for garnish |
| flaky sea salt | for garnish (optional) |
My Spring Bunny Cookies
Hello, my dear! Let’s make some happy cookies. These are my Spring Bunny Cookies. They are soft and full of chocolate. The pastel M&Ms make them look like little bunnies. I still laugh at how cute they turn out. My grandson calls them “Easter Bunnies” all year long. Doesn’t that smell amazing when they bake? Let’s get our bowls ready.
Step 1:
First, turn your oven to 350°F. Line your baking sheets with parchment paper. This keeps the cookies from sticking. I learned that the hard way once! Now, whisk your flour, cornstarch, baking powder, baking soda, and salt together. A good whisk makes them light. (Hard-learned tip: Spoon your flour into the cup. Don’t scoop it! Scooping packs it down.)
Step 2:
Now, let’s cream the butter and sugars. Use your mixer for 2-3 minutes. It should look fluffy and pale. Scrape the bowl sides with a spatula. Then add the egg and vanilla. Mix just until it’s all yellow and happy. This is the heart of your cookie dough.
Step 3:
Gently mix your dry ingredients into the butter mix. Go slow. Stop as soon as you see no more flour. Over-mixing makes tough cookies. Then, turn off the mixer! Use your strong arm and a spatula. Stir in the M&Ms and chocolate chips by hand. This keeps those candies whole and pretty.
Step 4:
Scoop the dough with a big spoon or cookie scoop. I like the bumpy scoop shape. Place about 6-8 scoops on a sheet. They need room to spread. Bake for only 8 minutes. They will look too soft. That’s perfect! They set as they cool. What’s the secret to a soft cookie? Share below!
Step 5:
Act fast when they come out! Use a cup to swirl each cookie into a perfect circle. Now, the magic. Press one whole M&M into the warm cookie for a face. Then, make bunny ears. Carefully cut another M&M in half. Place the halves above the face. Add a few extra chocolate chips if you like. A tiny sprinkle of sea salt is wonderful here. Let them cool a bit before you eat. I know, waiting is hard!
Cook Time: 8-10 minutes per batch
Total Time: About 30 minutes
Yield: About 18 cookies
Category: Dessert, Cookies
Three Fun Twists to Try
You can change these up for any holiday. It’s so fun. Use what you have in your cupboard. Here are three of my favorite ideas.
Rainbow Party: Use a whole bag of regular M&Ms. Make the cookies super colorful and cheerful.
Peanut Butter Cup: Skip the chocolate chips. Use chopped peanut butter cups instead. Oh, it’s so good.
Confetti Celebration: Use festive sprinkles instead of M&Ms. Perfect for a birthday or just a sunny day.
Which one would you try first? Comment below!
Serving Them Up Sweet
These cookies are a treat all by themselves. But I love to make a moment special. For a sweet plate, serve them with fresh berries. A small bowl of whipped cream for dipping is lovely too. It feels like a cafe at home.
For drinks, a cold glass of milk is the classic choice. It just goes together. For the grown-ups, a little glass of cream sherry pairs nicely. It’s sweet and nutty. Which would you choose tonight?
Keeping Your Spring Bunnies Fresh
These cookies are best enjoyed the day you bake them. But I always make a double batch. To store them, let them cool completely first. Then place them in a single layer in a container. Use parchment paper between layers if you stack them.
You can freeze the dough or baked cookies. For dough, scoop it onto a tray and freeze solid. Then pop the dough balls into a bag. Bake straight from the freezer, adding a minute or two. This matters because a ready-to-bake treat is a little gift to your future self.
I once left a warm cookie in a tin. It got soft and the bunny ears slid off! Now I always wait for them to cool. Have you ever tried storing it this way? Share below!
Cookie Troubles? Let’s Fix Them
First, flat cookies often mean butter was too warm. Your butter should be soft but not greasy. I remember when my grandson used melted butter. We got one giant, flat cookie sheet! Chilling your dough for 30 minutes can really help.
Second, dry cookies come from over-mixing the flour. Mix just until you see no more white streaks. This matters because gentle mixing keeps cookies tender. Third, if your bunnies crack, the dough was too cold. Let it sit on the counter for ten minutes.
Fixing small issues builds your kitchen confidence. You learn what feels right. Which of these problems have you run into before?
Your Quick Cookie Questions
Q: Can I make these gluten-free? A: Yes! Use a good 1-to-1 gluten-free flour blend. The results are wonderful.
Q: Can I make the dough ahead? A: Absolutely. Keep it covered in the fridge for up to three days.
Q: What can I use instead of M&Ms? A: Any small candy or more chocolate chips work just fine.
Q: Can I double the recipe? A: You sure can. Just mix in a very large bowl.
Q: Is the sea salt necessary? A: It’s optional, but it makes the chocolate taste richer. Which tip will you try first?
From My Kitchen to Yours
I hope you have fun making these spring treats. Baking is about sharing joy and making memories. *Fun fact: The “M” on the candy stands for Mars, the last name of the man who invented them.*
I would love to see your cookie bunnies. Have you tried this recipe? Tag us on Pinterest! Show me your kitchen creations. It makes my day to see them.
Happy cooking!
—Emma Caldwell.
Spring M&M Cookies: Spring M and M Cookies Recipe
Description
Bright & chewy Spring M&M Cookies! Easy recipe bursting with pastel candy colors, perfect for Easter baskets, spring parties, or a sweet seasonal treat.
Ingredients
Instructions
- Preheat & prep: preheat the oven to 350F and line 2 baking sheets with parchment paper. Set aside.
- Whisk dry ingredients: in a medium mixing bowl, whisk together the dry ingredients. Be sure to properly measure the flour. Set aside.
- Cream: in the bowl of a stand mixer fitted with the paddle attachment, cream the butter and sugars for 2-3 minutes, scraping down the sides of the bowl as needed.
- Egg & vanilla: add the egg and vanilla extract, and mix again until combined.
- Spoon in dry ingredients: gradually mix in the dry ingredients until incorporated, but do not over mix.
- Add in chocolate: turn the mixer off and add the pastel M&Ms and chocolate chips. Stir them in with a rubber spatula until incorporated throughout the cookie dough.
- Scoop: using a 2 Tbsp. Cookie scoop, scoop the cookies directly onto the prepared baking sheets. Baking ~6-8 cookies at a time. (I don’t roll these ones between the palms of my hands, I like how the scoop shape looks 😊).
- Bake: for 8-10 minutes, be sure to underbake. I always take mine out at 8 minutes.
- Swirl: the cookies will look underbaked, but they set up as they cool. Swirl a circular cup or cookie cutter (something larger than the cookies) around the cookies right out of the oven to give them a perfect circular look.
- Decorate: add the cute bunnies! While the cookies are warm, place 1 whole M&M into the cookie (make the logo face side down). Then, cut another M&M in half to create the ears and place the bunny ears on top. You can also add a couple more semi-sweet chocolate chips too, and sprinkle on flaky sea salt if desired.
- Enjoy!! Cool for just a couple minutes on the baking sheet, then transfer to a wire rack to cool completely.
Notes
- For perfectly chewy cookies, be sure to underbake them. The cookies will continue to set as they cool on the baking sheet.


Leave a Reply