
My First No-Bake Fiasco
Let me tell you about my first try at no-bake treats. It was a hot summer day. My oven was broken. I decided to get creative with dates and nuts.
I mixed everything in a big bowl. It was a sticky mess. I shaped it into a lumpy block. My grandson called it “mud pie.” I still laugh at that. But you know what? It tasted wonderful. This is why simple, real food matters. You don’t need fancy tools to make something good.
Why These Brownies Feel Special
These brownies are like little energy bites. The dates make them sweet and chewy. The walnuts give a nice crunch. Doesn’t that sound good?
You mix it all in a food processor. It comes together like magic dough. Press it into a pan. The frosting is just a stir-together glaze. It gets shiny and firm in the fridge. Fun fact: Dates are often called “nature’s candy” because they are so sweet all on their own.
A Little Kitchen Secret
The recipe says to process the dough in two batches. This is my favorite tip. It seems like an extra step. But it makes all the difference.
If you put everything in at once, the processor gets jammed. The dates won’t mix in right. Doing it in two parts keeps it easy. Your dough will be smooth and perfect. What’s a kitchen tip that saved you from a mess? I’d love to hear yours.
The Smell of Cocoa
When you open that cocoa powder, take a deep breath. Doesn’t that smell amazing? It smells like promise. It smells like a treat is coming.
Stirring the frosting is my favorite part. You watch the cocoa, honey, and oil become one. It goes from dusty to glossy. This is why cooking matters. It’s not just about eating. It’s about the smells and the quiet stirring. It’s a little moment of peace.
Your Turn to Make Memories
Now, it’s your turn. This recipe is for everyone. Use maple syrup instead of honey to keep it vegan. The coconut oil holds it all together.
Let the brownies chill for two whole hours. This is the hard part! But it makes them slice so neatly. What will you drink with your brownie? A glass of cold milk? Maybe some almond milk? Tell me your perfect pairing.

Ingredients:
| Ingredient | Amount | Notes |
|---|---|---|
| Dates, pitted | 25 | |
| Walnuts | 2 1/2 cups | |
| Unsweetened cocoa powder | 3/4 cup | for the brownie base |
| Creamy peanut butter | 1/4 cup | |
| Coconut oil, melted | 1/4 cup | for the brownie base |
| Vanilla extract | 1 tsp. | for the brownie base |
| Kosher salt | 1/2 tsp. | |
| For the frosting: | ||
| Cocoa powder | 1/3 cup | |
| Honey or maple syrup | 1/3 cup | use maple syrup for vegan option |
| Coconut oil, melted | 1/4 cup | for the frosting |
| Vanilla extract | 1/2 tsp. | for the frosting |
My No-Bake Chocolatey Date Brownies
Hello, my dear! Come sit at the counter. Let’s make something sweet. These brownies are my secret for a quick treat. They are rich, fudgy, and so simple. You don’t even need to turn on the oven. I love that. It keeps the kitchen cool on warm days. My grandson calls them “energy squares.” He eats one before soccer. I still laugh at that. They taste like pure chocolate joy to me. Doesn’t that smell amazing? Let’s begin.
Ingredients
- 2 cups pitted dates
- 2 cups walnuts
- 1 cup cocoa powder, divided
- 1/4 teaspoon salt
- 1/2 cup peanut butter (or other nut/seed butter)
- 1/4 cup coconut oil, melted
- 2 teaspoons vanilla extract
For the Frosting
- 1/4 cup cocoa powder
- 1/4 cup honey or maple syrup
- 1/4 cup coconut oil, melted
- 1/2 teaspoon vanilla extract
Instructions
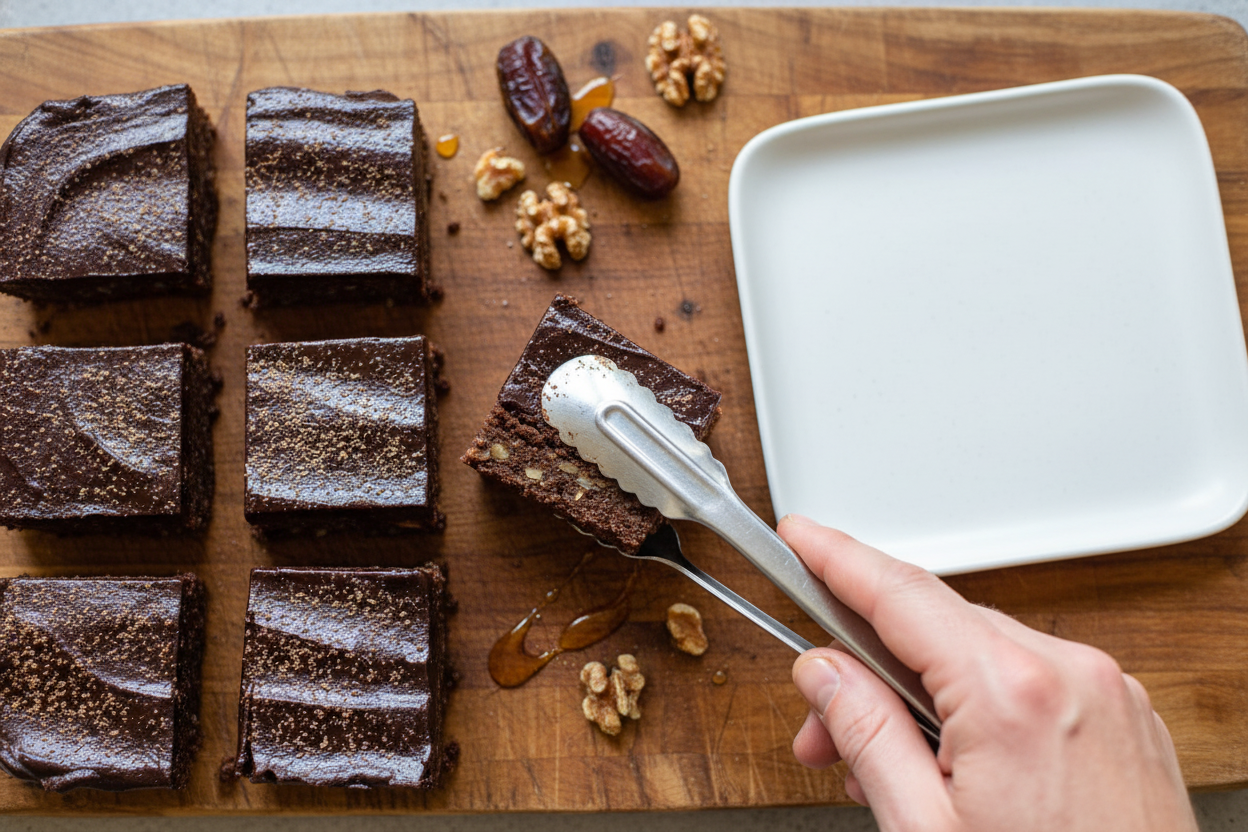
Step 1: First, get your pan ready. Lightly grease a small square pan (8×8 inch). You can also use parchment paper. I always use paper. It makes lifting the brownies out so easy. Set that pan aside for now. Now, place your dates in a big bowl. Cover them with lukewarm water. Let them take a ten-minute bath. This makes them soft and sweet. It’s like giving them a little spa treatment.
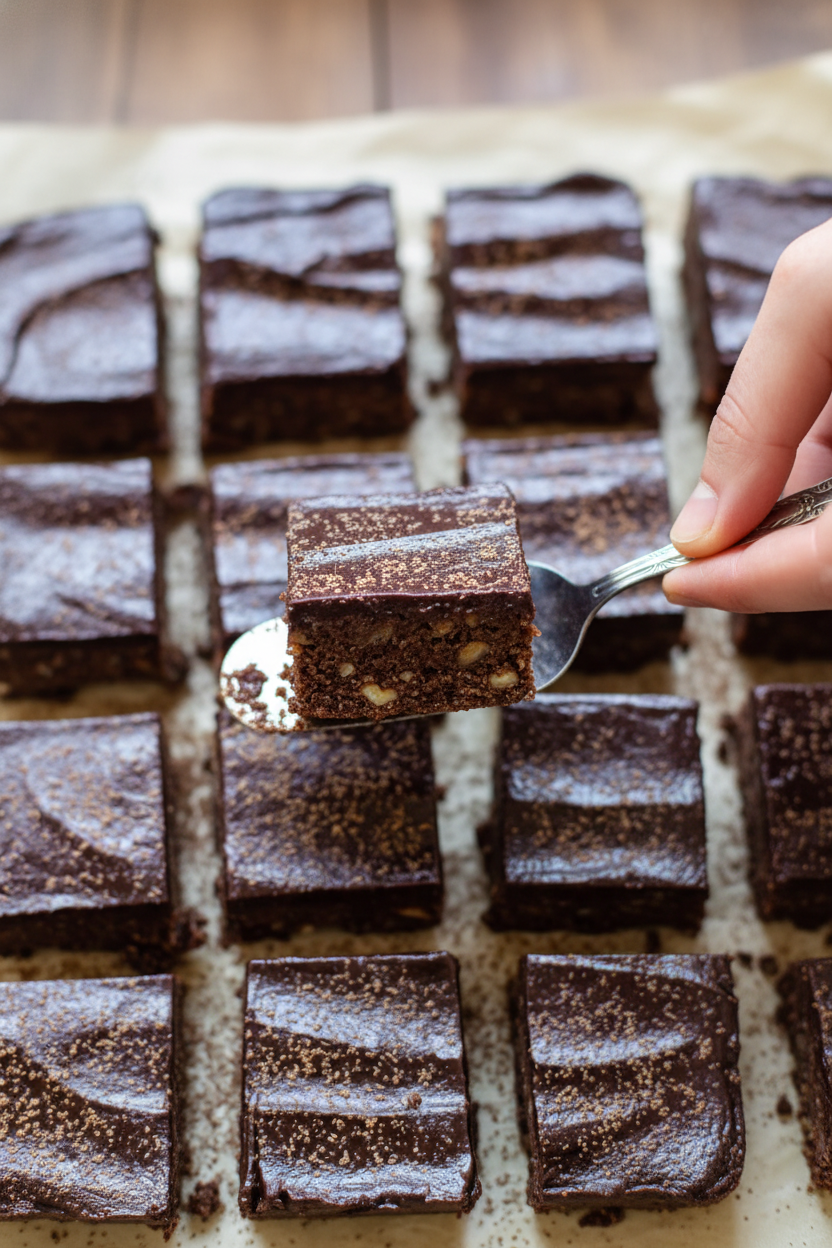
Step 2: Drain those plump dates well. Then, chop them into small pieces. Be careful with your fingers! Next, grab your food processor. Add the walnuts, cocoa powder, and salt. Process it until it looks like dark, crumbly sand. Here’s a hard-learned tip: You must do this in two batches. The processor gets too full otherwise! So, take out half of this yummy mixture. Put it in a separate bowl.
Step 3: Now, add half of your chopped dates to the processor. Also add half of the peanut butter, coconut oil, and vanilla. Let it whir until it all sticks together. Squeeze a bit in your hand. Does it hold? If it falls apart, add a tiny bit more oil. Press this first batch firmly into your prepared pan. Doesn’t it already look good?
Step 4: Now, repeat with the second half. Put the reserved crumbs back in the processor. Add the rest of your dates, peanut butter, oil, and vanilla. Process it all again. Then, plop this dough right on top of the first layer. Press everything down very, very firmly. You want it all to be one happy block. Pop the whole pan into the fridge. Let it chill while we make the magic frosting.
Step 5: The frosting is simple. Just stir everything in a bowl. Use cocoa powder, honey or maple syrup, melted coconut oil, and vanilla. Keep stirring. It will slowly thicken into a glossy, beautiful frosting. Spread it over your cold brownie base. Be gentle so you don’t pull up the crumbs. Now, the hardest part: waiting. They need at least two hours in the fridge to set. What’s your favorite part of making treats: the mixing or the eating? Share below!
Cook Time: 2 hours (chilling)
Total Time: 2 hours 30 minutes
Yield: 16 small squares
Category: Dessert, Snack
Three Fun Twists to Try
Once you master the basic recipe, you can play! Here are three of my favorite twists. They make each batch a new adventure. I love seeing what my family prefers.
Orange Zest Joy: Add the zest of one orange to the dough. It makes the chocolate taste brighter and sunny.
Peanut Butter Pocket: Before adding the frosting, drop little spoonfuls of extra peanut butter on the brownie. Then swirl it gently with a knife.
Sea Salt Sparkle: After frosting, sprinkle a tiny pinch of flaky sea salt on top. It makes the sweet chocolate taste even deeper and richer.
Which one would you try first? Comment below!
Serving Them Up With Style
These brownies are wonderful all on their own. But you can dress them up! For a fancy plate, dust them with a little extra cocoa powder. Serve one with a few fresh raspberries on the side. The tart berry is perfect with the sweet chocolate. You could also add a dollop of coconut whipped cream. It feels like a celebration.
What to drink? For a cozy night, I love a cold glass of almond milk. It’s a classic pairing. For the grown-ups, a small glass of ruby port wine is lovely. It sips like liquid raisins. Which would you choose tonight?
Keeping Your Brownies Perfect
These brownies love the cold. Keep them in the fridge for a week. They get nicely firm. For longer storage, the freezer is your friend. Wrap them tightly first. They will keep for two months there.
You can make a double batch easily. Just press the dough into a bigger pan. I once forgot to wrap a batch. They dried out a bit. Now I always use parchment paper.
Batch cooking saves you time later. It means a sweet treat is always ready. This matters for busy days. You deserve a simple joy. Have you ever tried storing it this way? Share below!
Fixes for Common Hiccups
Is your dough too crumbly? It needs more moisture. Add a tiny bit more coconut oil. I remember when my first batch fell apart. A little extra oil fixed it perfectly.
Is the frosting too runny? Just let it sit. Stir it a few more minutes. It will thicken as the oil cools. Getting the texture right builds your confidence. Good texture makes every bite more fun.
Are the dates too hard? Soak them longer in warm water. Soft dates blend smoothly. This ensures your brownies are chewy, not gritty. Which of these problems have you run into before?
Your Quick Questions, Answered
Q: Are these really gluten-free? A: Yes! They use no flour. Just nuts, dates, and cocoa.
Q: Can I make them ahead? A: Absolutely. They get better after a night in the fridge.
Q: What if I don’t have peanut butter? A: Almond or sunflower seed butter works great too.
Q: Can I double the recipe? A: You can. Use a 9×13 inch pan for a double batch.
Q: Any optional tips? A: A sprinkle of sea salt on top is lovely. *Fun fact: The salt makes the chocolate taste even richer.* Which tip will you try first?
From My Kitchen to Yours
I hope you love these no-bake treats. They are so simple and satisfying. Making them should feel like a happy little project.
I would be thrilled to see your creation. Share a picture of your brownie squares. It makes my day to see your kitchen wins. Have you tried this recipe? Tag us on Pinterest!
Happy cooking!
—Emma Caldwell.
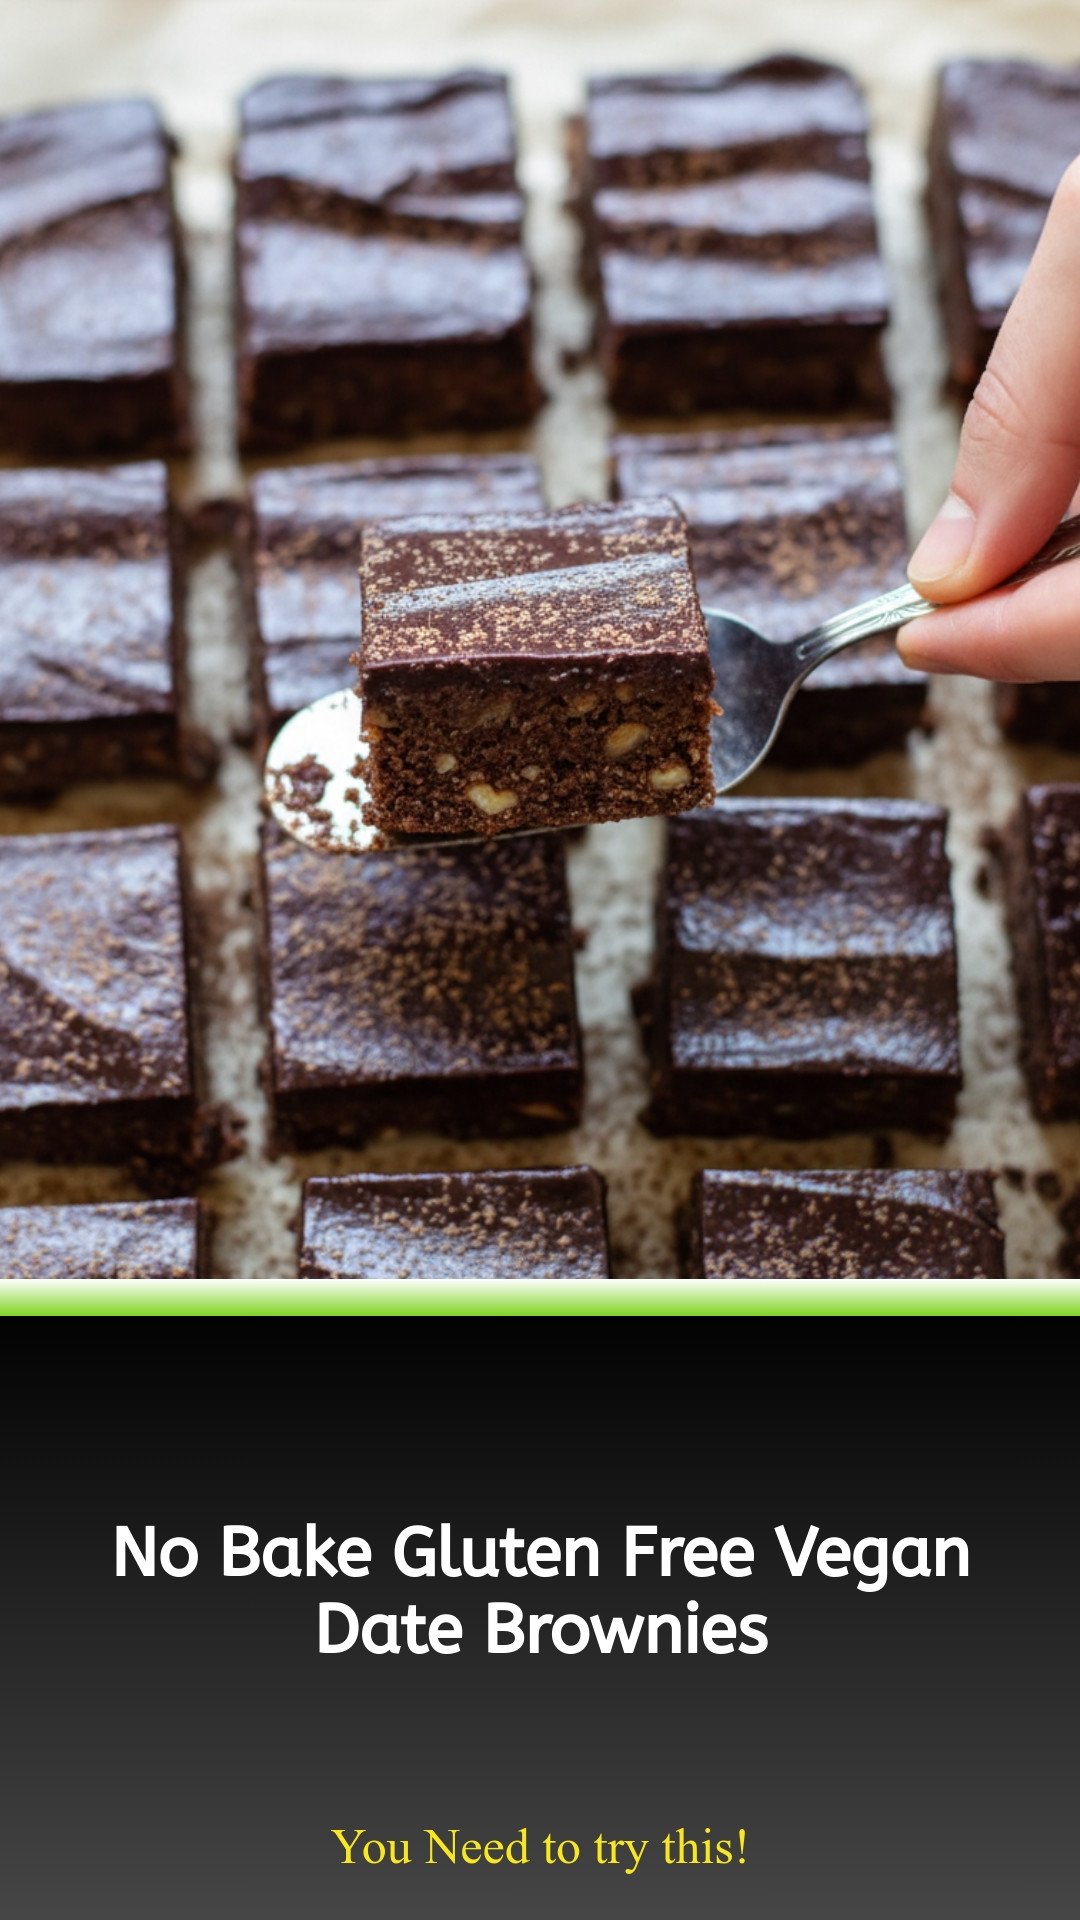
No Bake Date Brownies (GF, DF, Vegan option): No Bake Gluten Free Vegan Date Brownies
Description
No bake date brownies are a healthy, fudgy dessert! Gluten-free, dairy-free with a vegan option. Easy to make with simple ingredients.
Ingredients
=== For the frosting ===
Instructions
- Lightly grease an 8×8-inch square baking pan, or line the pan with parchment or wax paper. Set aside.
- Soak dates in lukewarm water in a large bowl for 10 minutes. Drain and chop into small pieces.
- Process the walnuts, cocoa powder and salt in the bowl of a food processor until crumbly.
- Remove half of the walnut mixture and set aside in a bowl (all of the dough won’t fit at one time to combine properly so you need to process half, set aside, then process the other half).
- Add half of the dates, half of the peanut butter, half of the oil and vanilla to the walnut mixture. Process until combined, adding more coconut oil as needed. If the mixture does not hold together when squeezed in your hand, you’ll know you need to add a touch more. Transfer this half of the dough into the prepared pan.
- Place remaining cocoa/walnut mixture, dates, peanut butter, oil and vanilla into processor and process again until combined.
- Transfer dough to the pan and press firmly until dough is distributed evenly in the pan. Place in fridge while you make the frosting.
- Stir together the cocoa powder, honey, coconut oil and vanilla in a medium sized bowl. Continue to stir until it thickens up a bit. Spread evenly over the brownies in the pan. Refrigerate again for at least 2 hours before cutting. Garnish with cocoa powder if desired.
Notes
- For a vegan version, be sure to use maple syrup instead of honey.


Leave a Reply