

The Secret Is In The Salt
Let me tell you about my friend Kate. Her fried chicken is the best. I asked for her secret. She said, “Emma, you must season early.” So we sprinkle that salt and pepper first. Then we let the chicken sit.
This waiting time is magic. The salt pulls moisture to the skin. This helps the flour stick later. It also makes the meat juicy inside. I still laugh at how simple it is. The best tricks often are.
Getting The Oil Just Right
Now, heating the oil is important. You want it at 350 degrees. Too cool, and the chicken gets greasy. Too hot, and it burns outside but stays raw inside. I use a thermometer. It is my kitchen friend.
Fun fact: You can test the oil with a bread cube. If it browns in 60 seconds, you are ready. Doesn’t that smell amazing? This matters because the right temperature gives you a crispy crust. That crunch is everything.
The Little Flour Massage
Here is my favorite part. Dredge the chicken in the seasoned flour. But do not just dip it. Get your hands in there. Massage that flour into every nook and cranny. Press it on good.
This creates little pockets of crunch. It makes all the difference. Do you like extra crispy skin or more tender coating? I always go for crispy. Tell me which you prefer!
Frying With Patience
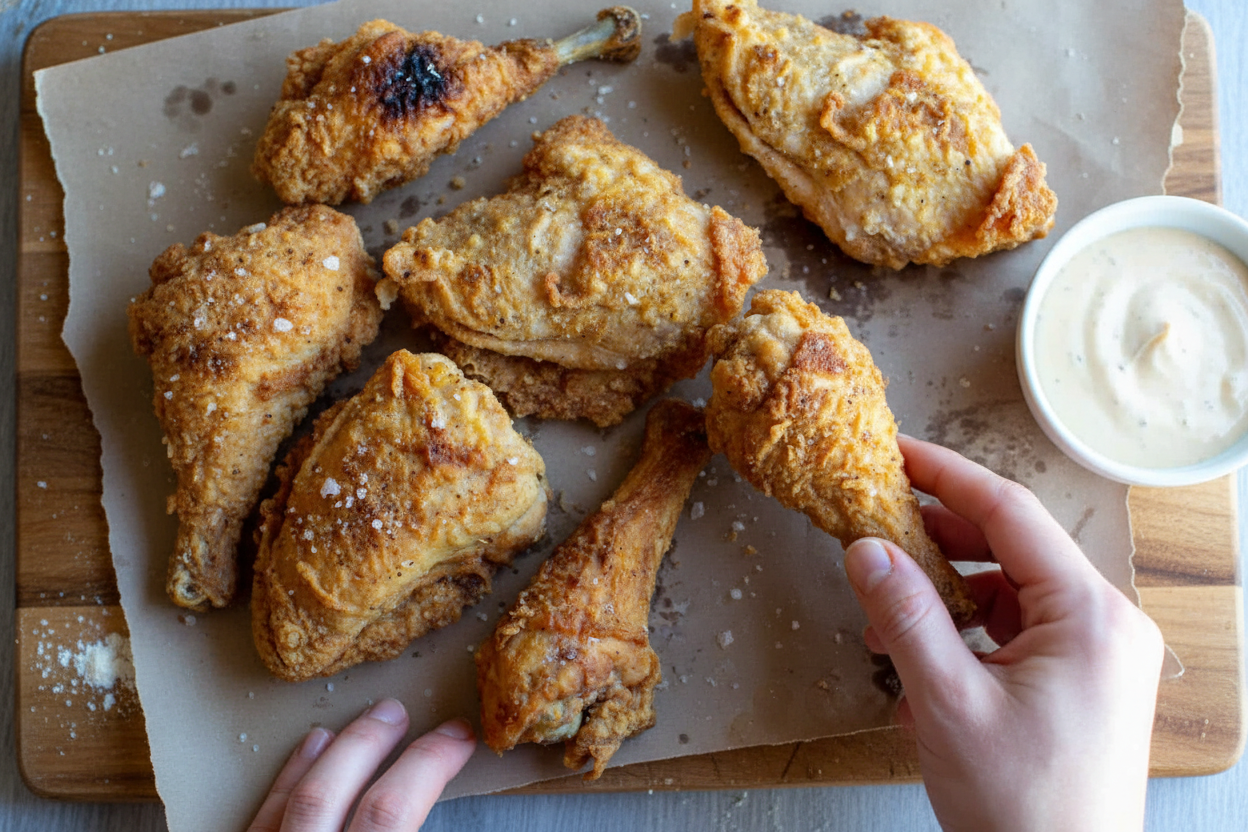
Do not crowd the pot. Fry just three or four pieces at a time. This keeps the oil hot. Flip them now and then with tongs. They will turn a beautiful golden brown.
It takes about 12 to 15 minutes. The wait is hard. But trust me, it is worth it. This matters because rushing ruins good food. Good things take time, even in the kitchen.
The Final Warm Rest
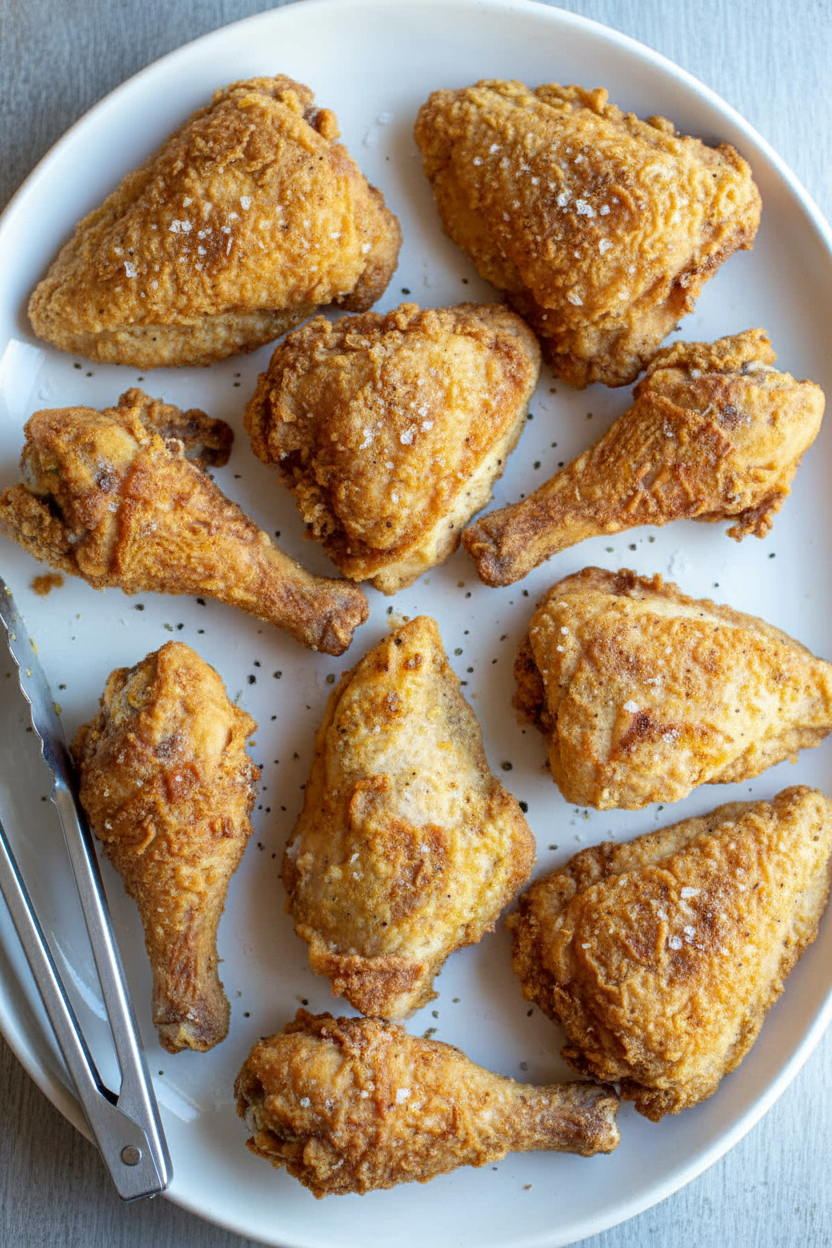
As each batch finishes, place it on a rack. Put that in a warm oven. This keeps the chicken crispy. It also lets the juices settle inside the meat. Never skip the rest.
Let the last batch rest on the counter for 10 minutes. Then dig in. What is your must-have side dish? Mine is creamy coleslaw. I would love to hear your family’s favorite way to serve it.
Ingredients:
| Ingredient | Amount | Notes |
|---|---|---|
| Bone-in, skin-on chicken thighs and drumsticks or breasts | 3-4 pounds | Breasts should be cut in half |
| Kosher salt | 4 teaspoons | Divided use |
| Freshly ground black pepper | 1 1/2 teaspoons | Divided use |
| Avocado oil | 2 liters (about 8 cups) | For frying |
| All-purpose flour | 1 cup |
Kate’s Fried Chicken: A Story in Every Crispy Bite
Hello, my dear. Come sit at the table. Let’s talk about fried chicken. My friend Kate taught me this recipe years ago. We laughed so much that first time. I still laugh at that. The secret is in the simple steps. And a little bit of patience. Let me walk you through it.
- Step 1: First, get your chicken ready. Pat it dry with a paper towel. This helps the skin get super crispy. Sprinkle it all over with salt and pepper. Let it sit on the counter for a bit. This brings out the flavor. (My hard-learned tip: Don’t skip the drying step. Wet chicken makes the flour gummy!).
- Step 2: Now, pour your oil into a big, heavy pot. You need it to be two inches deep. Attach a thermometer to the side. Heat it slowly to 350°F. This feels like it takes forever. I use the time to set up my station. Doesn’t that smell amazing when it heats up?
- Step 3: Mix flour with more salt and pepper. Coat each chicken piece really well. Press the flour into all the nooks. Fry just three or four pieces at a time. Too many will cool the oil. Fry until they are a deep golden brown. It takes about 15 minutes. What’s your favorite piece: drumstick or thigh? Share below!
- Step 4: As they finish, place them on a wire rack. Put that rack on a baking sheet. Keep them warm in a 250°F oven. This keeps everyone hot until dinner. Let the last batch rest for ten minutes. Then, it’s finally time to eat. The crunch is worth the wait.
Cook Time: 45 minutes
Total Time: 1 hour
Yield: 4 servings
Category: Dinner, Comfort Food
Three Fun Twists on a Classic
Once you master the basic recipe, try playing. It’s like adding a new chapter to the story. Here are three of my favorite twists. They make the chicken sing a different tune.
- Spicy Sunshine: Add two teaspoons of paprika and a pinch of cayenne to the flour. It gives a warm, happy glow.
- Herb Garden: Mix in one tablespoon of dried thyme and rosemary with the flour. It tastes like a summer afternoon.
- Cornflake Crunch: Replace half the flour with crushed cornflakes. The extra crunch is a delightful surprise.
Which one would you try first? Comment below!
Setting the Table for Success
This chicken deserves good company. I love it with creamy mashed potatoes. A simple coleslaw is perfect too. It adds a fresh, cool crunch. For a pretty plate, add a handful of pickles. Their bright green color looks so cheerful.
What to drink? For the grown-ups, a cold lager beer is lovely. It cuts right through the richness. For everyone, try sparkling apple cider. Its sweet fizz is a celebration. Which would you choose tonight?
Keeping Your Fried Chicken Crispy and Happy
Let’s talk about storing your beautiful chicken. First, let it cool completely. Never put hot food in the fridge. I learned that the hard way. My first batch steamed up and got soggy. It was a sad day.
For the fridge, use a shallow container. Lay pieces in a single layer. They will keep for three to four days. To reheat, use your oven. Set it to 375 degrees. Place chicken on a wire rack over a sheet pan. Heat for 15-20 minutes. This keeps the crust crispy.
You can freeze it for up to three months. Wrap each piece tightly in foil. Then place them all in a freezer bag. Thaw in the fridge overnight before reheating. Batch cooking saves busy nights. It matters because a good meal should bring joy, not stress. Have you ever tried storing it this way? Share below!
My Top Troubleshooting Tips for Golden Chicken
Problem one: pale, greasy chicken. This means your oil was too cold. The oil must be at 350 degrees. Use a thermometer. It is your best friend. I remember when I didn’t use one. My chicken was oily and sad.
Problem two: burnt outside, raw inside. Your oil is too hot. Turn the heat down. Also, do not crowd the pot. Fry just three or four pieces at a time. This keeps the oil temperature steady. Getting this right builds your cooking confidence.
Problem three: bland seasoning. Season your flour well. Do not be shy with the salt and pepper. Massage that flour into every nook. This matters for big flavor in every bite. Which of these problems have you run into before?
Your Fried Chicken Questions, Answered
Q: Can I make this gluten-free?
A: Yes! Swap the all-purpose flour for your favorite gluten-free blend. It works just fine.
Q: Can I prep ahead?
A: You can season the chicken hours before. Just keep it covered in the fridge. Let it sit out before frying.
Q: What oil can I use instead?
A: Avocado oil is great for high heat. You can also use peanut or vegetable oil.
Q: Can I double the recipe?
A: You can, but fry in more batches. Do not overload your pot. Patience makes perfect chicken.
Q: Any secret tips?
A: Letting the chicken rest after frying is key. It keeps the juices inside. Fun fact: letting meat rest after cooking makes it more tender and juicy. Which tip will you try first?
From My Kitchen to Yours
I hope you love this recipe as much as my family does. It is a real crowd-pleaser. Cooking should be fun and full of flavor. I would love to see your creations.
Share a photo of your golden, crispy chicken. Let me know how it turned out for you. Your stories make my day. Have you tried this recipe? Tag us on Pinterest!
Happy cooking!
—Emma Caldwell.
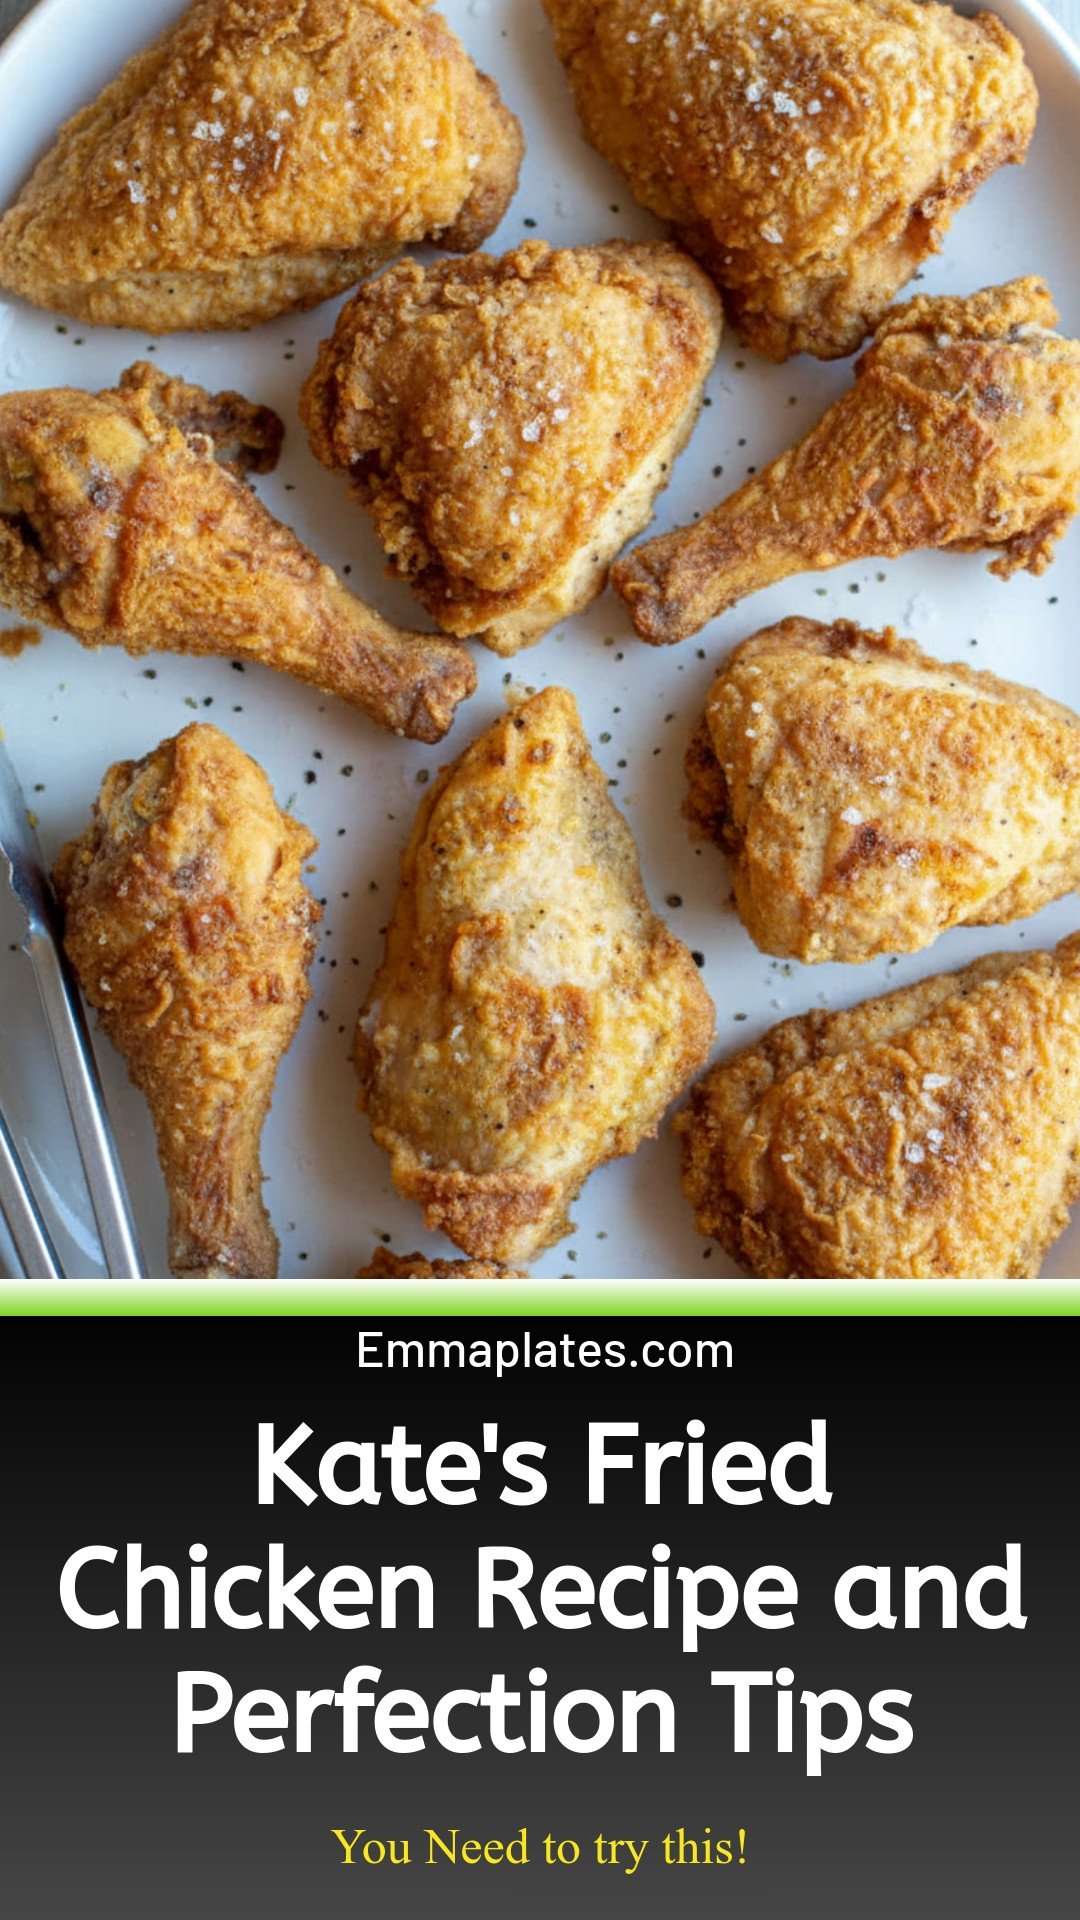
Tips For Fried Chicken Perfection + Kate’s Recipe: Kate’s Fried Chicken Recipe and Perfection Tips
Description
Discover the secrets to perfectly crispy, juicy fried chicken every time. Get Kate’s famous recipe and pro tips for golden, flavorful results.
Ingredients
Instructions
- Place chicken pieces on a baking sheet. Sprinkle on both sides with the 1 tablespoon of salt and 1 teaspoon black pepper. Let sit at room temperature while you heat the oil.
- Attach a deep fry thermometer to the side of a deep cast iron pot or Dutch oven. Pour in enough oil so it reaches 2-inches up the side of the pot (I used 2 liters of oil but this will depend on the size of your pot). Heat oil over medium-high heat to 350°F or until a piece of bread browns immediately when dropped in the oil. This usually takes between 10-15 minutes to reach temperature. Once it reaches temperature continue turning heat up or down to maintain 350°F.
- While oil is heating, place flour in a shallow dish and season with remaining 1 teaspoon salt and 1/2 teaspoon black pepper; stir to combine. Heat oven to 250°F, cover a baking sheet with paper towels and set a wire rack on top.
- Once oil is hot, coat a few pieces of chicken in flour, massaging it into the nooks and crannies. Fry 3 to 4 pieces at a time, flipping occasionally, until crispy, brown, juices run clear, and an instant read thermometer stuck in the thickest part of the chicken reads 170°-175°F about 12-15 minutes. Place on the wire rack and transfer to the warm oven. Continue with remaining chicken.
- Let final pieces of chicken rest 10 minutes before serving. Then serve with hot sauce.
Notes
- For best results, use a heavy-bottomed pot like cast iron to maintain oil temperature. Letting the seasoned chicken sit before frying helps the seasoning penetrate.


Leave a Reply