
My First Grilled Pizza Mistake
Let me tell you about my first grilled pizza. I was so nervous. I thought the dough would fall right through the grates. I almost didn’t try it. But I did. And I learned something wonderful.
Grilling gives the crust a special magic. It gets those dark, smoky lines. It tastes like a summer picnic. Doesn’t that smell amazing? It makes a simple pizza feel like a party. That’s why this matters. Cooking outside changes everything. It’s an adventure.
Why This Dough is So Clever
This dough is my new favorite trick. You only need two main things. Flour and Greek yogurt. No yeast, no waiting for it to rise. Just mix and go. It feels like a little kitchen secret.
It will look crumbly at first. Don’t worry. Just knead it a few times. It comes together so fast. Fun fact: the yogurt makes the dough tender and adds protein! Have you ever cooked with yogurt like this before? I’d love to know.
The Toppings are a Story
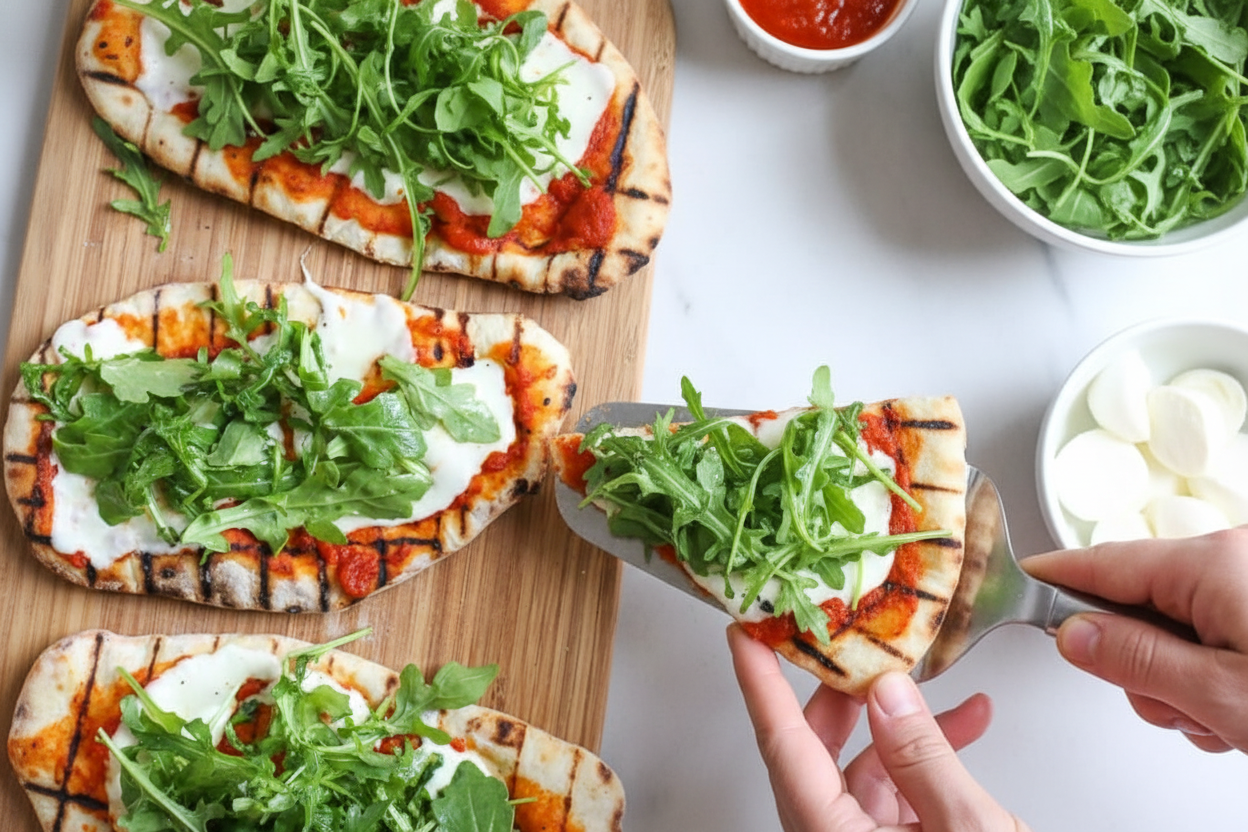
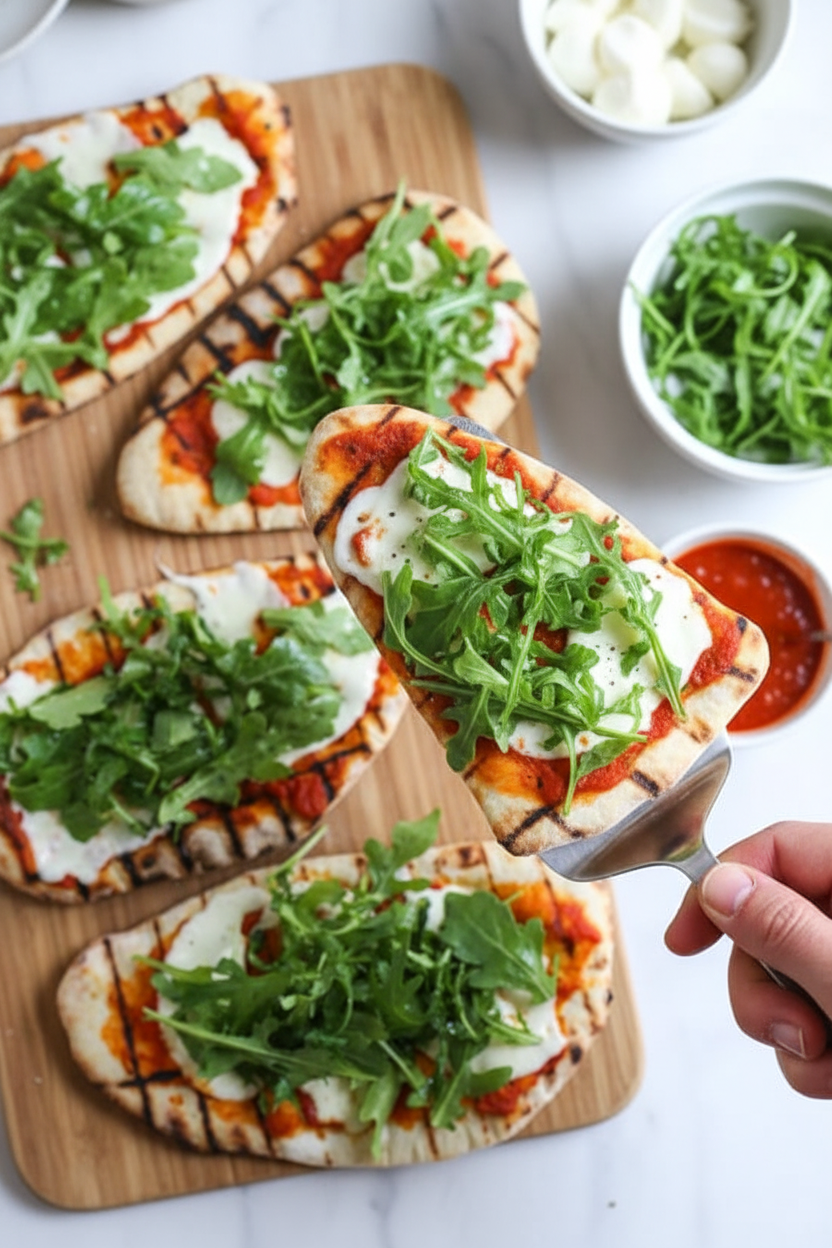
I keep the toppings simple here. A little sauce, fresh mozzarella, and peppery arugula. The hot pizza wilts the greens just right. It’s warm and cool in one bite. That contrast is everything.
You can use anything you like, of course. But try it this way once. The fresh greens make it feel light and special. That’s another reason this matters. Good food doesn’t need to be complicated. It just needs to make you smile.
Your Grill is Your Oven Now
Here’s the fun part. Get your grill very hot. Roll your dough thin. Be brave and lay it right on the oiled grates. Then close the lid. Walk away for just one minute. Trust the process.
When you peek, you’ll see those perfect grill marks. I still laugh at how proud I was. Flip it, add your toppings, and close the lid again. In one minute, dinner is ready. What’s your favorite thing to cook on the grill? Mine might be pizza now.
Make It Your Own
This recipe is a friend, not a boss. No grill? Your oven works great. I put the instructions for that too. Want different toppings? Go for it. The dough is your blank canvas.
The real recipe is the time together. Making food with your hands. Sharing it with people you love. That’s the best part. So tell me, what will you put on your pizza first? Share your ideas with me.

Ingredients:
| Ingredient | Amount | Notes |
|---|---|---|
| All purpose or white whole wheat flour | 1 cup (5 oz) | For the dough |
| Baking powder | 1 1/2 teaspoons | For the dough |
| Kosher salt | 1/2 teaspoon | For the dough, plus more to taste for toppings |
| 0% Stonyfield Greek yogurt | 1 cup | For the dough; not regular yogurt, drained if there’s any liquid |
| Pizza sauce | 1/4 cup | For toppings |
| Fresh mozzarella cheese | 4 ounces | For toppings; sliced thin |
| Baby arugula | 1 1/2 cups | For toppings |
| Black pepper | to taste | For toppings |
My Secret for Summer Pizza Night
Hello, my dear. Come sit. Let’s talk about pizza. Not the oven kind. The grilled kind. It tastes like summer. The crust gets smoky and crisp. I learned this from my grandson, Leo. He wanted pizza but our kitchen was too hot. So we got creative. I still laugh at that messy first try. Now it’s our favorite warm-weather dinner. You can make the dough with just yogurt and flour. Doesn’t that sound clever? It comes together in minutes. Let me walk you through it.
Step 1: Make your simple dough. Whisk the flour, baking powder, and salt in a bowl. Add the yogurt. Mix it with a fork until crumbly. It will look like little pebbles. Don’t worry, that’s perfect. Now, dust your counter with a little flour. Dump the crumbles out. Knead it about twenty times. Just until it feels like soft play-dough. (My hard-learned tip: If the dough sticks to your hands, add a tiny bit more flour. Too much makes it tough!).
Step 2: Get your grill hot and ready. Clean the grates first. Then turn the heat to high and close the lid. Divide your dough into four balls. Roll each one into a thin, rustic oval. They don’t need to be perfect. I think imperfect shapes have more character. Now, this is important. Oil the hot grates really well. Use a towel and tongs to be safe. Why do we oil the grill? Share below!
Step 3: Time to grill. Lay your dough ovals on the oiled grates. Close the lid. Cook for just about a minute. Peek underneath. You want nice dark grill marks. Then flip it. Cook the other side the same way. Doesn’t that smell amazing? You now have your crusts. Take them off the grill for a moment. Turn your grill heat down to medium.
Step 4: Add your toppings. Spread a spoonful of sauce on each crust. Top with thin slices of fresh mozzarella. Put them back on the cooler grill. Close the lid. Wait for the cheese to melt and bubble. It happens so fast. About one minute. Then slide them onto a plate. Top with fresh arugula, a pinch of salt, and pepper. Eat it right away. The warm cheese with the cool greens is magic.
Cook Time: 15–20 minutes
Total Time: 30 minutes
Yield: 4 personal pizzas
Category: Dinner, Grilling
Three Tasty Twists to Try
This recipe is your blank canvas. Change the toppings with the seasons. Here are three ideas I love. The Garden Fairy: Use pesto instead of red sauce. Top with ricotta, zucchini ribbons, and lemon zest. The Sweet Heat: Skip the sauce. Use sliced peaches, spicy pepperoni, and a drizzle of honey after grilling. The Breakfast-for-Dinner: Grill the crust, then top with scrambled eggs, cheddar cheese, and chopped chives. Put it back just to melt the cheese. Which one would you try first? Comment below!
Serving It Up Just Right
These pizzas are a full meal. But a simple side makes it special. I love a big, colorful salad with a lemony dressing. Or some chilled watermelon slices. They cut through the richness. For drinks, keep it easy. A fizzy lemonade with mint is perfect. For the grown-ups, a light, chilled red wine like a Beaujolais is lovely. Which would you choose tonight? I think I’d take the lemonade. It reminds me of summer afternoons on the porch. Now, go make some memories around the grill.
Keeping Your Grilled Pizza Perfect for Later
Let’s talk about saving some pizza for tomorrow. You can store cooked pizza in the fridge. Just wrap it tightly. It will be good for two days.
You can also freeze the dough balls. Wrap each one in plastic. They will keep for a month. Thaw them in the fridge before rolling out.
Reheating is easy. Use a skillet on medium heat. It makes the crust crispy again. The microwave makes it soggy, so avoid that.
I once froze a whole grilled pizza. My grandson found it weeks later. He said it was a “delicious treasure hunt.” Batch cooking means a fast, tasty meal anytime. It saves you money and time on busy nights. Have you ever tried storing it this way? Share below!
Simple Fixes for Common Grilling Hiccups
Is your dough sticking to the grill? Oil the grates well. Use a paper towel and tongs. This creates a non-stick surface.
Does the dough tear when you move it? Roll it on parchment paper. Lift the paper to flip it onto the grill. I remember when my first pizza folded like a taco.
Is the cheese not melting? Your grill might be too cool. Make sure the lid is closed. This traps the heat needed to melt cheese. Getting the temperature right builds your cooking confidence. A perfectly melted cheese makes every bite joyful. Which of these problems have you run into before?
Your Quick Grilled Pizza Questions, Answered
Q: Can I make this gluten-free? A: Yes. Use a gluten-free flour blend. The dough might be a bit more delicate.
Q: Can I make the dough ahead? A: Absolutely. Make the dough balls. Keep them in the fridge for up to two days.
Q: What are easy topping swaps? A: Try pesto instead of red sauce. Use spinach if you don’t have arugula.
Q: Can I double the recipe? A: You can. Just double all the ingredients. Mix in a bigger bowl.
Q: Any optional tips? A: A fun fact: adding a pinch of garlic powder to the dough gives a nice flavor. Which tip will you try first?
From My Kitchen to Yours
I hope you love this recipe. It brings summer right to your plate. Cooking should be fun, not fussy.
I would love to see your creations. Share a photo of your grilled pizza masterpiece. It makes my day to see your kitchen adventures.
Have you tried this recipe? Tag us on Pinterest! Use our handle @EmmasCozyKitchen. Thank you for cooking with me today.
Happy cooking!
—Emma Caldwell.

Grilled Pizza: Grilled Pizza Recipes Techniques and Tips
Description
Master the art of grilled pizza for a smoky, crispy crust and endless topping ideas. Perfect for summer nights and outdoor cooking.
Ingredients
Instructions
- In a medium bowl combine the flour, baking powder and salt and whisk well. Add the yogurt and mix with a fork or spatula until well combined, it will look like small crumbles.
- Lightly dust flour on a work surface and remove dough from the bowl, knead the dough a few times until dough is tacky, but not sticky, about 20 turns (it should not leave dough on your hand when you pull away).
- Clean and preheat the grill on high heat, covered. Working one at a time, divide dough into 4 equal balls about 3-3/8 oz each. Sprinkle a work surface and rolling pin with a little flour roll the dough out into thin ovals.
- Oil the grates of the grill then add the pizza dough directly to the grill. Cook, covered 1 to 1 1/2 minutes on each side until grill marks appear on both sides.
- Spread 1 tablespoon pizza sauce over each crust. Top each with 1 ounce of cheese. Put it back on the grill covered until the cheese is melted and bubbling, about 1 minute.
- Top with fresh arugula, salt and pepper and eat right away.
Notes
- To make this in the oven, bake the dough 450F 10 to 12 minutes turning halfway before adding the sauce and cheese.


Leave a Reply