
Two Comfort Foods Walk Into a Kitchen
I remember the first time I made this on a rainy Tuesday. I was out of regular sandwich bread, but I had a leftover hunk of sourdough. I thought, “Why not butter both sides like garlic bread and put cheese in the middle?” It felt like a happy accident. My husband came in from the garden and said, “What is that smell?” I just smiled and handed him a plate. He took one bite and asked me to write it down. I still laugh at that. He never asks for recipes. What is your favorite way to use up old bread? I’m always curious.The Magic of Simple Ingredients
You only need a few things for this. Sturdy bread, good cheese, butter, and garlic. That is it. No fancy tools and no long trips to the store. Why this matters: When you keep ingredients simple, you learn to trust your taste. You notice how garlic changes when it gets warm. You see how butter makes bread crisp. Cooking is about watching little things become big. Doesn’t that smell amazing when the garlic hits the pan? I think it is one of the best scents in the world.My Granny’s Garlic Trick
My grandmother taught me to always use fresh garlic. She would pound it with the flat side of her big knife until it was a paste. Then she mixed it right into the butter. She said dried garlic was for emergencies only. *Fun fact: Garlic has a natural sugar in it. When you cook it slowly in butter, it caramelizes and gets sweet. That is why this sandwich tastes like candy and toast had a baby.* Here is a little poll for you: Crunchy bread or soft bread? I am team crunchy all the way.Building Your Sandwich Like a Little House
First, you need to mix the butter and garlic until it looks like soft, speckled butter. Spread it on the outside of both bread slices. That is the roof and the floor. Then put the cheese in the middle. That is the cozy room. Why this matters: The butter goes on the outside so the bread gets golden and crispy. If you put it on the inside, you just have greasy bread. Little choices like that change everything. That is the secret of good cooking. Have you ever put butter on the wrong side? I did once. The sandwich was sad. We all learn.The Hot Pan Dance
Set your skillet over medium heat. Not too hot, or the bread burns before the cheese melts. Place the sandwich in carefully. Listen to that nice sizzle. Let it cook for 3 or 4 minutes until the bottom looks like a golden sunset. Flipping is the tricky part. Use a spatula and be brave. Cook the other side for another 3 or 4 minutes. Press down gently with the spatula so the cheese gets friendly with the bread. When you see cheese peeking out the sides, you know it is ready. Do you use a lid on your pan to help the cheese melt? I sometimes do. It works like a little steam bath.Let It Rest, Then Dig In
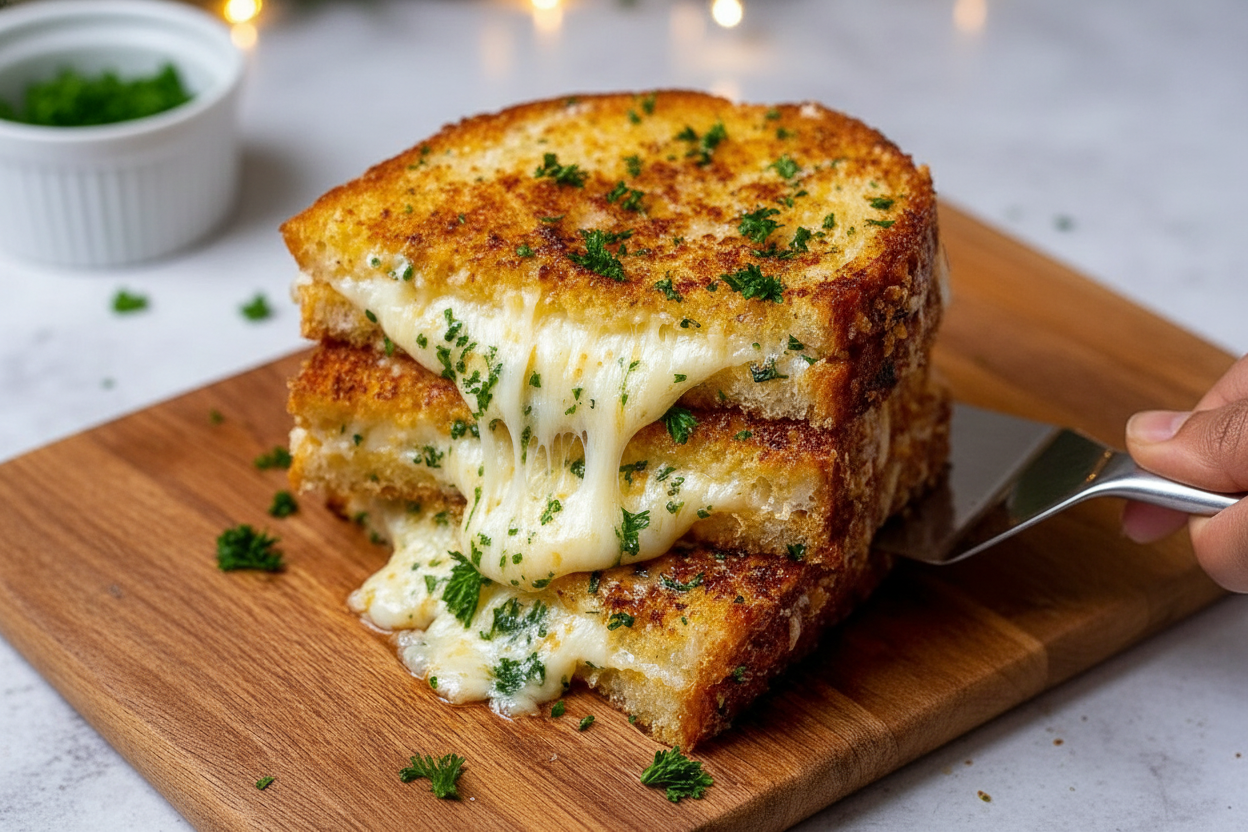
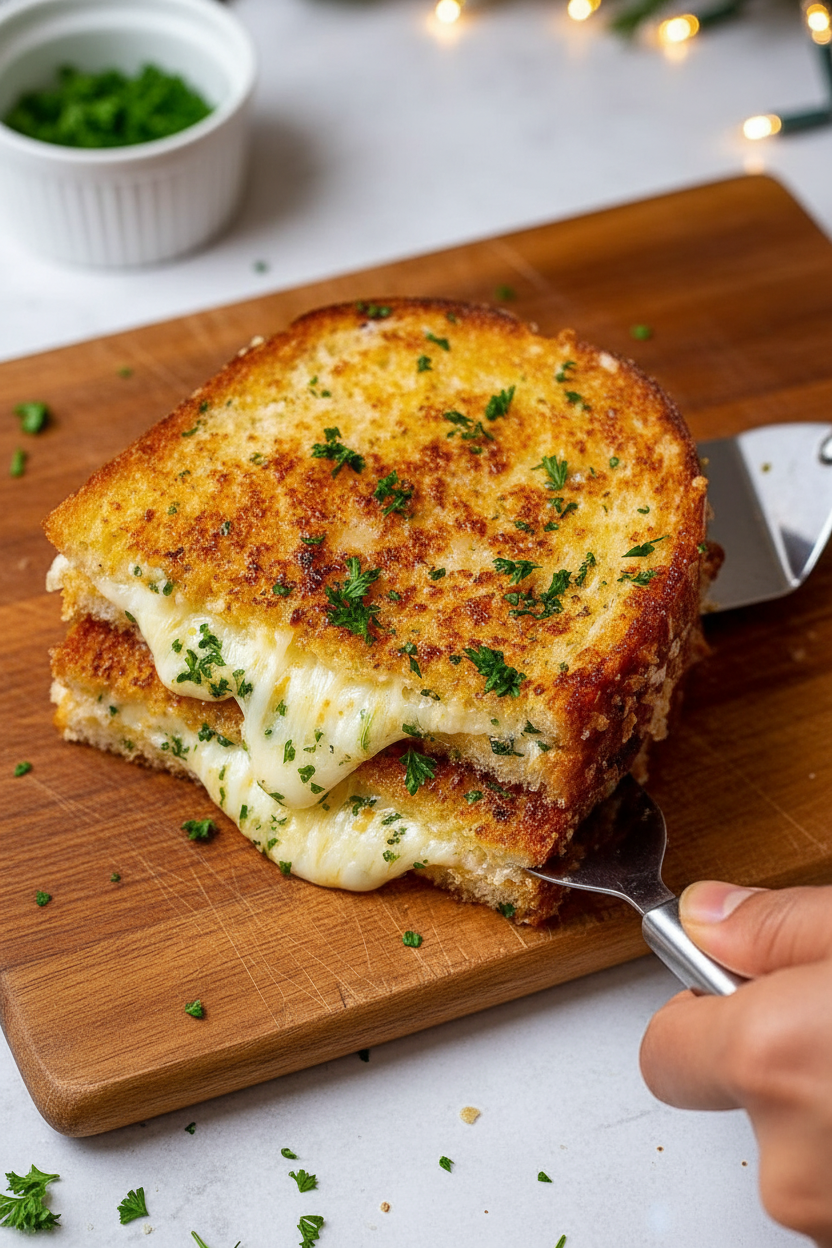
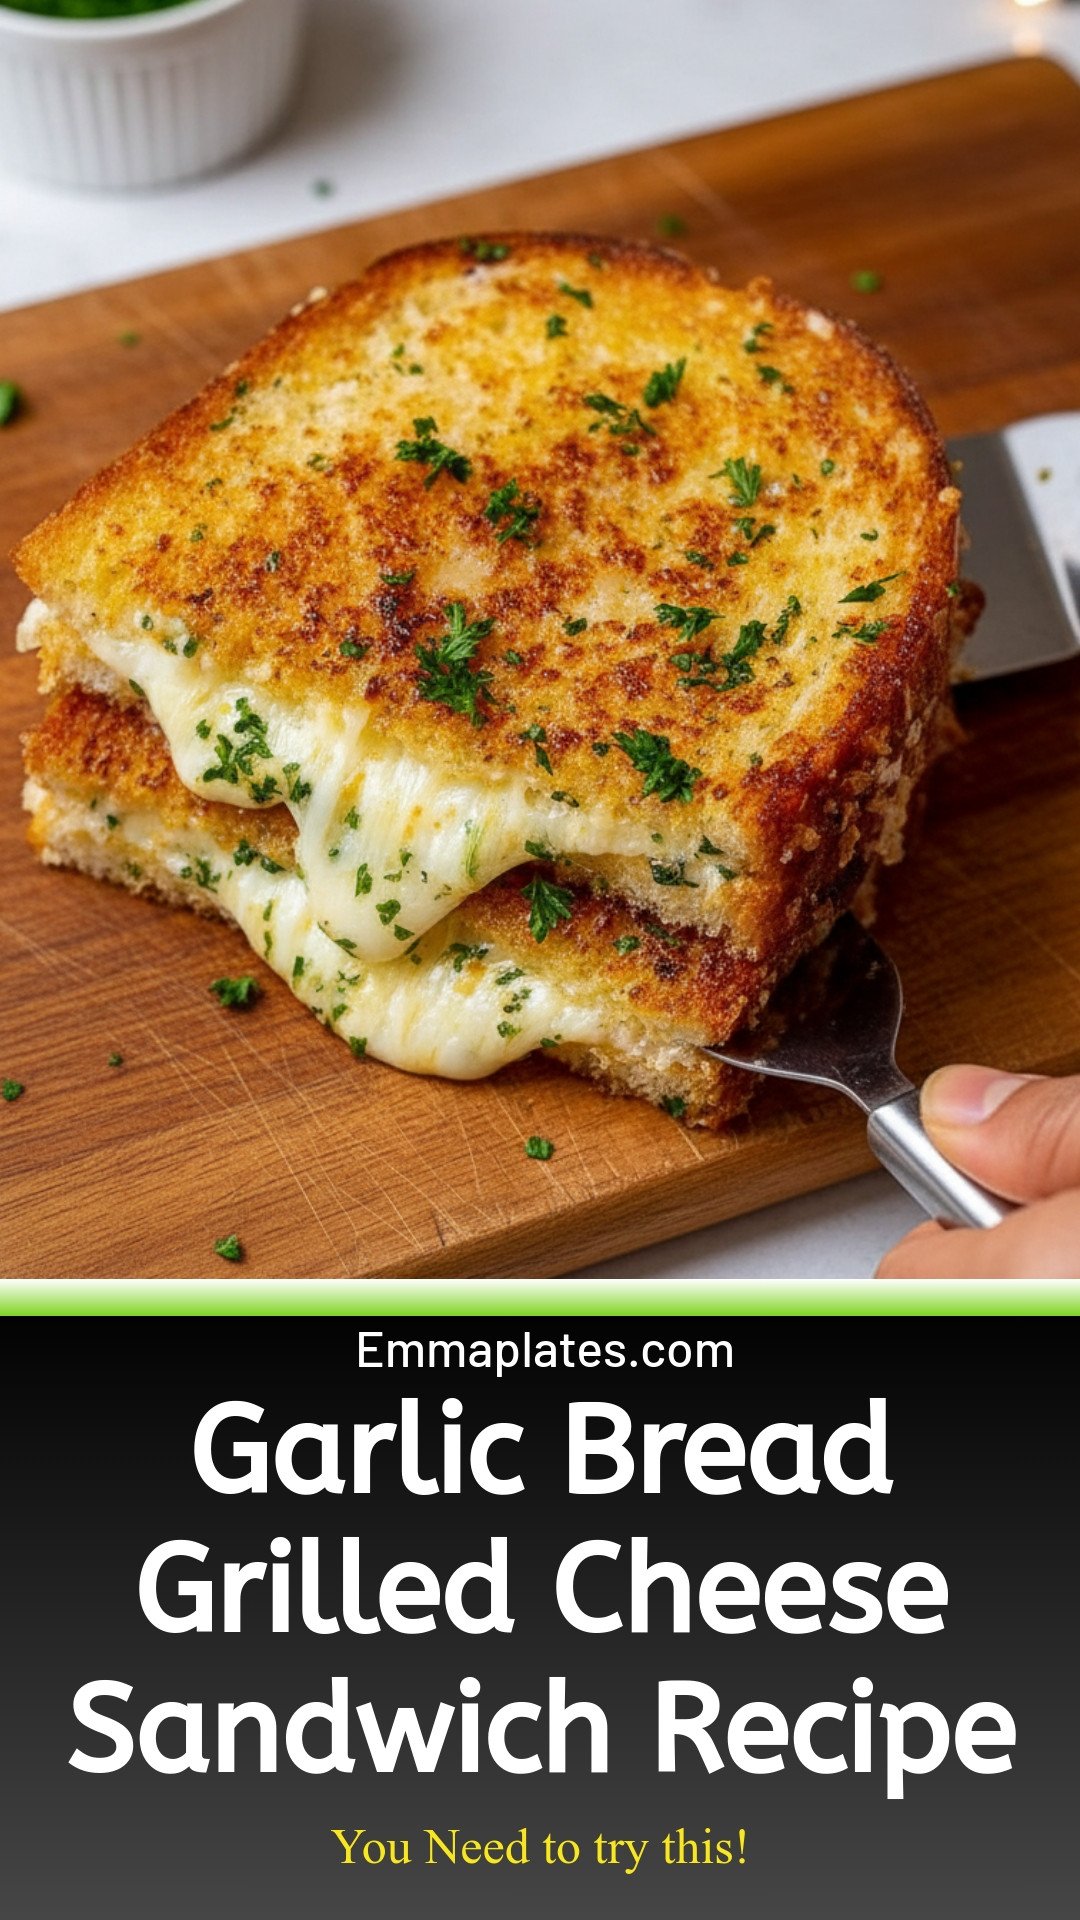
Take the sandwich out of the pan. Let it sit on a cutting board for about a minute. I know you want to bite it right away, but patience keeps the roof of your mouth safe. Cutting it in half shows you that beautiful, stretchy cheese. Sprinkle a little parsley on top if you want to be fancy. I do it mostly because green things look pretty against golden bread. Serve it warm with a cup of tomato soup or just by itself. It is a hug on a plate. Tell me: What would you dip this in? Ketchup? Soup? Nothing at all? I would love to know.Make It Your Own Tomorrow
The best part about this recipe is that it is a starting point. You can add a slice of tomato. You can sprinkle in some Italian seasoning. You can try pepper jack cheese for a little kick. My neighbor puts a thin layer of marinara sauce inside. She calls it a pizza sandwich. I think cooking should feel like play. You make it once by the rules. The second time, you break a rule and see what happens. That is how new favorite foods are born. I still discover things in my kitchen all the time. What is one thing you would add to this sandwich? I am taking notes for next week. Share with me!Ingredients:
| Ingredient | Amount | Notes |
|---|---|---|
| Sturdy bread (sourdough or ciabatta) | 2 slices | Choose a hearty, crusty bread for best results |
| Cheese (cheddar, mozzarella, or a combination) | 1–2 slices | Use your favorite melting cheese(s) |
| Unsalted butter | 2 tablespoons | Softened for easier spreading |
| Garlic, minced | 2 cloves | Fresh cloves are recommended |
| Dried or fresh parsley | Optional, for garnish | Sprinkle before serving |
My Favorite Garlic Bread Grilled Cheese
I still remember the first time I made this. It was a rainy afternoon, and I was hungry for something warm. Doesn’t that smell amazing? This sandwich brings together two of my favorite things: garlic bread and gooey cheese. It’s simple enough for a beginner to try.
The secret is in the butter. Mixing it with fresh garlic makes everything taste like a treat. You can use any sturdy bread you have. Sourdough or ciabatta works best because they hold up well. Let’s get started, friend.
Step 1: In a small bowl, mix two tablespoons of softened butter with two minced garlic cloves. Add a tiny pinch of salt. Stir until the garlic is spread evenly through the butter. (Hard-learned tip: If your butter is too hard, let it sit out for ten minutes first.)
Step 2: Take two slices of sourdough or ciabatta bread. Spread the garlic butter on one side of each slice. Now, on the unbuttered sides, lay down your cheese slices. I like using cheddar for sharpness and mozzarella for stretch. What cheese makes you happiest? Share below!
Step 3: Put a skillet on the stove over medium heat. Let it warm up for a minute. Place your sandwich in the pan, butter side down. Listen for that soft sizzle. Cook for three to four minutes until the bread turns golden.
Step 4: Carefully flip the sandwich with a spatula. Cook the other side for another three to four minutes. The cheese should be melted and a little oozy when you peek inside. My grandma always said patience makes the best crust.
Step 5: Remove the sandwich from the skillet. Let it rest on a plate for one minute. Cut it in half with a sharp knife. Sprinkle with dried or fresh parsley if you like. Serve while it’s warm and the cheese is still soft.
Cook Time: 8 minutes
Total Time: 12 minutes
Yield: 1 sandwich
Category: Lunch, Snack
Three Fun Twists to Try
Sometimes I like to change things up a little. Here are three ideas I have tried in my own kitchen. Each one adds a new flavor. Which one would you try first? Comment below!
Spicy Kick Twist: Add a few thin slices of jalapeno or a sprinkle of red pepper flakes on top of the cheese before cooking. It gives a nice little warmth without being too hot.
Tomato Basil Twist: Place two slices of fresh tomato and a few basil leaves inside the sandwich. The tomato gets soft and juicy, and the basil smells like summer.
Pesto Party Twist: Spread a thin layer of pesto on the unbuttered side of the bread before adding the cheese. It adds a herby, nutty taste that goes perfectly with garlic.
What to Serve with Your Sandwich
This sandwich is lovely on its own, but a little side makes it a meal. Try it with a small bowl of tomato soup for dipping. Or serve it next to a simple green salad with a light vinaigrette. A handful of crunchy pickles on the side is also nice.
For drinks, a cold glass of lemonade is perfect for kids. Grown-ups might enjoy a crisp glass of Sauvignon Blanc. Both cut through the richness of the cheese and butter. Which would you choose tonight?
How to Store Your Garlic Bread Grilled Cheese
This sandwich is best hot and fresh. But leftovers can be saved. First, let the sandwich cool all the way down. Wrap it tightly in foil or plastic wrap. Pop it in the fridge for up to three days.
To reheat, use a skillet again. A microwave will make it soggy. Heat it on medium for a few minutes per side. I once wrapped one in foil and forgot it in my lunch bag. I found it hours later, cold but still tasty. That is when I learned to store it properly.
For batch cooking, make a few sandwiches at once. Cook them all, then cool and wrap each one. Freeze them for up to one month. Reheat straight from the freezer in a skillet. Have you ever tried storing it this way? Share below!
Why this matters: Storing your sandwich right keeps it crispy and safe to eat. Batch cooking saves you time on busy days. You can have a warm, buttery meal ready in minutes.
Common Problems and Easy Fixes
Soggy bread is the biggest problem. The fix is simple. Use sturdy bread like sourdough or ciabatta. Also, spread butter on the outside of the bread, not the inside. I once used soft white bread and ended up with a mushy mess. It still tasted good, but the crunch was gone.
Another issue is burnt garlic. Garlic burns fast. Mix it into softened butter first, not the hot pan. That way, the garlic cooks slowly with the bread. I remember my first time. I put raw garlic right in the skillet. The kitchen smelled like a bonfire.
Cheese that doesn’t melt is a third problem. Use cheese that melts well, like mozzarella or cheddar. Cover the skillet with a lid for the last minute. This traps heat and melts the cheese perfectly. Which of these problems have you run into before?
Why this matters: Fixing these small mistakes makes your sandwich truly golden and gooey. You gain confidence in the kitchen. Good cooking comes from tiny tweaks that bring big flavor.
Your Top Questions Answered
Q: Can I make this gluten-free?
A: Yes. Use your favorite gluten-free bread. Sturdy slices work best for holding the cheese.
Q: Can I make it ahead of time?
A: Yes. Assemble the sandwich, wrap it in foil, and keep it in the fridge. Cook it fresh when you are ready.
Q: What if I don’t have garlic?
A: Use garlic powder. Mix a pinch into the butter. It will still taste great.
Q: Can I double the recipe?
A: Absolutely. You can cook two or four sandwiches at once. Just make sure your skillet is big enough.
Q: Any extra tips?
A: Add a sprinkle of dried parsley before serving. It looks pretty and adds a little herby flavor. Which tip will you try first?
From My Kitchen to Yours
Thank you for making this simple treat with me. I hope your kitchen smells warm and buttery. Remember, cooking is about sharing good moments.
If you try this recipe, I would love to see it. Snap a photo of your golden, cheesy sandwich. Share it with your family and friends. Have you tried this recipe? Tag us on Pinterest!
*Fun fact: Grilled cheese sandwiches were once called “cheese toasties” in the 1920s.*
Happy cooking!
—Emma Caldwell.

Garlic Bread Grilled Cheese Sandwich Recipe
Description
Indulge in the ultimate Garlic Bread Grilled Cheese with crispy, buttery edges and melted cheese. Perfect comfort food.
Ingredients
Instructions
- In a small bowl, mix softened butter with minced garlic and a pinch of salt until well combined.
- Spread the garlic butter generously on one side of each slice of bread. On the unbuttered sides, lay down your cheese slices.
- Preheat a skillet over medium heat.
- Place the sandwich in the skillet, butter side down, and cook for 3-4 minutes until golden and the cheese starts to melt.
- Carefully flip the sandwich and cook for another 3-4 minutes until the other side is golden and the cheese is oozy.
- Remove from the skillet, let it cool slightly, cut in half, and serve warm, optionally garnished with parsley.


Leave a Reply