

The Little Strawberry Secret
I learned a little secret from my own grandma. She always kept her butter in the freezer. I thought it was strange. But it makes the flakiest, most wonderful pastries.
That’s why we grate frozen butter for these scones. It makes them light and tender. Cold butter is the key to a happy scone. This little trick matters because it creates tiny pockets of steam in the oven. That steam is what makes the pastry flaky and lift up so nice.
Making the Dough with Love
Let’s mix our dry things first. Just whisk them all together in a big bowl. It feels like the start of something good.
Then we mix the wet things in another bowl. The egg, cream, yogurt, and vanilla. Doesn’t that smell amazing? When you combine them, don’t stir too much. A shaggy, sticky dough is just perfect. I still laugh at how messy my first batch looked, but they tasted divine.
A Patience Lesson from the Freezer
After you shape your dough, we do something important. We pop it in the freezer for a little bit. This feels like a long wait when you’re excited. But it is so worth it.
This cool rest matters because it relaxes the dough. It also keeps the butter cold. This gives our scones a better rise and a tender crumb. Good things come to those who wait, even in baking.
The Sweetest Finish
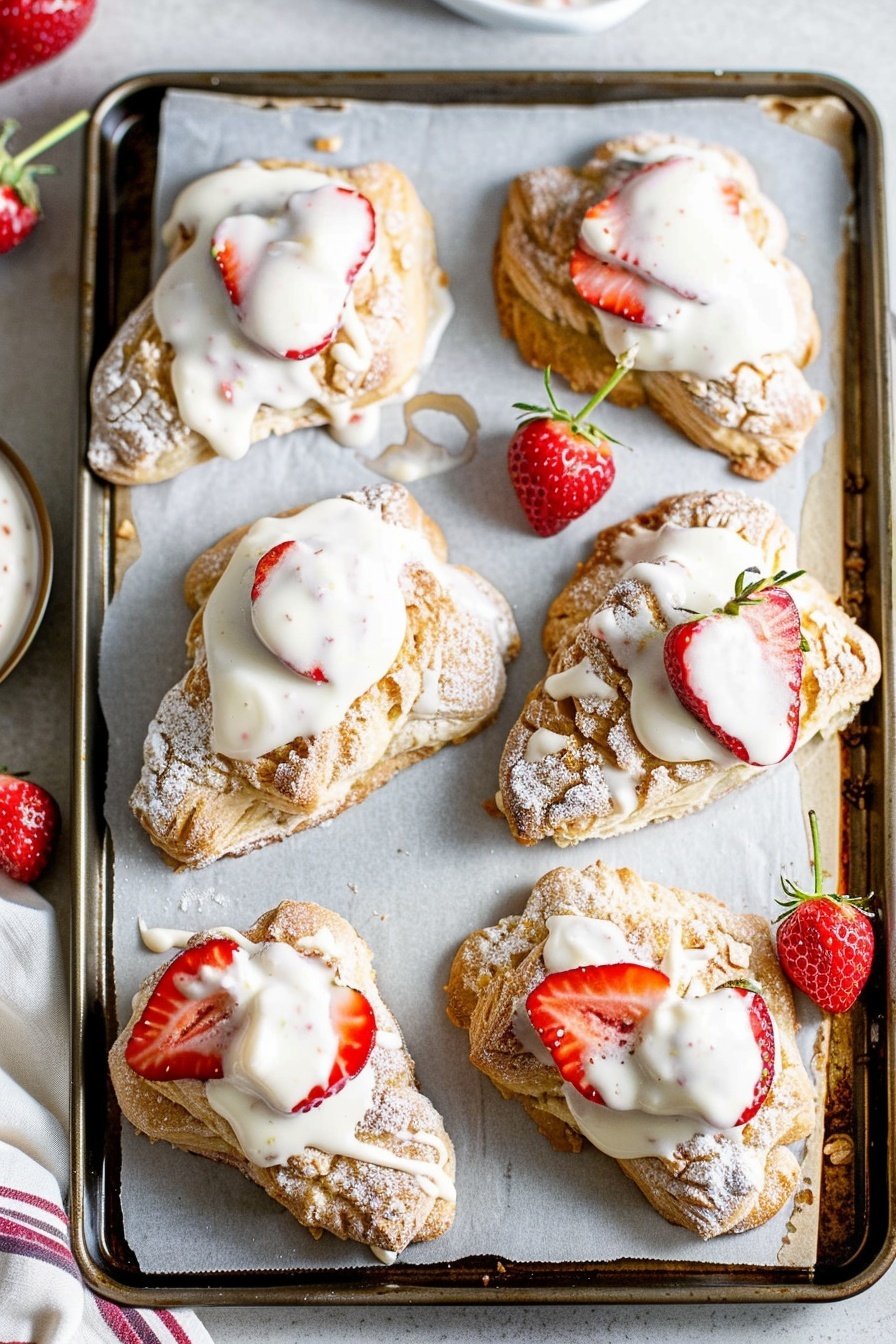
While the scones bake, your kitchen will smell like heaven. That warm, sweet smell is part of the joy. After they cool, we drizzle on the simple glaze.
Fun fact: The word “scone” might come from a Scottish word for a beautiful stone. But I think they taste much better than any stone! What is your favorite thing to bake on a cozy afternoon?
Your Turn in the Kitchen
Now you have the recipe and the stories. Baking is about sharing and making memories. It’s not just about following steps.
Did you use the coarse sugar on top? I love the little crunch it gives. And what is a food secret your family taught you? I would love to hear it. Share a picture if you make them, so I can see your beautiful work.
Ingredients:
| Ingredient | Amount | Notes |
|---|---|---|
| all-purpose flour | 2 cups | |
| granulated sugar | 1/2 cup | |
| baking powder | 1 Tbsp. | |
| salt | 1/2 tsp. | |
| cinnamon | 1/8 tsp. | |
| frozen butter, unsalted | 1/2 cup (8 Tbsp.) | |
| large egg | 1 | |
| heavy cream | 1/2 cup + 2 Tbsp. | 2 Tbsp. for brushing on top of scones |
| Greek yogurt, full fat | 1/4 cup | |
| vanilla extract | 1 tsp. | |
| strawberries, fresh, diced small | 1/2 cup | + 1 Tbsp. flour |
| coarse sugar | 2 Tbsp. | optional |
| For the glaze | ||
| powdered sugar | 1 cup | |
| heavy cream | 3 Tbsp. | |
| vanilla extract | 1/2 tsp. | |
| salt | pinch | |
My Strawberry Cream Tea Pastries
Hello, my dear! Let’s bake something special today. I’m thinking of my strawberry cream scones. They are so soft and sweet. They always remind me of summer mornings with my own grandma. We would eat them warm from the oven. The whole kitchen would smell like heaven. Doesn’t that sound lovely? Let’s make some new memories together.
First, we need to get everything ready. This is the most important part. It makes the baking so much easier. I still laugh at the time I forgot the baking powder. My scones were like little stones! So let’s start right.
- Step 1: Get a big bowl for your dry things. Put in the flour, sugar, baking powder, salt, and that tiny bit of cinnamon. The cinnamon is my little secret. It makes the strawberries taste even sweeter. Whisk it all together until it’s one happy family.
- Step 2: Now for the frozen butter. Grating it is the best trick. It makes the scones so flaky. (My hard-learned tip: if the butter feels soft, pop it all back in the freezer for a bit. Cold butter makes the best scones!). Add the fluffy butter shreds to your flour mix.
- Step 3: Use your fingers to mix the butter in. You want little pea-sized pieces. Then, put the whole bowl in the freezer. This keeps our butter nice and cold. While it chills, let’s mix the wet ingredients in another bowl.
- Step 4: Crack the egg into a smaller bowl. Add the heavy cream, Greek yogurt, and vanilla. Whisk it until it’s smooth and yellow. I love the smell of vanilla. It reminds me of my mother’s perfume. Doesn’t that smell amazing?
- Step 5: Make a little hole in your dry ingredients. Pour the wet mix right into that well. Stir it just a few times. The dough will look a bit messy and shaggy. That is perfectly okay, I promise. We are not done yet!
- Step 6: Toss your diced strawberries in a spoonful of flour. This stops them from sinking to the bottom. Then, gently fold them into the dough. Be gentle so you don’t smash the berries. What’s your favorite berry to bake with? Share below!
- Step 7: Sprinkle some flour on your counter. Turn the dough out onto it. With floured hands, pat the dough into a circle. Make it about an inch thick. Then, use a knife or scraper to cut it into 8 triangles, like a pizza.
- Step 8: I know you’re eager to bake. But let’s put the scones in the freezer for 15 minutes. This helps them rise tall and proud in the oven. It’s a little wait that makes a big difference. You can wash a few dishes while you wait!
- Step 9: Now, heat your oven to 400°F. Place the cold scones on your baking sheet. Brush the tops with a little cream. This makes them golden. Sprinkle with coarse sugar if you like. It adds a lovely crunch.
- Step 10: Bake them for about 23-25 minutes. You’ll know they’re done when the tops are golden brown. Let them cool for just 5 minutes. Then, make the simple glaze and drizzle it over the top. Enjoy your beautiful creation!
Cook Time: 25 minutes
Total Time: 1 hour
Yield: 8 scones
Category: Baking, Dessert
Three Tasty Twists
This recipe is like a good friend. It’s wonderful as it is, but it’s always up for a little adventure. You can change it with the seasons. Here are a few of my favorite ways to mix it up.
- Lemon Blueberry Sunshine: Use blueberries instead of strawberries. Add the zest from one lemon to the dough. It tastes like a sunny day.
- Chocolate Chip Hug: Skip the fruit and cinnamon. Fold in a half-cup of chocolate chips. This one is for when you need a sweet hug.
- Cozy Apple Spice: Use finely chopped apple and a whole teaspoon of cinnamon. It smells like autumn in your kitchen.
Which one would you try first? Comment below!
Serving Your Masterpiece
Now, how shall we eat these lovely pastries? They are best shared with someone you love. I think they are perfect for a weekend treat. Or pack one in a lunchbox for a sweet surprise.
For a real treat, split a warm scone. Spread on some clotted cream and strawberry jam. That is how they do it in England. It is simply divine. Or just enjoy one with a pat of soft butter. It will melt right into the warm crumb.
What should we drink? A cup of strong English breakfast tea is my go-to. For a non-alcoholic option, a glass of cold milk is perfect. If you’re feeling fancy, a little glass of sparkling rosé pairs beautifully. Which would you choose tonight?

Keeping Your Strawberry Cream Tea Pastries Fresh
These scones are best the day you make them. But they keep well for two days in a sealed container. Just pop them in the fridge if your kitchen is warm. I once left a batch on the counter overnight. They were a bit sad and soft the next morning.
You can freeze them before baking for a future treat. Shape the dough into wedges and freeze them solid on a tray. Then put them in a freezer bag. This way, you always have fresh scones ready for guests. A little planning makes busy mornings so much sweeter.
To reheat, warm them in a 300-degree oven for ten minutes. This brings back their lovely flaky texture. It feels like they are fresh from the oven. Have you ever tried storing it this way? Share below!
Simple Fixes for Scone Troubles
Is your dough too sticky? Do not worry. That is completely normal. Just use floured hands to shape it. I remember when I first started. I added more flour and my scones became tough rocks.
Are your scones not rising high? The butter might have been too warm. Using frozen, grated butter is the secret. Cold butter creates steam in the hot oven. This steam lifts the dough up and makes it fluffy. Getting this right builds your baking confidence.
Are the strawberries sinking to the bottom? Tossing them in flour first helps a lot. The light flour coating makes them stick to the dough. This ensures you get fruit in every single bite. Which of these problems have you run into before?
Your Scone Questions Answered
Q: Can I make these gluten-free?
A: Yes! Use a good gluten-free flour blend. The results are still very tasty.
Q: Can I make the dough ahead?
A: You can shape the scones and freeze them. Bake them straight from the freezer later.
Q: What can I use instead of Greek yogurt?
A: Sour cream is a perfect swap. It gives the same tender crumb.
Q: Can I double this recipe?
A: Absolutely. Just make two separate dough rounds. This ensures they bake evenly.
Q: Is the coarse sugar necessary?
A: No, but it gives a lovely crunchy top. It is a nice little extra touch. Which tip will you try first?
Bake With Love
I hope you love baking these strawberry pastries. Sharing them with family is the best part. My grandson always asks for them with a big glass of milk. Fun fact: The word “scone” comes from Scotland!
I would be so happy to see your creations. It makes my day to see your kitchen adventures. Have you tried this recipe? Tag us on Pinterest!
Happy cooking!
—Emma Caldwell.

Strawberry Cream Tea Pastries: Irresistibly Rich and Creamy
Description
Indulge in the ultimate summer treat with these easy Strawberry Cream Tea Pastries. A delightful, no-bake dessert that’s perfect for any occasion.
Ingredients
=== For the glaze ===
Instructions
- Line a baking sheet with parchment paper or a silicone baking mat and set aside.
- In a large bowl, whisk together the flour, sugar, baking powder, salt and cinnamon.
- Grate the frozen butter using a box grater and add the butter to the dry ingredients. Break up any larger shreds of butter into small pea sized pieces. Place in the freezer while you prep the wet ingredients.
- Whisk together the egg, heavy cream, Greek yogurt and vanilla extract.
- Make a well in the dry ingredients and pour the wet ingredients in. Stir a few times.
- Toss the diced strawberries in 1 Tbsp. flour and then gently fold in the strawberries just until combined. The dough will be sticky and a bit shaggy, that’s ok.
- Turn the dough onto a lightly floured surface. With lightly floured hands, work the dough into a ball and then flatten into a round, making it about 3/4-1 inch thick. Using a bench scraper, into 8 wedges to make the scones.
- Optional step: freeze the scones for 15-30 minutes. Sometimes when working the dough with our hands the dough can warm up and scones are best nice and cold so a little freezer time can help. I recommend it for a tender, flaky scone and it gives them a better rise.
- Preheat the oven to 400°F.
- Place scones on the prepared baking sheet and brush the tops with heavy cream. Sprinkle with coarse sugar (optional).
- Bake for 23-25 minutes, or until the tops of the scones are browned. Allow to cool for 5 minutes on the baking sheet then transfer to a cooling rack.
- Whisk together the ingredients for the glaze in a mixing bowl and drizzle on top of scones once they have cooled. Enjoy!
Notes
- For a truly no-bake option, you can use pre-made scones or puff pastry shells and simply prepare the strawberry cream filling separately.


Leave a Reply