

My Summer Strawberry Surprise
I have a little strawberry patch by my back porch. Every June, it gives me the sweetest berries. One hot afternoon, my grandkids visited. We picked a big bowl together. Their little hands were so sticky and red! I knew we had to make something fun right away.
That’s how these pops were born. We mixed our berries with cool yogurt. It was a happy kitchen accident. Now, it’s my favorite way to beat the heat. What’s your favorite summer fruit to pick or buy? I’d love to know.
Why The Swirl Matters
The recipe says not to mix it all the way. That’s the secret! When you gently fold, you get pretty pink swirls. Each pop looks like a little piece of art. It makes eating them feel extra special.
This matters because food should delight your eyes, too. A little beauty in your day is important. It turns a simple snack into a tiny celebration. Doesn’t that sound nice?
The Crunchy Little Secret
Now, about that crust. It’s just crushed vanilla wafers and butter. You press it on top before freezing. It gives you a wonderful, sweet crunch with every bite. It’s the best part, I think!
Fun fact: The first popsicles were invented by an 11-year-old boy! He left his drink outside with a stick in it. It froze. I still laugh at that. The best ideas are often simple.
Let’s Make Them Together
First, make your crumb crust. Pulse the wafers, then add melted butter. Set it aside. Now, blend those lovely strawberries until smooth. If you’re using the rum or tequila, add it here. It’s for grown-ups, and it keeps the pops a bit softer.
Mix honey into the yogurt. Gently swirl in the strawberry puree. Don’t overmix! Pour into molds, leave a little room. Sprinkle on the crumbs, press gently, add the stick. Then, the hard part: waiting. Freeze them for a few hours. Do you prefer wooden sticks or the plastic handles? I’m a wooden stick fan myself.
A Treat For Sharing
I keep a few of these in my freezer all summer. When friends stop by, I have a cool treat ready. It’s a small way to say, “I’m glad you’re here.” Food connects us. That’s why this matters so much.
Making them is half the fun. It’s a perfect project for a sunny day. Will you try making these with someone you like? Tell me who your perfect popsicle-making partner would be!
Ingredients:
| Ingredient | Amount | Notes |
|---|---|---|
| Strawberries | 2 cups | |
| Greek Yogurt | 2 cups | |
| Honey or agave nectar | 3 Tbsp. | |
| Coconut rum or tequila | 1/4 cup | optional |
| For the crust: | ||
| Vanilla wafers | 2 cups | |
| Butter, melted | 4 Tbsp. | |
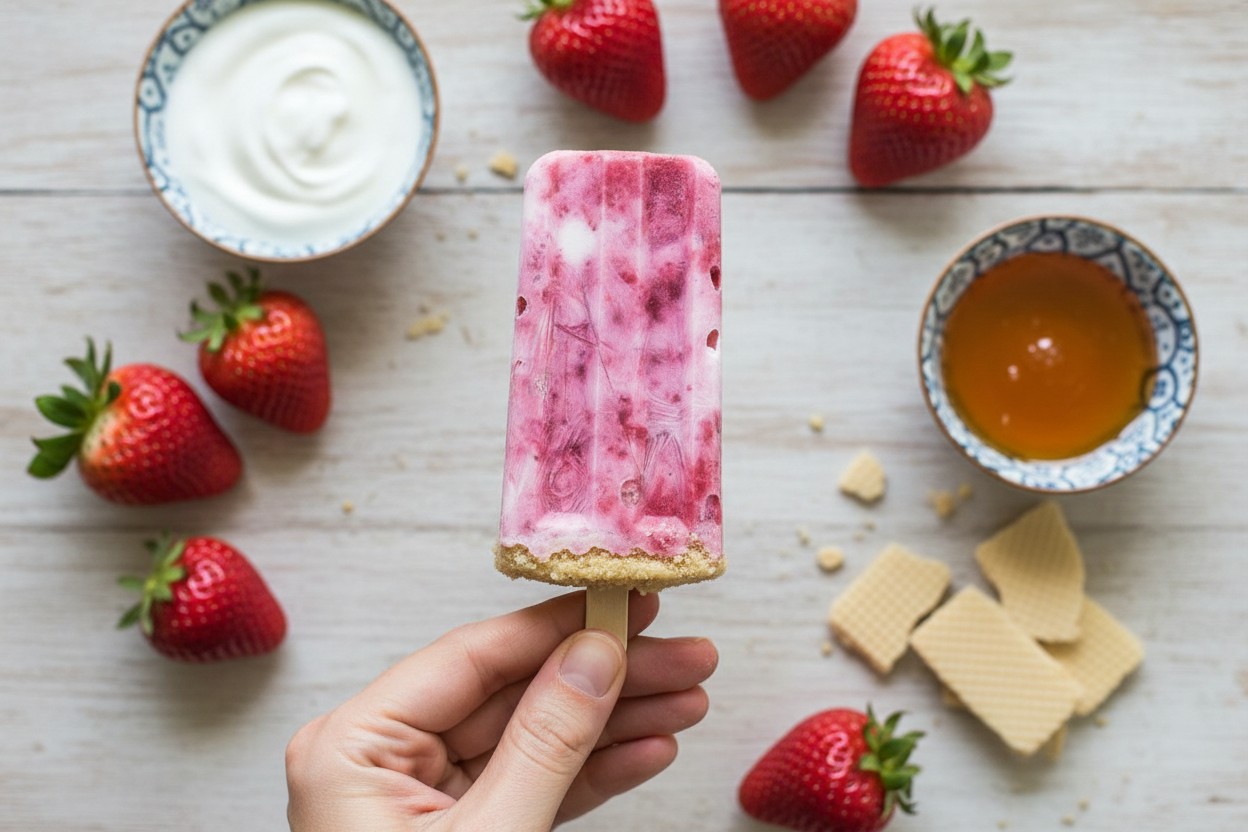
My Creamy Strawberry Yogurt Pops with a Secret Crunch
Hello, dear! Let’s make a sweet summer memory. These pops are my favorite. They taste like a strawberry field on a sunny day. The best part is the crunchy bottom. It’s like a secret cookie surprise. My grandson calls them “magic wands.” I still laugh at that. Doesn’t that smell amazing? Let’s begin.
Step 1: First, we make the crunchy crust. Grab your vanilla wafers. Crumble them in your food processor. It should look like fine sand. Now, pour in the melted butter. Pulse it a few more times. The mix will start to stick together. Put it all in a little bowl. (Hard-learned tip: No food processor? Put wafers in a bag and roll with a tin can!).
Step 2: Wash out the processor bowl. Now for the strawberries! Toss them in and blend. You want a lovely, pink liquid. It should be nice and smooth. If you’re using the rum or tequila, add it now. This step is for grown-up pops only, of course. The kitchen smells so fruity already.
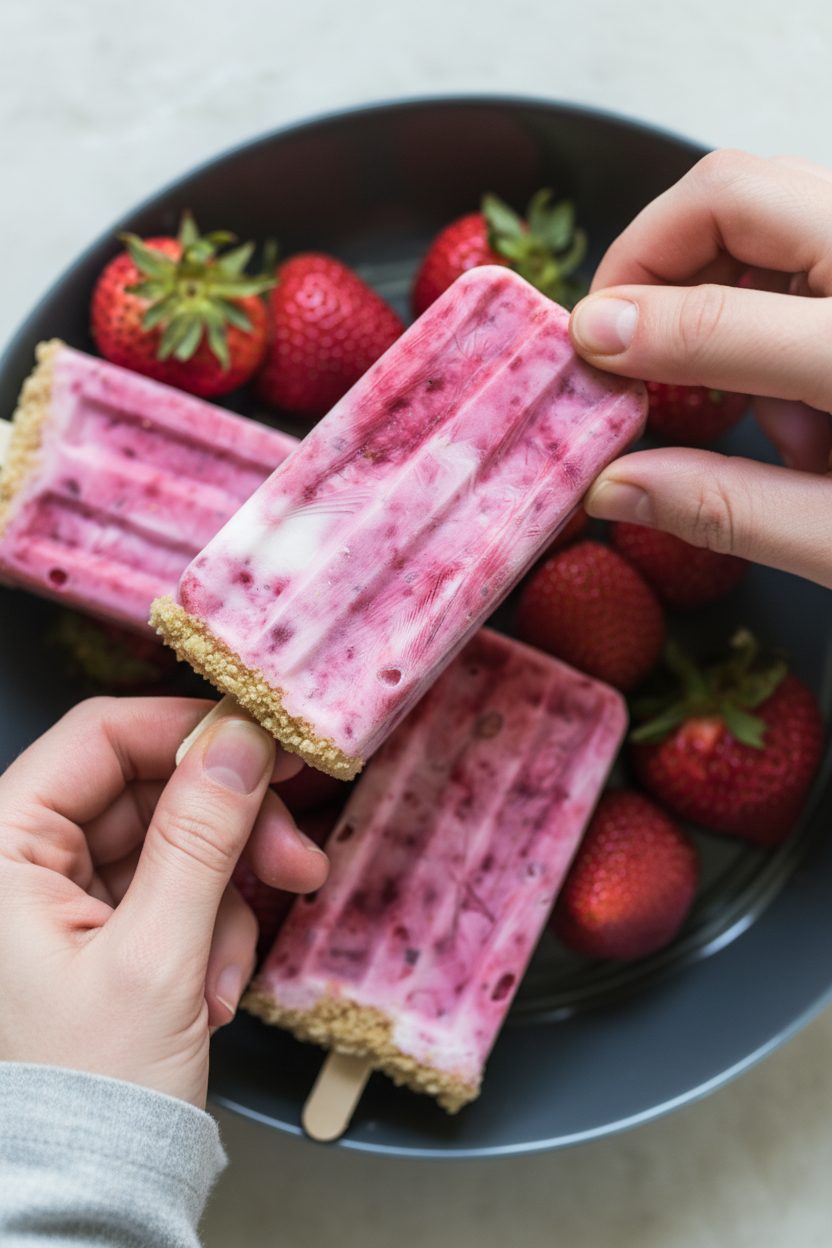
Step 3: In another bowl, mix the yogurt and honey. Stir it until it’s creamy. Now, pour in your beautiful strawberry liquid. Here is the trick. Do not mix it all the way! Just a few gentle folds. We want pretty pink swirls. Swirls or full mix—which do you think looks prettier? Share below!
Step 4: Time to fill the molds. Pour your swirly mixture in. Leave a little space at the top. Now, add a spoonful of our crumbly crust. Press it down gently. Finally, add your popsicle stick. It’s starting to look real, isn’t it?
Step 5: Patience time! Pop them in the freezer. Let them sleep for 4 to 6 hours. Overnight is even better. To get them out, run the mold under warm water. They’ll slide right out. Then, take your first lick. Pure joy.
Cook Time: 4–6 hours
Total Time: 4 hours 20 minutes
Yield: About 6 pops, depending on your mold
Category: Dessert, Snack
Three Fun Twists to Try
You can play with this recipe. It’s like a kitchen adventure. Here are three of my favorite ideas. They make it new every time.
Berry Mix-Up: Use half strawberries and half blueberries. You’ll get a deep, purple color. It tastes like a summer berry patch.
Tropical Dream: Swap strawberries for mango chunks. Use coconut yogurt instead of Greek. It will feel like a vacation.
Cookie Swap: Use chocolate graham crackers for the crust. It adds a rich, chocolaty crunch. Kids absolutely love this one.
Which one would you try first? Comment below!
Serving Them Up with Style
These pops are stars on their own. But a little extra touch is nice. For a party, stand them up in a tall glass filled with more vanilla wafer crumbs. You can also drizzle them with a tiny bit of honey. It looks so fancy.
What to drink? For a fancy night, a little glass of champagne pairs wonderfully. For everyday, I love fizzy lemonade. The tart lemon and sweet strawberry are perfect friends. Which would you choose tonight?
Keeping Your Popsicles Perfect
Let’s talk about storing these sweet treats. Your freezer is their best friend. Freeze them solid for four to six hours first. Then, you can move them to a freezer bag. This saves space in your tiny freezer. I remember my first batch. I left them uncovered. They tasted like my frozen peas! Now I always bag them.
You can make a big batch easily. Just double the recipe. Use two different molds if you have them. This matters because a ready-made snack is a happy surprise. It saves you time on a hot day. Have you ever tried storing popsicles this way? Share below!
Popsicle Problems and Easy Fixes
Sometimes things go wrong. Do not worry. I have fixes. First, your pop might not come out. Just run the mold under warm water for five seconds. It will slide right out. I once pulled the stick and left the pop behind!
Second, the layers might mix too much. For a pretty swirl, just fold the yogurt and berries twice. Do not stir. This matters because we eat with our eyes first. It makes the treat feel special. Third, the crust can get soggy. Press it in just before freezing. Which of these problems have you run into before?
Solving small issues builds your kitchen confidence. You learn that mistakes are okay. Fun fact: The first popsicle was invented by an 11-year-old boy by accident!
Your Popsicle Questions, Answered
Q: Can I make these gluten-free? A: Yes! Use gluten-free vanilla cookies for the crust. It works just the same.
Q: How far ahead can I make them? A: You can make them a full week ahead. Keep them in a sealed bag.
Q: What if I don’t have honey? A: Use maple syrup or agave. The sweetness will be a little different but good.
Q: Can I make a giant batch? A: Absolutely. Double or triple everything. Just blend in batches.
Q: Is the alcohol needed? A: No, it is optional. The pops are creamy and delicious without it. Which tip will you try first?
From My Kitchen to Yours
I hope you love making these cool treats. They remind me of summer afternoons with my grandkids. I would love to see your creations. Your swirl might be better than mine! Share your kitchen joy with others. Have you tried this recipe? Tag us on Pinterest!
I am so glad we cooked together today. Come back soon for another simple recipe. Happy cooking!
—Emma Caldwell.

Creamy Strawberry Yogurt Pops: Creamy Strawberry Yogurt Pops Recipe
Description
Cool off with these easy, creamy strawberry yogurt pops! A healthy, homemade frozen treat perfect for hot days and kids’ snacks.
Ingredients
=== For the crust: ===
Instructions
- First make the “crust” by pulsing the vanilla wafers in a food processor or blender until crumbled. Then add in the melted butter and pulse again until mixture holds together a bit more.
- Set the wafers aside in a bowl and clean out the food processor to blend the strawberries.Blend the strawberries in your food processor or blender on high speed until nearly liquified into a smoothie-like consistency. (If adding in coconut rum or tequila do it in this step).
- Mix the yogurt and agave/honey together and then add in the strawberries. **NOTE: To get the swirly look to your popsicles, do not fully mix the yogurt with the strawberries.
- Pour mixture in your popsicle mold and be sure to leave a little room at the top for the wafer crust. Press down about 1-2 Tbsp. and then add in the popsicle stick (if your mold has the slot for sticks).
- Freeze for 4-6 hours or overnight until completely frozen. You can run the popsicle mold under warm water to remove the popsicles when you are ready to enjoy, but if you use the silicone popsicle mold they are fairly easy to just pop out.


Leave a Reply