
My First Galette Fiasco
Let me tell you about my first galette. It was a mess. The butter was too warm. My dough looked like a map with too many countries. I patched it together with my fingers. It baked up lumpy and wild. I still laugh at that. It tasted wonderful, though. That’s the magic of a galette. It’s supposed to be rustic and free. Perfection is not the goal here. A happy kitchen is.
That matters because cooking should be fun, not scary. A galette is a friendly recipe. It forgives mistakes. Have you ever had a kitchen mess turn out great? I’d love to hear your story.
Butter is Your Best Friend
Cold butter is the secret. Those little pea-sized bits in the dough are key. In the oven, they melt. They create steam. That steam makes the crust flaky and light. Isn’t that clever? Your fingers should work fast. We don’t want warm, greasy butter. Ice-cold water helps too. It keeps everything chilly.
Fun fact: This method is called “cutting in” the butter. Bakers have done it for centuries! Why does this matter? Good ingredients treated right make simple food special. You can taste the care.
The Apple of My Eye
I love a mix of apples. Tart Granny Smith and sweet Honeycrisp are perfect. The tart ones keep things bright. The sweet ones make it cozy. Toss them with sugar and spice. Doesn’t that smell amazing? Like a fall day in a bowl. You don’t even need to peel them. The skins add color and a little chew.
What’s your favorite apple for baking? Is it a tart one or a super sweet one? Tell me in the comments.
The Joy of Folding
This is my favorite part. You roll the dough into a rough circle. Then you pile the apples in the middle. Now, just fold the edges up. Overlap the dough like you’re tucking in a blanket. It doesn’t have to be neat. Those folds and pleats are beautiful. They hold all the sweet juices inside.
Brushing the crust with cream makes it shine. A sprinkle of sugar gives it a sweet crunch. Then into the oven it goes. The smell will fill your whole house. It is the best welcome home.
Serving With Love
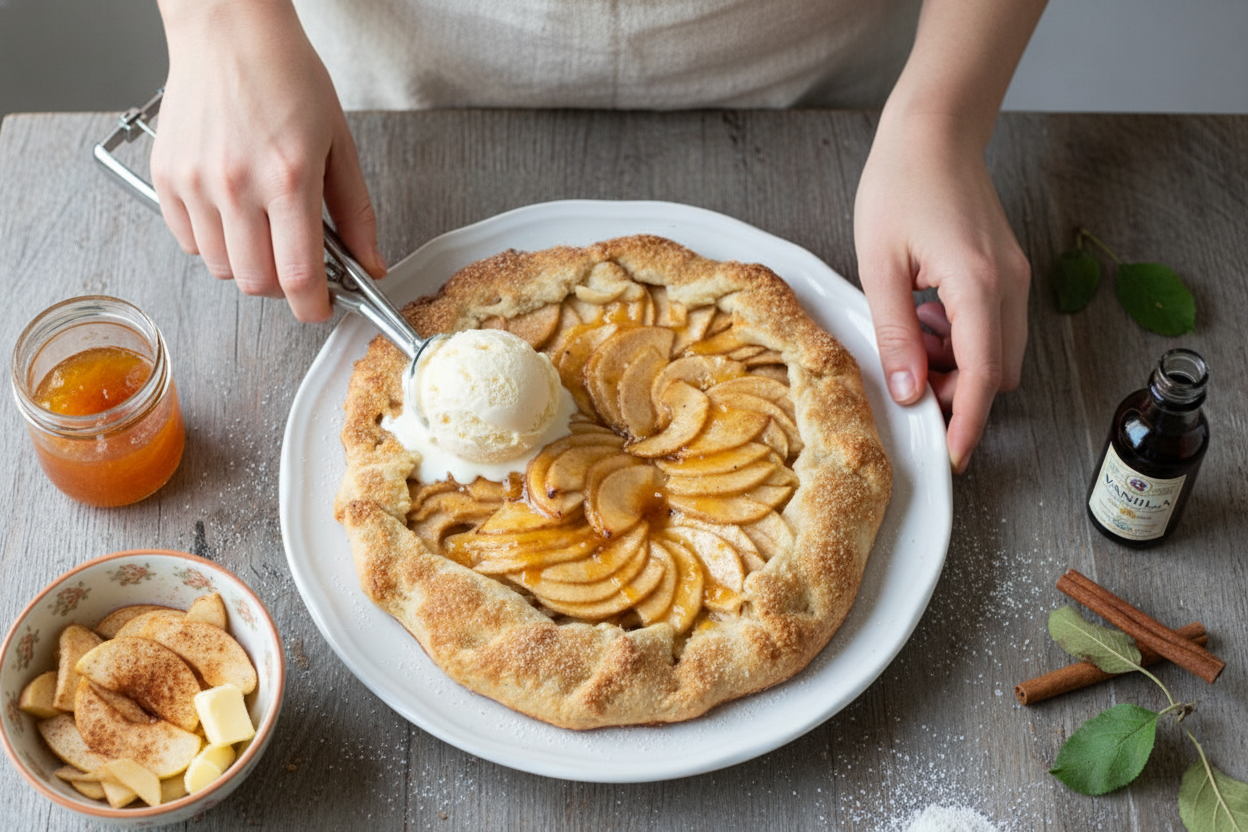
Let it cool a bit on the rack. The apricot jam glaze is my grandma’s trick. It makes the apples gleam. It adds a little fruity sweetness. Then, cut big wedges. Always serve it warm with vanilla ice cream. The cold ice cream melts into the warm apples. It’s pure happiness in a bowl.
This matters because food shared is love shared. Who will you make this for? A family dinner? A treat for a friend? Share a picture of your rustic creation if you try it. I would be so proud.

Ingredients:
| Ingredient | Amount | Notes |
|---|---|---|
| All-Purpose Flour | 1 1/2 cups | For the dough |
| Sugar | 1 Tbsp. | For the dough |
| Salt | 3/4 tsp. | For the dough |
| Cold butter | 1 1/2 sticks (3/4 cup) | For the dough |
| Ice cold water | 4-5 Tbsp. | For the dough |
| Apples (Granny Smith and Pink Lady/Honeycrisp mix) | 2 lbs. | For the apple filling |
| Granulated sugar | 1/3 cup | For the apple filling |
| Lemon juice or Apple Cider Vinegar | 1 Tbsp. | For the apple filling |
| Cornstarch | 1/2 Tbsp. | For the apple filling |
| Salt | 1 tsp. | For the apple filling |
| Vanilla extract | 1 tsp. | For the apple filling |
| Cinnamon | 1/2 tsp. | For the apple filling |
| Nutmeg | 1/2 tsp. | For the apple filling |
| Heavy cream or 1 egg, whisked | 1 Tbsp. | For brushing on the crust |
| Apricot Jam | 1/3 cup | For brushing on apples |
| Vanilla Ice Cream | 1 pint | For serving |
My Cozy Apple Galette: A Simple, Rustic Treat
Hello, my dear! Come sit. Let’s make a simple apple galette. It’s just a fancy word for a rustic, free-form pie. No perfect edges needed here. I love that. It feels friendly and forgiving. Doesn’t that sound nice?
We’ll start with the dough. It’s easier than you think. The secret is keeping everything cold. I still laugh at my first try. I used warm butter! What a soft, sticky mess that was. You live and you learn, my love.
Step 1: Put your flour, sugar, and salt in a food processor. Give it a few quick pulses to mix. Now add your cold, cubed butter. Pulse again until the butter looks like little peas. This makes the crust flaky. I promise!
Step 2: Now, slowly add the ice water. Stream it in while pulsing. Start with just 3 tablespoons. The dough should start clumping together. (Hard-learned tip: Too much water makes a tough crust. Stop at 5 tablespoons max!).
Step 3: Dump the dough onto a floured counter. Gently press it into a ball. Then flatten it into a thick disk. Wrap it tightly in plastic. Pop it in the fridge to rest. This chill time is so important. It lets the dough relax.
Step 4: While the dough chills, make the filling. Slice your apples nice and thin. I use a mix of tart and sweet ones. Toss them with sugar, lemon, and spices. Doesn’t that smell amazing already? It’s like autumn in a bowl.
Step 5: Roll your chilled dough into a big circle. Don’t worry about perfect shapes! Mine are always a bit lopsided. Transfer it to a baking sheet with parchment paper. Now, pile those lovely apples in the center.
Step 6: Here’s the fun part. Fold the dough edges up over the apples. Just pleat it as you go around. It should look beautifully messy. Brush the crust with a little cream. This gives it a gorgeous golden color. Sweet or tart apples: which do you prefer for pie? Share below!
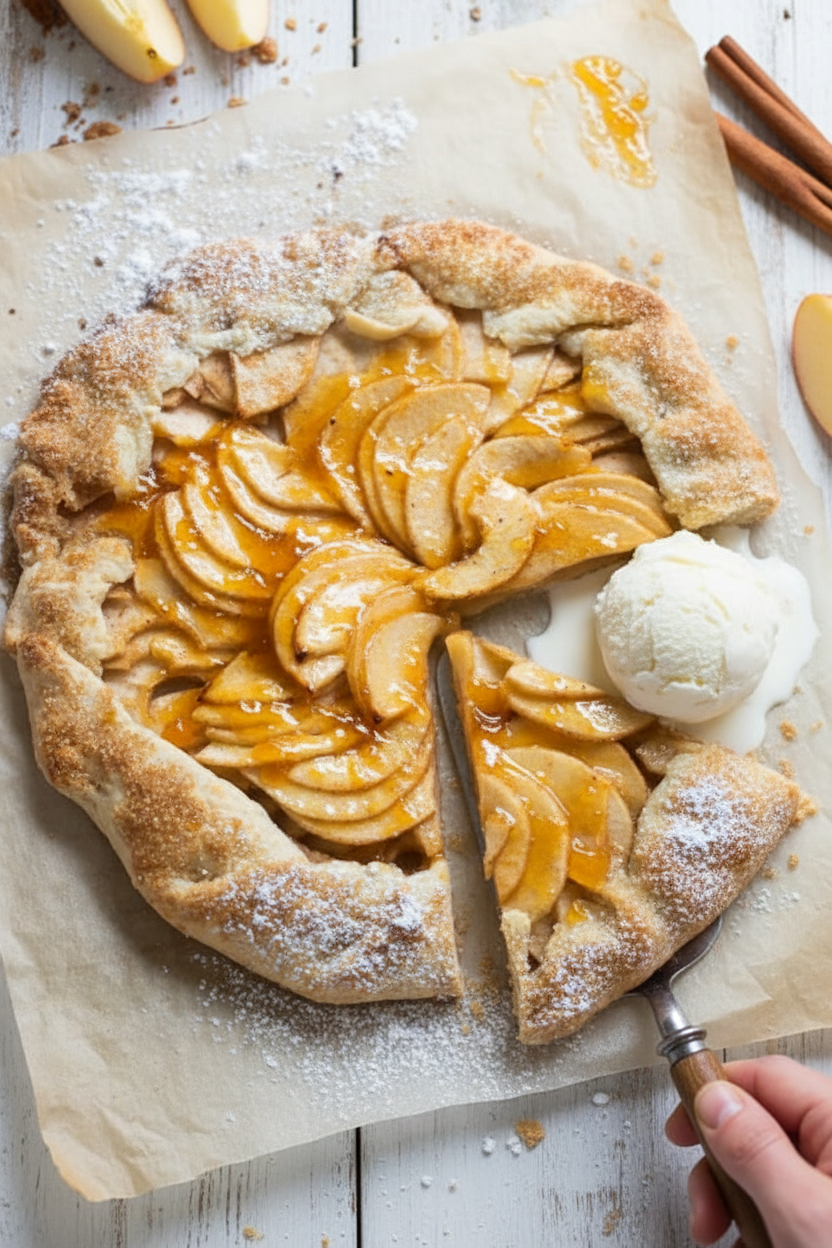
Step 7: Bake until your kitchen smells like heaven. The crust should be golden brown. Let it cool on the rack. Warm jam brushed on top makes everything glisten. Serve it with a big scoop of vanilla ice cream. Pure joy on a plate.
Cook Time: 35–45 minutes
Total Time: About 1 hour 30 minutes (with chilling)
Yield: 6 generous slices
Category: Dessert, Baking
Three Fun Twists to Try
This recipe is like a blank canvas. You can paint it with so many flavors. Here are a few of my favorite ideas. They make me smile just thinking about them.
Summer Berry Bliss: Swap apples for mixed berries. Use blueberries, raspberries, and blackberries. So bright and juicy!
Savory Garden Galette: Skip the sugar. Fill it with sliced tomatoes, zucchini, and goat cheese. A lovely light lunch.
Peach & Brown Sugar Dream: Use ripe peaches instead of apples. Add a sprinkle of brown sugar. Taste the sunshine.
Which one would you try first? Comment below!
Serving It Up With Style
Now, let’s talk about serving. A galette is a humble thing. But you can dress it up so nicely. I love a dollop of softly whipped cream next to the ice cream. A tiny sprinkle of sea salt on top is magic too. It makes the sweet apples sing.
What to drink? On a cozy evening, a hot mug of spiced apple cider is perfect. For a special dinner, a small glass of sweet dessert wine pairs beautifully. The flavors dance together. Which would you choose tonight?
Keeping Your Galette Happy (Storage Tips)
Let’s talk about keeping your galette tasty. First, let it cool completely. Then wrap it tightly in plastic. It will be happy in the fridge for three days. You can also freeze it for two months. Wrap it well in foil first.
To reheat, use your oven. Warm it at 350 degrees for about 10 minutes. This keeps the crust crisp. I once used a microwave. It made the crust soggy. The oven is always better.
You can make the dough ahead. Just freeze the disk for later. This is great for busy days. Having food ready matters. It brings comfort on a tough afternoon. Have you ever tried storing it this way? Share below!
Galette Troubles? Easy Fixes!
Is your dough cracking? Do not worry. Just press it together with your fingers. It is very forgiving. I remember when my first galette had a big tear. I patched it like doughy clay. It baked up just fine.
Is the filling too runny? Your apples might be too juicy. Toss them with the cornstarch well. This thickens the juices. Why does this matter? A thick filling won’t make your crust wet. You get a perfect slice every time.
Is the crust not golden? Brush it with that cream or egg. This gives it a beautiful color. A pretty bake builds your cooking confidence. It makes you proud. Which of these problems have you run into before?
Your Galette Questions, Answered
Q: Can I make this gluten-free? A: Yes! Use your favorite gluten-free flour blend. The recipe works the same way.
Q: Can I prepare parts ahead? A: Absolutely. Make the dough disk up to two days early. Keep it chilled in the fridge.
Q: What if I don’t have apricot jam? A: Honey or maple syrup works nicely. Just brush it on the warm apples.
Q: Can I make a smaller one? A: Sure. Just cut the recipe in half. Use a smaller baking sheet.
Q: Any secret for extra flavor? A: A pinch of cardamom in the filling is lovely. Fun fact: Cardamom is often called the “queen of spices.” Which tip will you try first?
From My Kitchen to Yours
I hope you love making this rustic galette. It is meant to be simple and joyful. Do not stress about perfect circles. Imperfect food made with love tastes the best.
I would be so delighted to see your creation. Share a photo of your kitchen adventure. Have you tried this recipe? Tag us on Pinterest! You can find me at @EmmasCozyKitchen. Thank you for baking with me today.
Happy cooking!
—Emma Caldwell.

Easy Rustic Galette Baking Guide: Easy Rustic Galette Baking Guide for Beginners
Description
Master rustic galettes with our simple guide! Perfect, buttery pastry & endless sweet or savory fillings. Easy, impressive, & delicious every time.
Ingredients
=== For the dough ===
=== For the apple filling ===
Instructions
- Pour the flour, sugar and salt in the food processor. Pulse a few times to combine. Add in cubed butter and pulse again until butter pieces are the size of peas, ~7-8 times.
- Slowly stream in the ice water, 3-4 Tbsp. should be enough for the dough to come together. 5 Tbsp. water max.
- Remove the dough from the food processor and place on a clean, floured surface. Roll/form the dough into a ball and slightly flatten into a disk.
- Cover in plastic wrap and place in the fridge for 30 minutes – 1 hour.
- While the dough is chilling, prep the apple filling (or filling of choice!) Slice thin, ~1/4 inch thick and place in a large bowl. You can peel or not peel them, up to you.
- Mix all of the ingredients (from Apples to the nutmeg from the list above) into the apples and toss gently to coat. You can use a wooden spoon or your hands.
- By this time your dough should be chilled. Roll the dough out on a floured surface into a 12-inch round about 1/8-inch thick. Mend any cracks or tears by pressing them back together with your fingers or use a knife to make clean edges.
- Use your rolling pin to roll the flattened dough onto the pin so you can transfer it onto a sheet of parchment paper on your baking sheet.PRO TIP:Place a 9-inch pie pan in the center of the dough and gently press down so it creates an indentation. This helps you to know how far out to place the filling! (see video for guidance)
- Preheat the oven to 375° F. Arrange your apples onto the dough. Fold the rim of the dough up and over the edge of the filling, overlapping the dough as you go around and pleating the dough.
- Before baking, use a pastry brush to brush 1 Tbsp. heavy cream or egg wash all over the dough. Sprinkle crust with coarse sugar, if desired.
- Bake for ~35-45 minutes or until the crust becomes golden brown. Transfer the galette with the parchment paper on to a wire cooling rack and cool.
- Once cooled, dilute your apricot jam with 1-2 teaspoons of water and brush the apples with the apricot jam. YUM. Cut into wedges and serve with vanilla bean ice cream.
Notes
- For a savory variation, try fillings like caramelized onions and goat cheese, or tomatoes and pesto. The dough can be made ahead and refrigerated for up to 2 days or frozen for a month.


Leave a Reply