
The Magic of Brown Butter
Let me tell you about brown butter. It makes everything taste warmer and richer. You just cook it until it smells a little nutty. It is like a secret kitchen trick.
I learned this from my friend Marie. She put it in her cookies one day. It changed my baking forever. I still laugh at that. Such a small change made a huge difference. That is why details matter in cooking.
Making the Gooey Goodness
Now we stir in the sweet, sticky milk and vanilla. Doesn’t that smell amazing? Then comes the marshmallows. You get to watch them melt into a sweet, white river.
You need a very big pot for this giant batch. I once used a pot that was too small. Cereal went everywhere. It was a funny mess. What is the biggest cooking mess you have ever made?
The Best Part is the Stirring
Pour in all that crispy cereal. This is where you need some muscle. Get a friend or a sibling to help you stir. It is a fun job to do together.
We gently fold in the last marshmallows. Do not over mix. We want little fluffy surprises in every bite. This makes the treat special. It is good to have sweet surprises in life.
Time to Press and Decorate
Press the mixture into the pan lightly. Do not squish it down hard. A gentle touch keeps the squares soft and airy. I use the butter wrapper for this. It works perfectly.
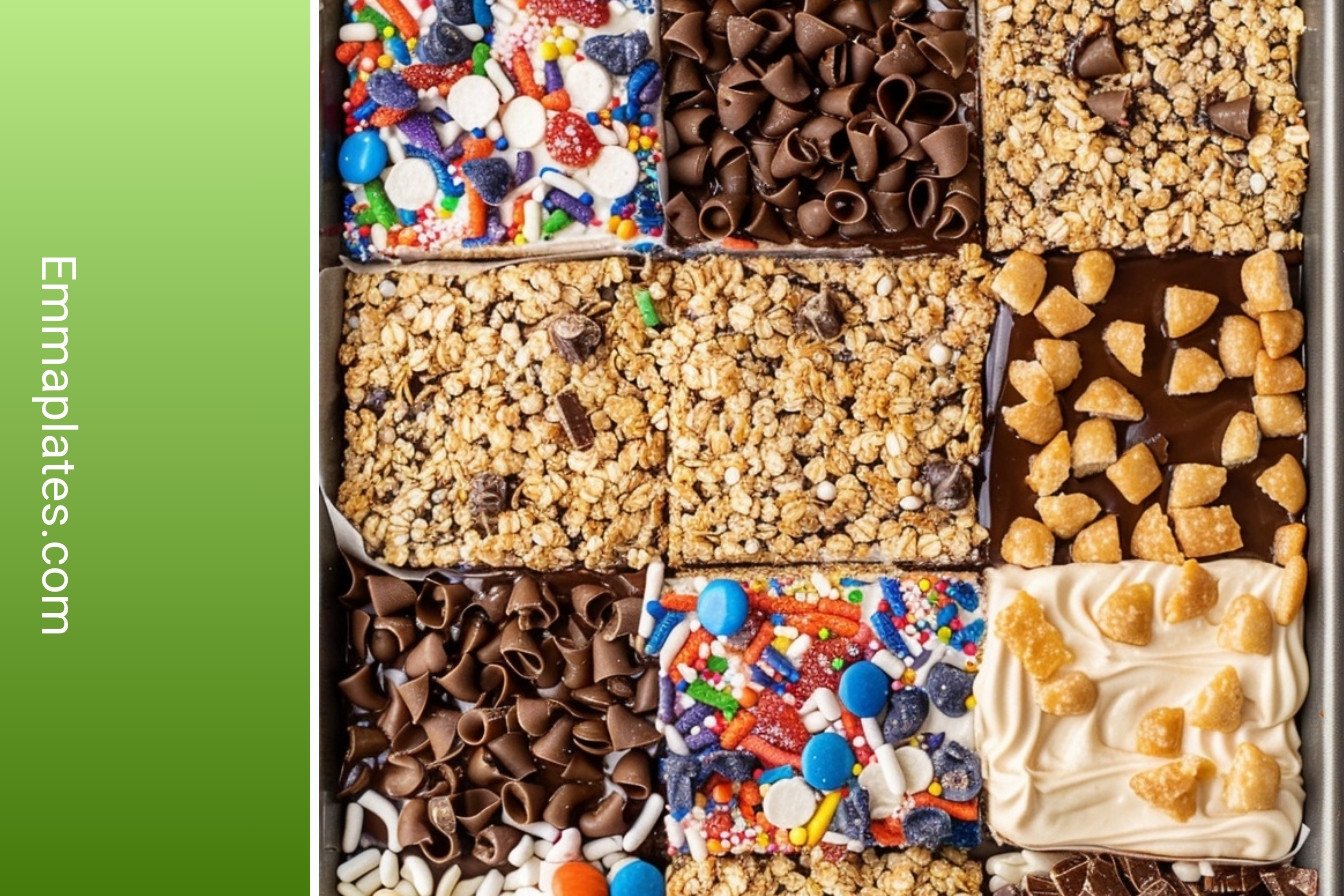
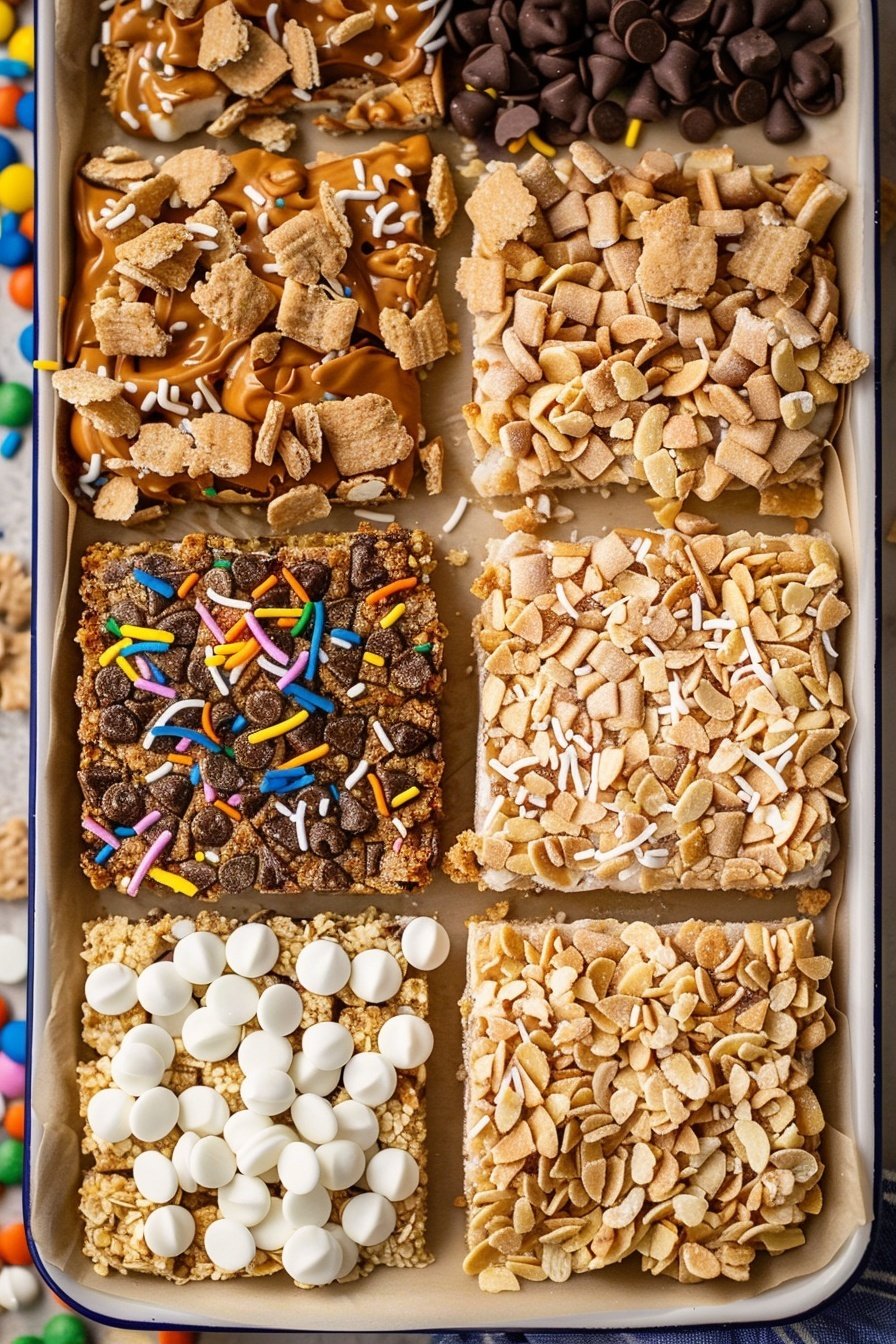
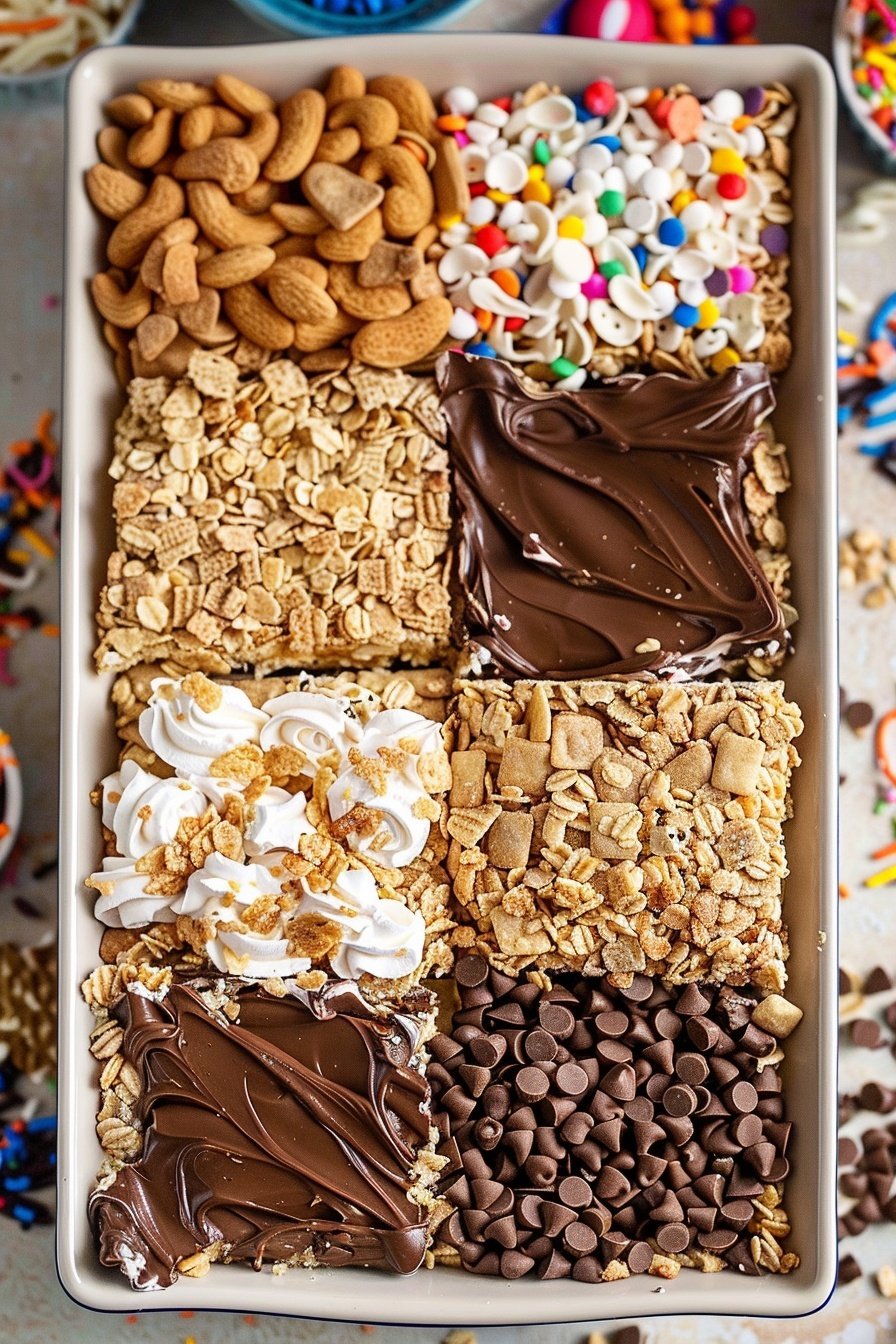
Now for the toppings. This is your chance to be an artist. What do you like best? Sprinkles, chocolate chips, or maybe some crushed candy? I always choose chocolate. What toppings will you pick?
A Little Patience for a Big Reward
The hardest part is waiting. Let the pan sit for a bit. This helps the squares hold their shape. You can put them in the fridge to speed it up.
*Fun fact: The original Rice Krispie treat recipe was first published in 1939. People have loved this simple snack for a very long time. It is a classic for a reason. What is your favorite classic snack from your family?
Ingredients:
| Ingredient | Amount | Notes |
|---|---|---|
| unsalted butter | 1 1/2 cups | |
| sweetened condensed milk | 1, 14 oz. can | |
| vanilla extract | 2 Tbsp. | |
| kosher salt | 1 1/2 tsp. | use less salt if using table salt or a fine sea salt. |
| mini marshmallows | 3, 10 oz. bags, divided | |
| Rice Krispie Cereal | 15 cups | |
| toppings (candy, chocolate, sprinkles, etc.) | as needed | optional |
My Giant Batch of Crispy Squares
Hello, my dear! Come sit with me in the kitchen. I want to share my famous crispy squares recipe. This one makes a giant batch for a whole crowd. The secret is browning the butter first. It makes the whole house smell like warm, nutty goodness. I love that smell. It reminds me of making these for my grandchildren’s school parties. They were always the first treat to disappear from the table.
Now, let’s get our hands busy. I will walk you through each step. Don’t worry if it seems like a lot of cereal. We will manage it together. Just follow along with me. Cooking is all about the little stories we create. I still laugh at the time I used a whole bag of salt by mistake. What a mess that was! Let’s make some happier memories today.
- Step 1: First, grab a big sheet pan. Line it with parchment paper and give it a little spray. This keeps our squares from sticking. I always use the butter wrapper for this job. It feels nice to not waste a thing. Set the pan aside for now. We will need it soon enough.
- Step 2: Next, we brown the butter. Melt it in your biggest pot over medium heat. It will foam and bubble. Then you will see little brown specks at the bottom. Keep stirring so they do not burn. (My hard-learned tip: use a light-colored pot so you can see the color change clearly.) Those little specks are pure magic. They give our treats a yummy, rich flavor.
- Step 3: Now, pour in the sweetened condensed milk. Add the vanilla and salt, too. Stir it all for one minute. Doesn’t that smell amazing? It becomes a sweet, creamy sauce. Make sure your heat is on medium-low now. We do not want this lovely mixture to scorch. Keep it moving in the pot.
- Step 4: Time for the first wave of marshmallows. Dump in about two and a half bags. Stir until they melt into a gooey, wonderful mess. It will look like a sweet, white cloud. Once it is smooth, take the pot off the heat. This is the fun part. The whole kitchen starts to feel like a candy shop.
- Step 5: Here comes the cereal! Pour all fifteen cups in. You might need to mix this in a giant bowl. My old Dutch oven can handle it. Stir until every piece is coated in that marshmallow goodness. What is your favorite cereal to snack on? Share below! I always sneak a handful while I cook.
- Step 6: Gently fold in the last two cups of marshmallows. Do not stir too much. We want soft, fluffy pockets of marshmallow inside. Then, spread the mixture onto your prepared pan. Press it down lightly with your hands or a greased spatula. Do not pack it too tight. A gentle touch makes the squares perfectly chewy.
- Step 7: Finally, the decorations! Sprinkle your favorite toppings over the top. Press them in gently so they stick. Now, we must be patient. Let it sit for at least half an hour to set. I know, the waiting is the hardest part. But it is worth it for a clean cut.
Cook Time: 30 minutes
Total Time: 1 hour 30 minutes
Yield: One giant sheet pan
Category: Dessert, Snack
Fun Twists for Your Treats
The basic recipe is a dream. But sometimes, you want to play with your food. I love getting creative with these. Here are a few of my favorite twists. They are so simple and fun. They can make your crispy squares feel brand new.
- Birthday Party: Mix in rainbow sprinkles and colorful candy. It is a celebration in every bite.
- Chocolate Lover’s: Swirl in melted chocolate before pressing into the pan. You can also press chocolate chips on top.
- Peanut Butter Delight: Add a big spoonful of peanut butter to the melted marshmallow mix. It is so creamy and good.
Which one would you try first? Comment below!
Serving Your Masterpiece
These squares are wonderful all on their own. But I think everything is better with a friend. For a real treat, serve a square with a scoop of vanilla ice cream. The warm and cold together is just lovely. You could also pack them in a lunchbox with some fresh apple slices. It makes a happy, balanced snack.
Now, what to drink? A tall, cold glass of milk is the classic choice. It is perfect for washing down the sweet, chewy bites. For the grown-ups, a cup of dark roast coffee is wonderful. The bitter coffee tastes so nice with the sweet treat. Which would you choose tonight?
Keeping Your Crispy Squares Perfect
These treats are best enjoyed fresh. But you can keep them for later. Store them in a sealed container at room temperature. They will stay good for two days.
For a longer treat, freeze them. I wrap each square in plastic wrap. Then I put them all in a freezer bag. They taste wonderful straight from the cold.
I once made a huge batch for my grandson’s party. We had so many leftovers. Freezing them saved the day. He enjoyed them for weeks after.
This matters because it saves time and food. A little planning makes busy days sweeter. You always have a homemade snack ready. Have you ever tried storing it this way? Share below!
Easy Fixes for Common Crispy Square Troubles
Is your treat too hard? You probably pressed the mixture down too firmly. Just press it gently into the pan. This keeps the squares light and chewy.
Are the marshmallows not melting smoothly? Your heat might be too high. I remember when I rushed this step. I ended up with sticky, stringy marshmallow clumps.
Is the butter burning? Use a light-colored pot to see the color change. Those little brown specks are full of flavor. But black specks mean it has gone too far.
Getting it right builds your cooking confidence. A perfect texture makes the treat extra special. Which of these problems have you run into before?
Your Crispy Square Questions Answered
Q: Is this recipe gluten-free? A: Yes, if you use a gluten-free rice cereal. Always check the cereal box label to be sure.
Q: Can I make these ahead? A: Absolutely. They are a great make-ahead snack for a busy week. Just follow my storage tips.
Q: What can I use instead of vanilla? A: You can try using almond extract. Just use a little less, as the flavor is stronger.
Q: Can I make a smaller batch? A: Of course. Simply cut all the ingredients in half. Use a smaller pan for baking.
Q: Are the toppings necessary? A: Not at all. They are just for extra fun and color. The plain squares are delicious too. Which tip will you try first?
A Little Note From My Kitchen to Yours
I hope you love making these crispy squares. The best recipes are the ones we share. They create sweet memories in our kitchens.
Fun fact: The original Rice Krispie treat recipe was first published in 1939!
I would love to see your creations. Show me your colorful, topped masterpieces. Have you tried this recipe? Tag us on Pinterest!
Happy cooking!
—Emma Caldwell.
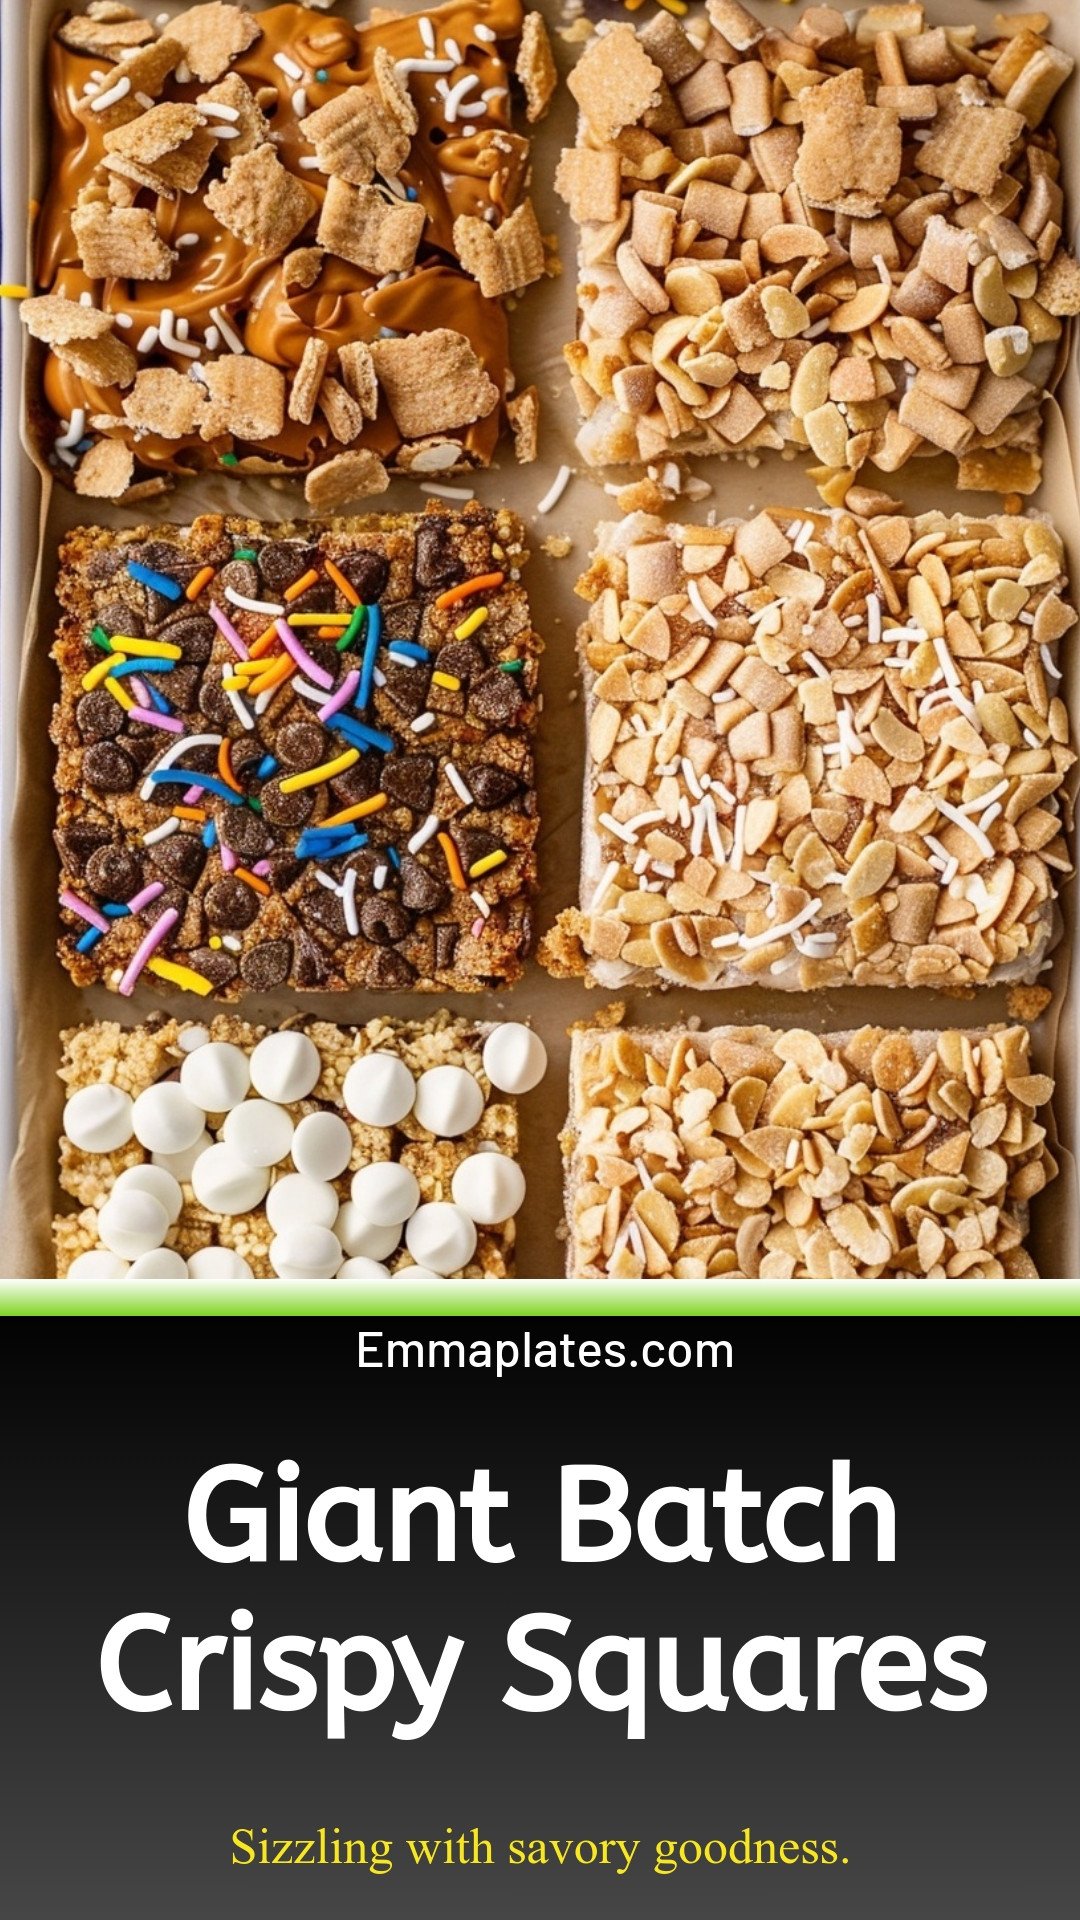
Giant Batch Crispy Squares: Sizzling with savory goodness.
Description
The ultimate no-bake Giant Batch Crispy Squares recipe! Perfect for parties, these easy, chewy & crispy treats are a guaranteed crowd-pleaser everyone will love.
Ingredients
Instructions
- Line a sheet pan with parchment and lightly grease the parchment with non stick spray, set aside.
- Brown the butter: In a large light-bottomed Dutch oven over medium heat, melt the butter. The butter will begin to foam, and then the foam will begin to subside and you’ll start to see tiny specks at the bottom of the pan, stir with a heat resistant spatula or wooden spoon and constantly stir and scrape so milk solids that are browning don’t stick. (These are what give brown butter it’s yummy flavor.)
- Add the condensed milk, vanilla, and salt. stir for 1 minute or until combined over medium-low heat.
- Add 10 cups of the marshmallows (about 2 1/2 bags).
- Stir until melty and then remove from the heat.
- Pour in the rice krispie cereal, working in increments if needed since it’s quite a lot of cereal. (My Dutch oven is a 7 1/4 qt so it’s pretty large. You may need to transfer this to a large bowl to get everything incorporated nicley).
- Stir until incorporated.
- Gently stir in the remaining 2 cups mini marshmallows. Stir gently and don’t over mix because we want those pockets of marshmallow throughout.
- Transfer the mixture onto the prepared sheet pan.
- Gently press down using the back of the butter wrapper or a greased spatula. Be sure to lightly press instead of tightly compacting for best results, making sure it’s in an even layer.
- Add your favorite toppings, pressing them down gently so they stick. Allow to set up for 30-60 minutes before cutting. You can also pop in the fridge to get clean cuts. Be sure to cover them if leaving them out for longer than an hour. Enjoy!
Notes
- For best results, use a large Dutch oven or pot to accommodate the large volume of ingredients. Do not overmix after adding the final 2 cups of marshmallows to preserve the chewy pockets.


Leave a Reply