
A Chocolatey Memory
I remember my first chocolate popsicle. It was from a truck. It was so sweet it made my teeth hum! I loved it. But I wanted a treat I could feel good about.
So I made my own. This recipe is my favorite. It tastes rich and creamy. But it is much better for you. It feels like a happy secret. Doesn’t that sound nice?
Why This Simple Recipe Works
You only need five things. Coconut milk makes it creamy. Cocoa powder gives that deep chocolate taste. The maple syrup is just for sweetness.
Why does this matter? You know every single thing going into your body. No strange chemicals. Just real food. That feels peaceful to me. What is your favorite real-food treat?
The Little Tricks
Whisk everything in a bowl. Taste it! Add more maple syrup if you like it sweeter. This is your treat. Make it taste right for you.
Pour it into the molds. Leave a little space at the top. Fun fact: The mix expands a tiny bit when it freezes! Then the hard part: waiting. But it is worth it.
The Best Part
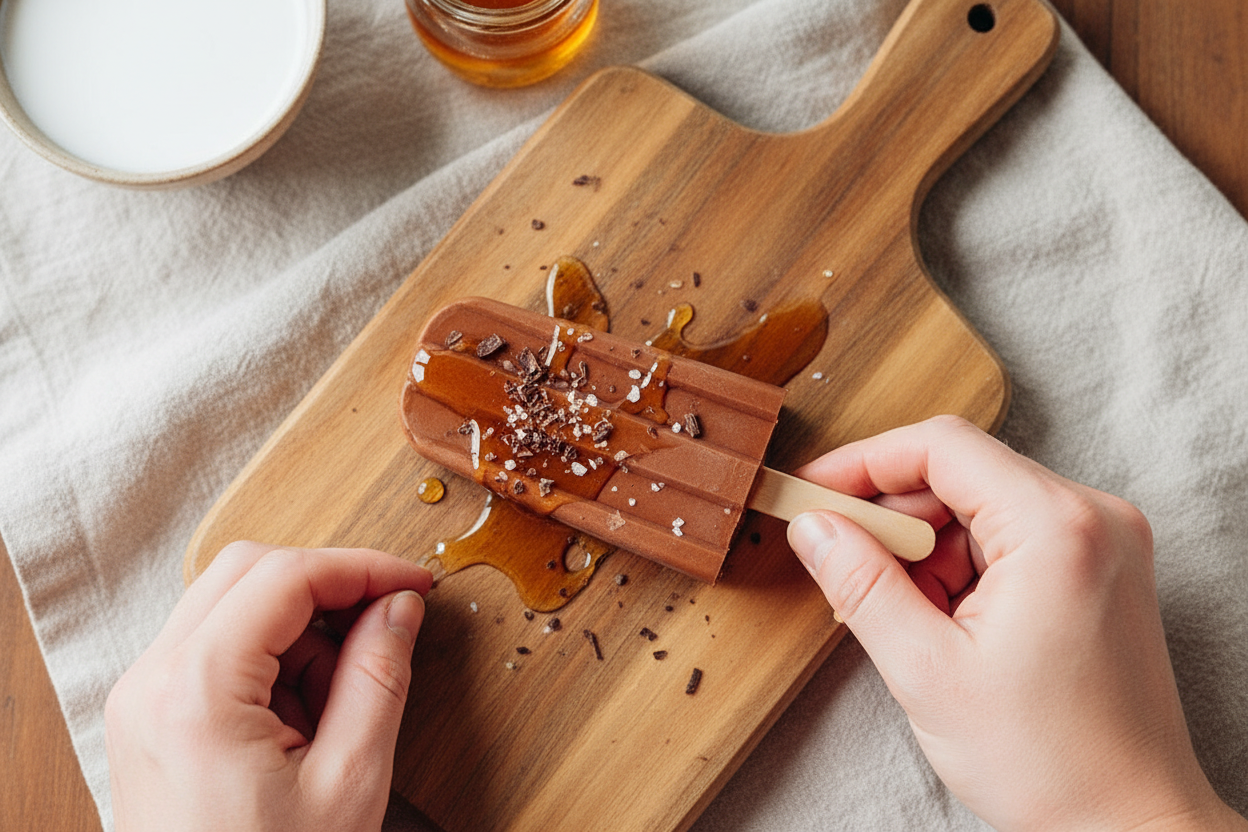
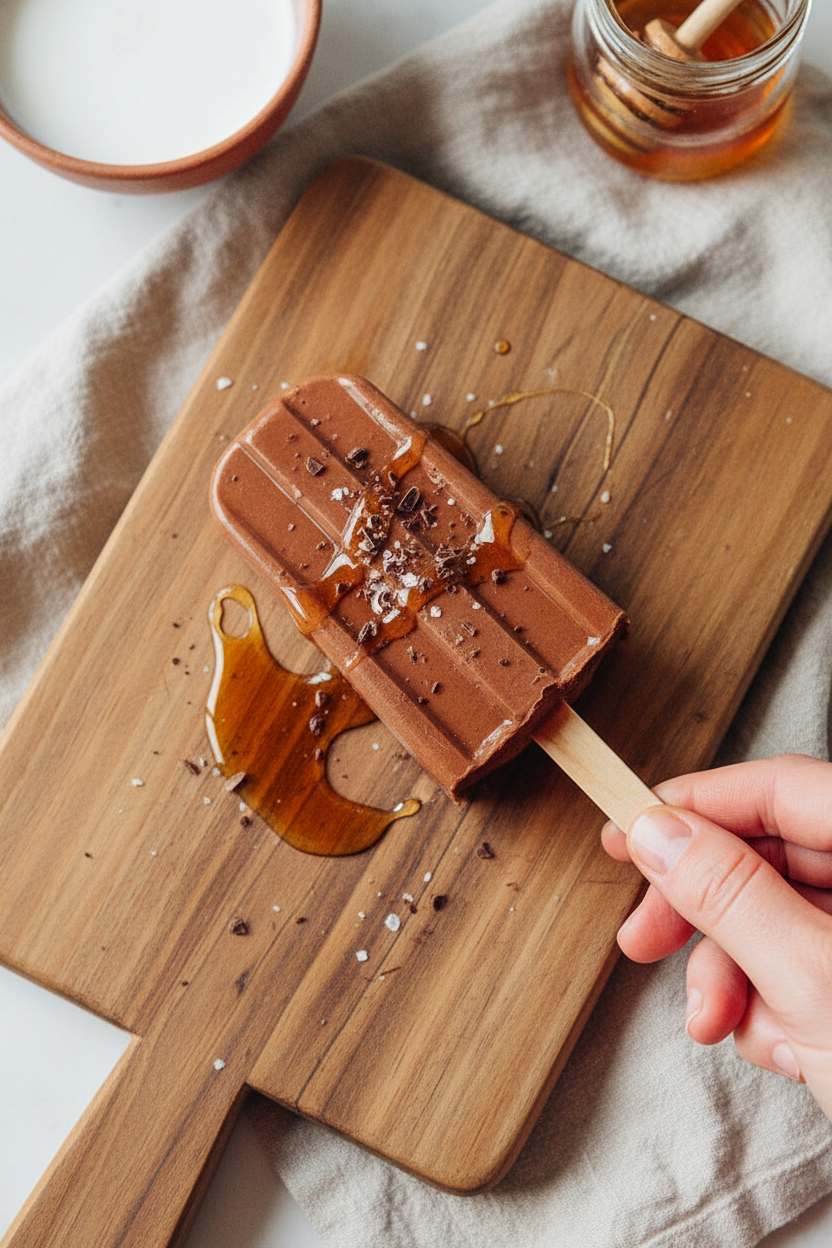
After four hours, they are ready. Run the mold under warm water. Just for a few seconds. Then your perfect pop slides right out.
That first cold, chocolatey bite is magic. It is creamy, not icy. Why does this matter? A good treat can make a whole afternoon better. It is a small joy. Do you have a food that always makes you smile?
Make It Your Own
This is a wonderful base. You can add so much. Try a tiny pinch of cinnamon. Or some crushed berries in the bottom of the mold. My grandson loves mini chocolate chips in his.
Making food your own is a life lesson. It teaches you to trust your own taste. I still laugh at my first try. I added too much salt! We all learn. What would you add to your chocolate pop?

Ingredients:
| Ingredient | Amount | Notes |
|---|---|---|
| Coconut milk | 1 can (14 oz / 415 mL) | |
| Unsweetened cocoa powder | 1/2 cup | |
| Maple syrup or honey | 4 to 6 Tbsp (60 to 90 mL) | to taste |
| Vanilla extract | 1 tsp (5 mL) | |
| Salt | 1 pinch |
My Creamy Dreamy Chocolate Pops
Hello, my dear! Come sit with me. Let’s make a treat from my childhood. We used to get those icy pops from the truck. Mine were always grape. This version is much creamier and richer. It tastes like a frozen chocolate pudding. Doesn’t that sound wonderful? We use simple, good things from the pantry. I still laugh at my first try. I forgot the sticks! We had to eat them with spoons.
Here is how we make the magic happen. Just follow these easy steps. It’s more fun with a little helper, you know.
- Step 1: Grab a big mixing bowl. Pour in the whole can of coconut milk. It should look nice and creamy. Now, add your cocoa powder. I like to sift it. This stops little lumps from forming. Whisk it all together until it’s smooth.
- Step 2: Time for the sweet stuff. Start with four spoons of maple syrup. Give it a taste. Want it sweeter? Add a little more. Now, a splash of vanilla and a tiny pinch of salt. The salt makes the chocolate taste even better. (My hard-learned tip: taste before you freeze! It should taste perfect now.)
- Step 3: Carefully pour your mixture into the popsicle molds. Leave a little room at the top. They need space to grow as they freeze. Now, firmly push the sticks into each one. Doesn’t that smell amazing? Pop the whole tray into the freezer. Walk away for a few hours.
- Step 4: Be patient, my dear. Wait at least four hours. When they’re solid, it’s time to eat! Run the mold under warm water for just five seconds. This loosens them right up. Gently pull on the stick. Out comes your perfect pop. What summer sound do you love most? The ice cream truck or birds chirping? Share below!
Cook Time: 4–6 hours
Total Time: 4 hours 15 minutes
Yield: About 6 popsicles
Category: Dessert, Snack
Let’s Get Creative!
Once you master the basic pop, you can play! Here are three fun twists I love. They make a simple treat feel extra special.
- Berry Swirl: Drop a spoonful of raspberry jam into each mold before pouring. Use a knife to swirl it gently.
- Crunchy Peanut: Stir two big spoonfuls of peanut butter into the mix. Add some crushed peanuts for a fun crunch.
- Minty Fresh: Swap the vanilla for a drop or two of peppermint extract. It tastes like a frozen chocolate mint.
Which one would you try first? Comment below!
The Perfect Little Treat
These pops are wonderful all on their own. But sometimes, I like to dress them up. Roll the frozen pop in crushed almonds or sprinkles right after you take it out. You could also drizzle a little melted dark chocolate over the top. Let it harden into a shell. For a real party, serve two mini pops stuck into a halved orange. It looks so cheerful on a plate.
What to drink with them? A cold glass of almond milk is just right. For the grown-ups, a little cup of strong coffee is lovely. The bitter coffee and sweet pop are best friends. Which would you choose tonight?
Keeping Your Chocolate Coconut Pops Perfect
Let’s talk about storing these treats. They need a flat spot in your freezer. A level shelf is best. This keeps the sticks straight as they freeze.
You can make a big batch. Just double the recipe. More pops mean more sweet, cold fun later. I remember my first batch. I was so eager I checked every hour!
To serve, run the mold under warm water. Do this for just five seconds. It loosens the pop without melting it. This little trick matters. It saves you from a sticky, broken mess.
Have you ever tried storing it this way? Share below! Batch cooking saves time. It also means a happy surprise is always waiting for you.
Simple Fixes for Popsicle Problems
Sometimes popsicles can be tricky. First, the stick might fall over. Pour the mix in, then freeze it for one hour. After that, insert the sticks. They will stand up straight.
Second, the pop might taste too icy. Be sure to use full-fat coconut milk. It makes the pop creamy. I once used a light version. The pop was full of ice crystals!
Third, the pop might not come out. Be patient with the warm water. Do not pull too hard. Let the warmth do the work. This matters for your confidence. A small fix makes you feel like a kitchen pro.
Fun fact: The word “popsicle” was coined by a kid! Getting the flavor right matters most. A creamy, chocolatey pop is pure joy. Which of these problems have you run into before?
Your Popsicle Questions, Answered
Q: Is this recipe gluten-free?
A: Yes, all the ingredients are naturally gluten-free.
Q: Can I make these ahead?
A: Absolutely! They keep for weeks in a sealed freezer bag.
Q: What can I use instead of maple syrup?
A: Honey works great. You could also use agave syrup.
Q: Can I make a smaller batch?
A: Of course. Just cut all the ingredients in half.
Q: Any optional add-ins?
A: Try a tiny pinch of cinnamon. It adds a lovely warmth. Which tip will you try first?
Wrapping Up From My Kitchen
I hope you love these chocolate coconut pops. They remind me of summer afternoons. I would make them with my grandkids.
It is so fun to make treats at home. You control what goes in them. That is the best part. I would love to see your creations.
Have you tried this recipe? Tag us on Pinterest! Use our handle @EmmasCozyKitchen. Share a photo of your frozen masterpiece. Happy cooking!
—Emma Caldwell.

Healthy Upgrades for Nostalgic Popsicles
Description
Relive childhood summers with a healthy twist! These easy, homemade fruit pops are naturally sweetened, sugar-free, and perfect for kids and adults.
Ingredients
Instructions
- Whisk together all ingredients, adding more or less maple syrup to suit your taste.
- Pour into molds, leaving a little space at the top for them to expand. Insert sticks and freeze until hard (at least 4 hours).
- Run the mold under warm water for a few seconds to loosen them up, then remove from the mold.
Notes
- Nutrition per 1 popsicle: Calories: 180kcal | Carbohydrates: 15g | Protein: 2g | Fat: 14g | Saturated Fat: 12g | Polyunsaturated Fat: 0.3g | Monounsaturated Fat: 1g | Cholesterol: 0mg | Sodium: 10mg | Potassium: 200mg | Fiber: 3g | Sugar: 9g | Vitamin A: 0IU | Vitamin C: 0mg | Calcium: 15mg | Iron: 1.5mg


Leave a Reply