
Why I Make Mini Pies
I love a big pie. But a whole pie is a big promise. These little ones are just for you. Or for you to share with one special person.
My grandson Sam taught me this. He wanted to make a pie “just for me and you, Nana.” So we did. I still laugh at that. Now, making them feels like a little hug. It matters because food made with a happy heart just tastes better.
Getting Your Berries Ready
First, wash your berries gently. Let them dry on a towel. The recipe uses strawberries, raspberries, and blackberries. You can use just one kind, or all three.
Slice the strawberries. The others can stay whole. Toss them all in a big bowl. Doesn’t that mix of red and purple look pretty? *Fun fact: mixing berries gives you lots of different vitamins. That’s good for you!*
The Little Secret in the Bowl
Now for the magic dust. That’s the sugar, cornstarch, and salt. Whisk it together. The cornstarch is the quiet helper. It thickens the berry juices so you don’t get a soup.
Sprinkle the magic dust over the berries. Toss them gently with your hands. You want every berry to get a little sparkle. Then add the lemon juice and zest. That little zip makes all the flavors sing. What’s your favorite berry to bake with?
Putting on the Hat
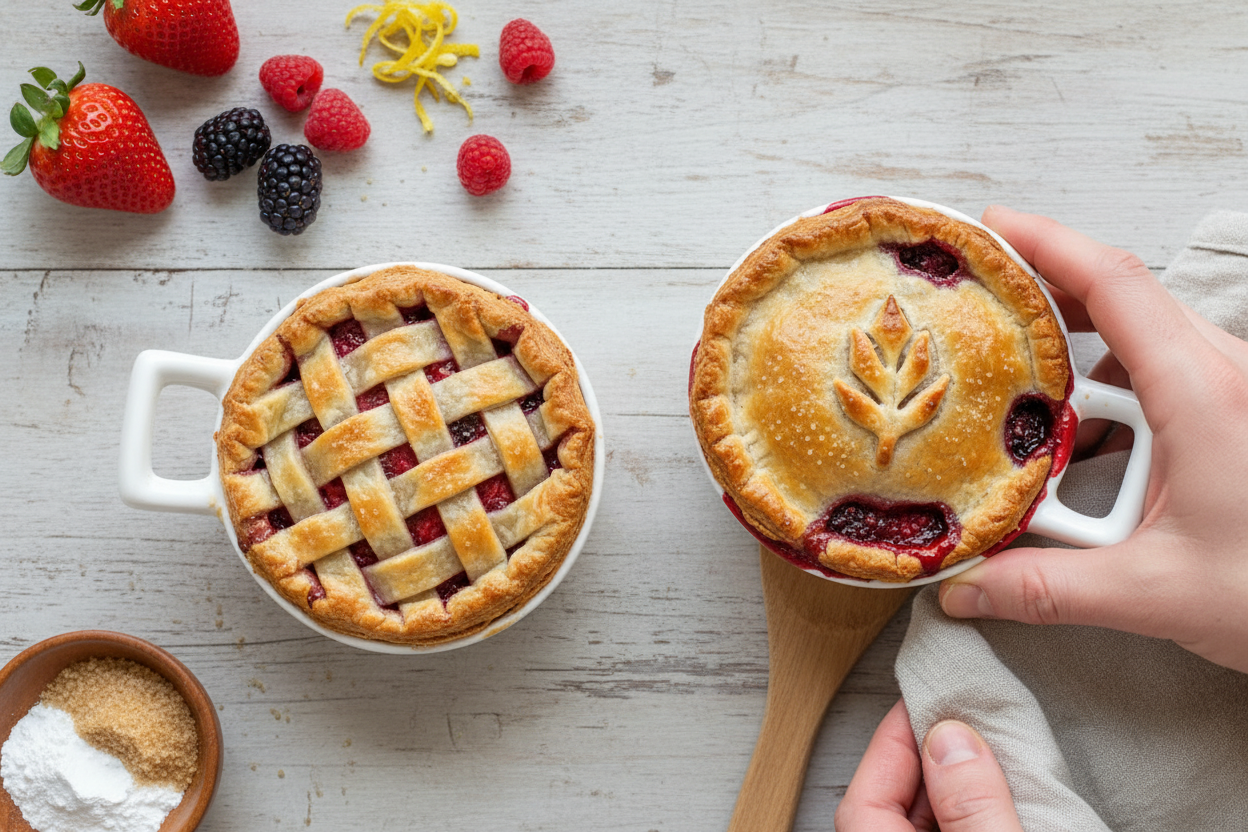
Get your ramekins. Those are the little ceramic dishes. Fill them up with your berry mix. Now for the pie crust hat. Roll it out a bit. Cut a circle bigger than your dish.
Here’s the sweet part. Cut a little heart shape from the middle. That’s your steam vent. It also lets everyone see the berries inside. Place the crust over the fruit. Brush it with the beaten egg. This makes it bake up shiny and golden.
Watching Them Bake
Put the ramekins on a baking sheet. This catches any bubbly spills. Now into the oven they go. The wait is the hardest part.
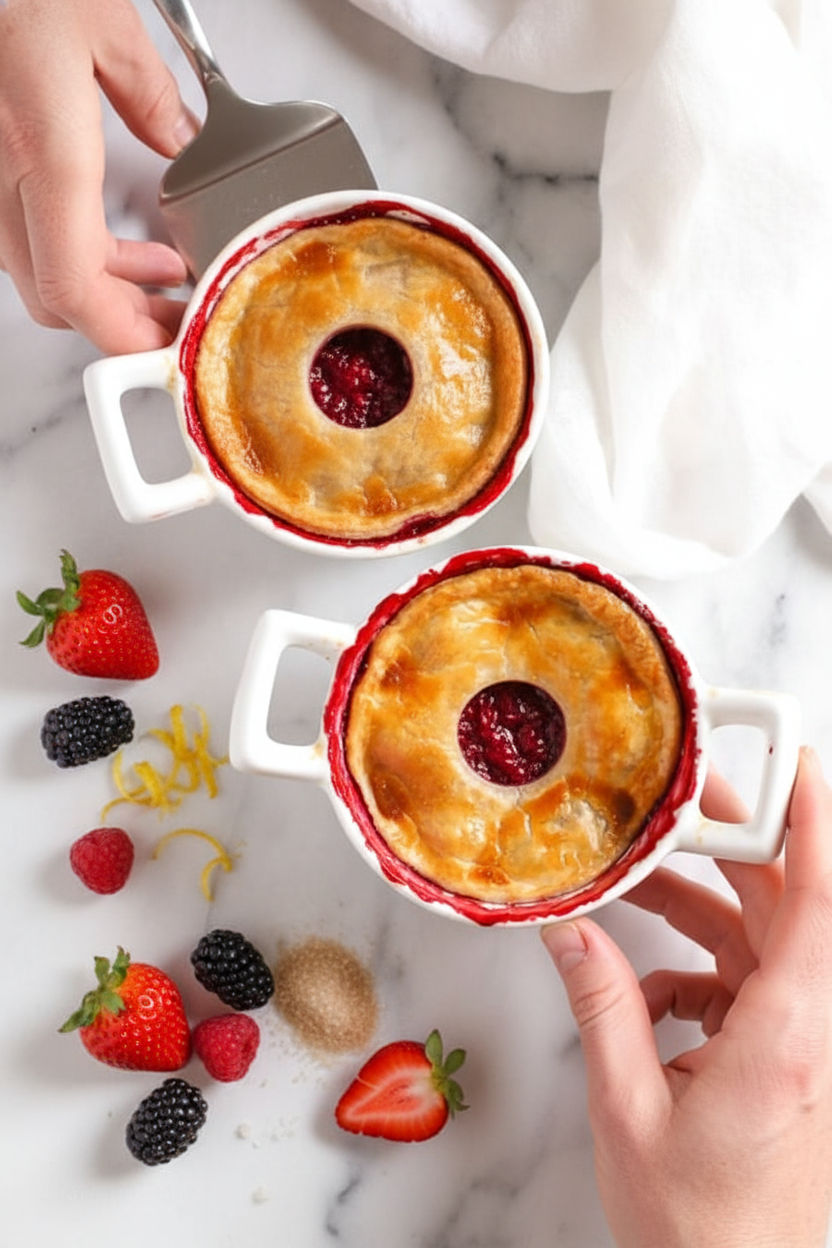
Soon, your kitchen will smell amazing. Like sweet berries and warm pastry. When the crust is golden and you see purple juice bubbling, they’re done. Let them cool a bit. The filling is very hot! This matters because patience keeps your tongue safe.
Your Turn to Share
These pies are best shared warm. Maybe with a little scoop of vanilla ice cream. The cold and hot together is so good.
Food is a story. Who would you make a mini pie for? Tell me about it. And what other fillings should we try? Apple? Peach? I’d love to hear your ideas.

Ingredients:
| Ingredient | Amount | Notes |
|---|---|---|
| raw sugar | 4 tablespoons | |
| cornstarch | 1 1/2 tablespoons | |
| salt | 1 pinch | |
| fresh strawberries | 1 1/4 cups | stemmed and sliced |
| fresh raspberries | 1 1/4 cups | |
| fresh blackberries | 1 1/4 cups | |
| fresh lemon juice | 1 teaspoon | |
| lemon zest | 1/4 teaspoon | plus |
| refrigerated pie crust | as needed | |
| egg | 1 | beaten |
My Mini Berry Pie Adventure
Hello, my dear! Come sit at the table. Let’s make mini berry pies. They are my favorite summer treat. I love how the kitchen smells like sunshine. We use strawberries, raspberries, and blackberries. Their colors are so cheerful together. It reminds me of my own grandma’s apron. She had one with little red polka dots. I still smile thinking about it.
These little pies are perfect for small hands. You get your very own ramekin. No fighting over the biggest slice! The crust gets all golden and flaky. The berries inside bubble like a happy, purple jam. Doesn’t that sound wonderful? Let’s gather our bowls and begin. I’ll tell you a secret as we go.
Step 1:
First, heat your oven to 375°F. Get out four little ramekins. Now, let’s mix the dry things. Put sugar, cornstarch, and a tiny salt pinch in a big bowl. Whisk them together. This helps thicken the berry juices. My grandson calls this “making sweet snow.” I still laugh at that.
Step 2:
Time for the berries! Gently toss them in the sugar mix. Please be gentle. We don’t want to smash them. Add the lemon juice and zest. The lemon makes the berry flavors pop! (A hard-learned tip: Toss the berries last minute. If you wait, they get too juicy.)
Step 3:
Scoop the berries into the ramekins. Now for the crust. Unroll your refrigerated pie dough. Cut four circles a bit bigger than the ramekin tops. Roll them slightly to stretch. Here’s the fun part. Cut a little heart shape from the center. This lets the steam out. It also looks so sweet.
Step 4:
Place a crust circle over each berry-filled ramekin. Brush the tops with a beaten egg. This makes them shiny and golden. Put the ramekins on a baking sheet. It catches any bubbly spills. Why do we need that baking sheet? Share below! Now, bake them for about 40 minutes.
Step 5:
Wait for the magic. Your kitchen will smell amazing. The crust will turn a perfect golden brown. The berries will be hot and bubbly. Let them cool a little before eating. The filling is very hot! I once burned my tongue being too eager. Serve them warm, maybe with a scoop of vanilla ice cream.
Cook Time: 40 minutes
Total Time: 55 minutes
Yield: 4 servings
Category: Dessert, Baking
Three Fun Twists to Try
You can change this recipe with the seasons. It’s fun to play with flavors. Here are three of my favorite ideas. They make the pies feel new again.
- Apple-Berry Mix: Use half berries, half tiny diced apples in fall. Add a pinch of cinnamon. It tastes like a cozy sweater.
- Lemon-Thyme Sparkle: Add one more teaspoon of lemon zest. Toss in a few fresh thyme leaves. It’s surprisingly fresh and lovely.
- Peach & Raspberry Dream: Swap blackberries and strawberries for ripe peaches. Use just raspberries for a pink blush. Perfect for a picnic.
Which one would you try first? Comment below!
Serving Your Little Masterpieces
These pies are stars all on their own. But a little extra touch is nice. Place a ramekin on a small plate. Add a tiny dollop of whipped cream. A single mint leaf looks pretty too. For a real treat, a scoop of vanilla bean ice cream is heaven. It melts into the warm berries.
What to drink? For a fancy night, a small glass of sweet Moscato wine pairs beautifully. For everyday, I love cold milk or sparkling lemonade. The tart lemonade sings with the berries. Which would you choose tonight?
Keeping Your Berry Pies Happy
Let’s talk about storing these little pies. Once cooled, cover them with plastic wrap. They will be happy in the fridge for three days. You can also freeze them for a month. Just wrap each ramekin tightly.
To reheat, warm them in a 300-degree oven. This keeps the crust crisp. I once microwaved one. The crust got soggy! Oven warming is best.
You can batch-cook the berry filling. Make a big batch and freeze portions. This matters because a ready filling makes a fast, special dessert. It turns a busy day into a sweet one. Have you ever tried storing it this way? Share below!
Simple Fixes for Common Berry Pie Hiccups
First, a soggy bottom crust. Place your ramekins on a hot baking sheet. This helps the bottom cook fast. I remember when my first pie was a bit wet underneath. A hot pan fixed it!
Second, the filling is too runny. Make sure your cornstarch is fresh. Toss the berries well so it coats everything. This matters for a perfect, glossy berry sauce.
Third, the crust browns too quickly. Tent it loosely with foil. This lets the fruit bubble without burning. Fixing small issues builds your kitchen confidence. You learn that every problem has a simple answer. Which of these problems have you run into before?
Your Mini Pie Questions, Answered
Q: Can I make this gluten-free? A: Yes! Use your favorite gluten-free pie crust from the store.
Q: Can I make it ahead? A: Assemble the pies and keep them chilled. Bake just before guests arrive.
Q: What fruit can I swap? A: Use any berries you like. Frozen berries work, but don’t thaw them first. Fun fact: A mix of berries gives you more flavors and colors!
Q: Can I make one big pie? A: Absolutely. Use a standard pie dish. Just bake it a little longer.
Q: Any optional tips? A: A sprinkle of sugar on the crust adds a sweet crunch. Which tip will you try first?
Bake Some Joy
I hope you love making these mini berry pies. They are little bites of summer. I would love to see your creations. Sharing food stories connects us all.
If you make them, please share a picture. It makes my day to see your kitchen adventures. Have you tried this recipe? Tag us on Pinterest! Thank you for baking with me today.
Happy cooking!
—Emma Caldwell.
Mini Berry Pie: Mini Berry Pie Recipes and Baking Tips
Description
Bite-sized Mini Berry Pies bursting with summer flavor! Perfect for parties, holidays, or a sweet homemade treat. Easy recipe with fresh or frozen berries.
Ingredients
Instructions
- Preheat the oven to 375°F.
- In a large bowl, whisk the sugar, cornstarch and salt. Toss in berries and gently mix to coat.
- Add lemon juice and lemon zest, then divide evenly into 4 (6 oz) ramekins.
- Cut the pie crust into 4 circles about 4 inches round. Roll to elongate slightly.
- Cut a heart out of the center and place the crust over the fruit in the ramekins. Brush with egg wash.
- Place the ramekins on a rimmed baking baking sheet and place in the center of the oven.
- Bake until the berries are hot and bubbling and the crust is golden, about 40 minutes.
Notes
- Nutrition per Serving (1 mini pie): Calories: 217 kcal, Carbohydrates: 39 g, Protein: 3.5 g, Fat: 7 g, Saturated Fat: 2.5 g, Cholesterol: 51 mg, Sodium: 129 mg, Fiber: 6 g, Sugar: 18.5 g


Leave a Reply