

A Sweet Idea from My Granddaughter
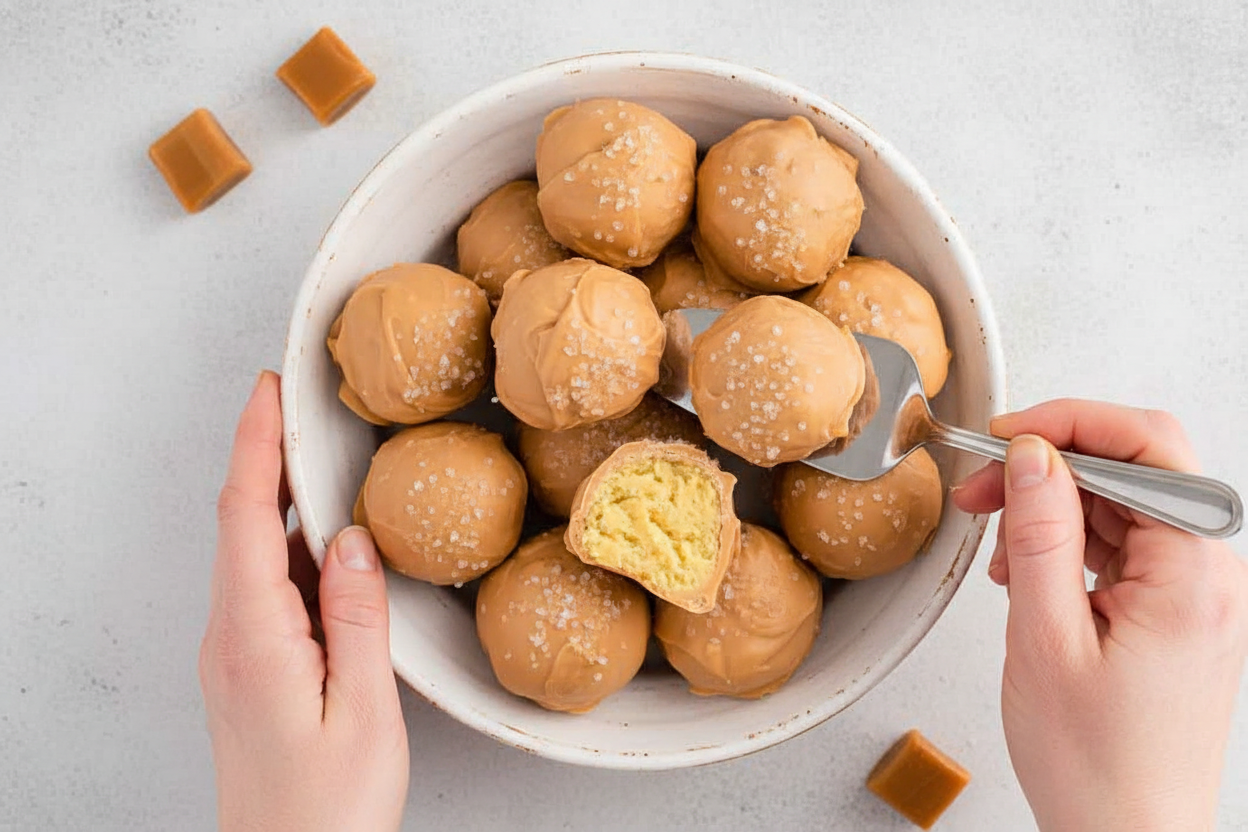
My granddaughter Lily visited last week. She wanted a baking project. We had cake mix and cream cheese. So we got creative.
We made these little caramel cheesecake bites. They were so fun. Lily loved rolling the dough balls. I loved her smile. Do you have a favorite person to bake with? I’d love to hear about them.
The Magic of a Warm Cake Mix
First, we heat the dry cake mix. This is the special step. You microwave it for two short bursts. Then let it cool completely.
Why does this matter? It makes the mix safe to eat raw. It also gives the dough a nice texture. Fun fact: This is called “heat-treating” flour. It works for cake mix too!
Mixing with Your Heart
Next, beat the cream cheese and caramel flavor. Beat it until it’s super smooth. Doesn’t that smell amazing? Then mix in your cooled cake mix.
The dough will be soft. You must chill it for two hours. This patience is important. It makes the bites firm enough to roll. I still laugh at how Lily kept opening the fridge to check.
The Coating Adventure
Now for the messy, fun part. Melt the caramel candy melts. Roll each chilled ball in the warm coating. Use a fork to let the extra drip off.
Why does this last step matter? It turns a simple dough ball into a special treat. The sweet shell with the creamy inside is perfect. Do you prefer your treats crunchy outside or soft all the way through?
Sharing Your Creations
Let the bites harden on parchment paper. Then they are ready. We put ours in a little box. Lily gave them to her teacher.
Making food for others is a gift of love. It’s a small way to say you care. These bites are perfect for sharing. What’s your favorite treat to make for friends? Tell me about it.
Ingredients:
| Ingredient | Amount | Notes |
|---|---|---|
| Yellow cake mix | 15.25 ounces | |
| Cream cheese | 8 ounces | softened |
| Caramel flavoring | 2 teaspoons | |
| Salted caramel candy melts | 12 ounces |
Mini Carrot Cake Cheesecake Bites: A Sweet Little Story
Hello, dear! Come sit at my counter. I want to tell you a story. My grandson calls these his “magic cookie balls.” They aren’t magic, of course. But they are a wonderful little trick. They taste just like a big, fancy cheesecake. But you make them with no oven at all. Doesn’t that sound fun? We use simple cake mix and cream cheese. The secret is in the warming. Let me show you how.
Step 1
First, we must heat-treat the dry cake mix. Pour it into a bowl. Microwave it for two 30-second bursts. Stir well in between. Let it cool completely. This keeps everything safe to eat. I once forgot to let it cool. My cream cheese got all melty! (My hard-learned tip: Patience here saves a mess later.)
Step 2
Now, beat the soft cream cheese and caramel flavoring. Use a mixer for about two minutes. You want it super smooth and fluffy. It will smell like a candy shop. I still laugh at that. My dog always comes running when he hears the mixer.
Step 3
Sprinkle the cooled cake mix over the cream cheese. Gently mix it all together. Just mix until you see no more dry powder. The dough will be thick and lovely. What’s your favorite no-bake treat? Share below!
Step 4
Cover the dough tightly. Let it chill in the fridge for two hours. This helps it firm up. It makes rolling the balls so much easier. Use this time to clean up. Or just sit and dream about caramel.
Step 5
Line a baking sheet with parchment paper. Scoop the dough with a tablespoon. Roll each scoop into a neat little ball. Place them on your sheet. See how many you get? It feels like making treasure.
Step 6
Time for the candy coating! Melt the caramel candies in the microwave. Do it in 30-second steps, stirring well. Now, roll each cheesecake ball in the melted candy. Use a fork to lift it out. Tap off the extra. A toothpick helps you slide it back onto the sheet. Let them harden completely. Then, the magic is ready.
Cook Time: 2 hours 15 minutes
Total Time: 2 hours 30 minutes
Yield: About 24 bites
Category: Dessert, No-Bake
Three Tasty Twists to Try
These bites are wonderful as they are. But you can play with the flavors too. It’s like changing the color of your socks. Here are three fun ideas for your next batch.
Chocolate Dream
Use chocolate cake mix. Add a teaspoon of vanilla instead of caramel. Dip them in dark chocolate melts.
Berry Blast
Use strawberry cake mix. Add a spoon of mashed real berries to the cream cheese. A white chocolate coating looks pretty.
Cookie Dough Delight
Use yellow mix but add mini chocolate chips. Skip the caramel flavor. Roll them in crushed graham cracker crumbs instead of candy.
Which one would you try first? Comment below!
Serving Your Sweet Creations
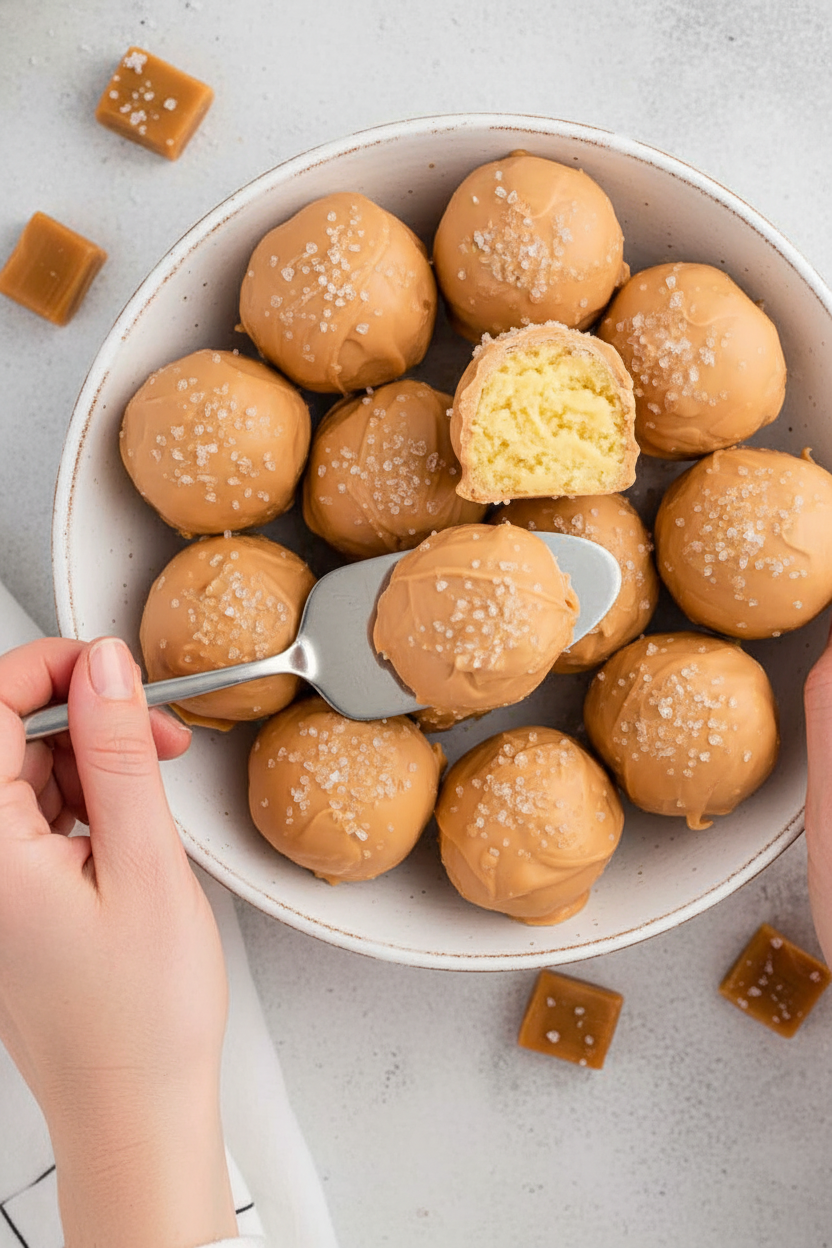
Presentation is part of the joy. Place these bites in little paper candy cups. They look so professional. You could also stack them on a pretty plate. Sprinkle a tiny pinch of sea salt on top. It makes the caramel flavor sing.
What to drink with them? For a cozy night, a glass of cold milk is perfect. For the grown-ups, a small glass of sweet sherry pairs beautifully. The nutty taste loves caramel. Which would you choose tonight?
Keeping Your Cheesecake Bites Happy
These little bites are best kept cool. Store them in a sealed container in the fridge. They will stay fresh for about five days. You can also freeze them for a later treat. Just place them on a tray until solid, then bag them up. They keep for two months this way. No need to reheat, just thaw in the fridge.
I love making a double batch. It saves so much time later. I remember my first batch disappeared in minutes. I was so glad I had more dough chilling. Having treats ready makes busy days sweeter. It means you can share joy anytime.
Have you ever tried storing it this way? Share below!
Simple Fixes for Common Hiccups
Is your dough too sticky? Just chill it longer. Cold dough is much easier to handle. Are the candy melts too thick? Add a tiny bit of coconut oil. This helps them melt smoothly for dipping.
I once rushed and didn’t cool the cake mix. My cream cheese got a little melty. Patience here makes a big difference. It ensures your bites have the perfect texture. Getting these steps right builds your kitchen confidence. It also makes the flavor just perfect.
Are the bites cracking when you roll them? Your dough is probably too cold. Let it sit on the counter for five minutes. Which of these problems have you run into before?
Your Quick Questions, Answered
Q: Can I make this gluten-free?
A: Yes! Just use a gluten-free yellow cake mix. It works the same way.
Q: How far ahead can I make them?
A: The dough chills for two hours. You can make it a full day ahead.
Q: What if I don’t have caramel flavoring?
A: Use two tablespoons of caramel sauce instead. Mix it right in with the cream cheese.
Q: Can I make a bigger batch?
A: Absolutely. Just double all the ingredients. Use a bigger bowl for mixing.
Q: Any fun topping ideas?
A: A tiny sprinkle of sea salt is lovely. A fun fact: salt makes caramel taste even sweeter! Which tip will you try first?
From My Kitchen to Yours
I hope you love making these sweet bites. They always remind me of my grandkids. They gather around the counter to help roll the dough. Cooking is about making memories together.
I would be thrilled to see your creations. Sharing food stories connects us all. Have you tried this recipe? Tag us on Pinterest! You can find me at @EmmasCozyKitchen. I can’t wait to see what you make.
Happy cooking!
—Emma Caldwell.
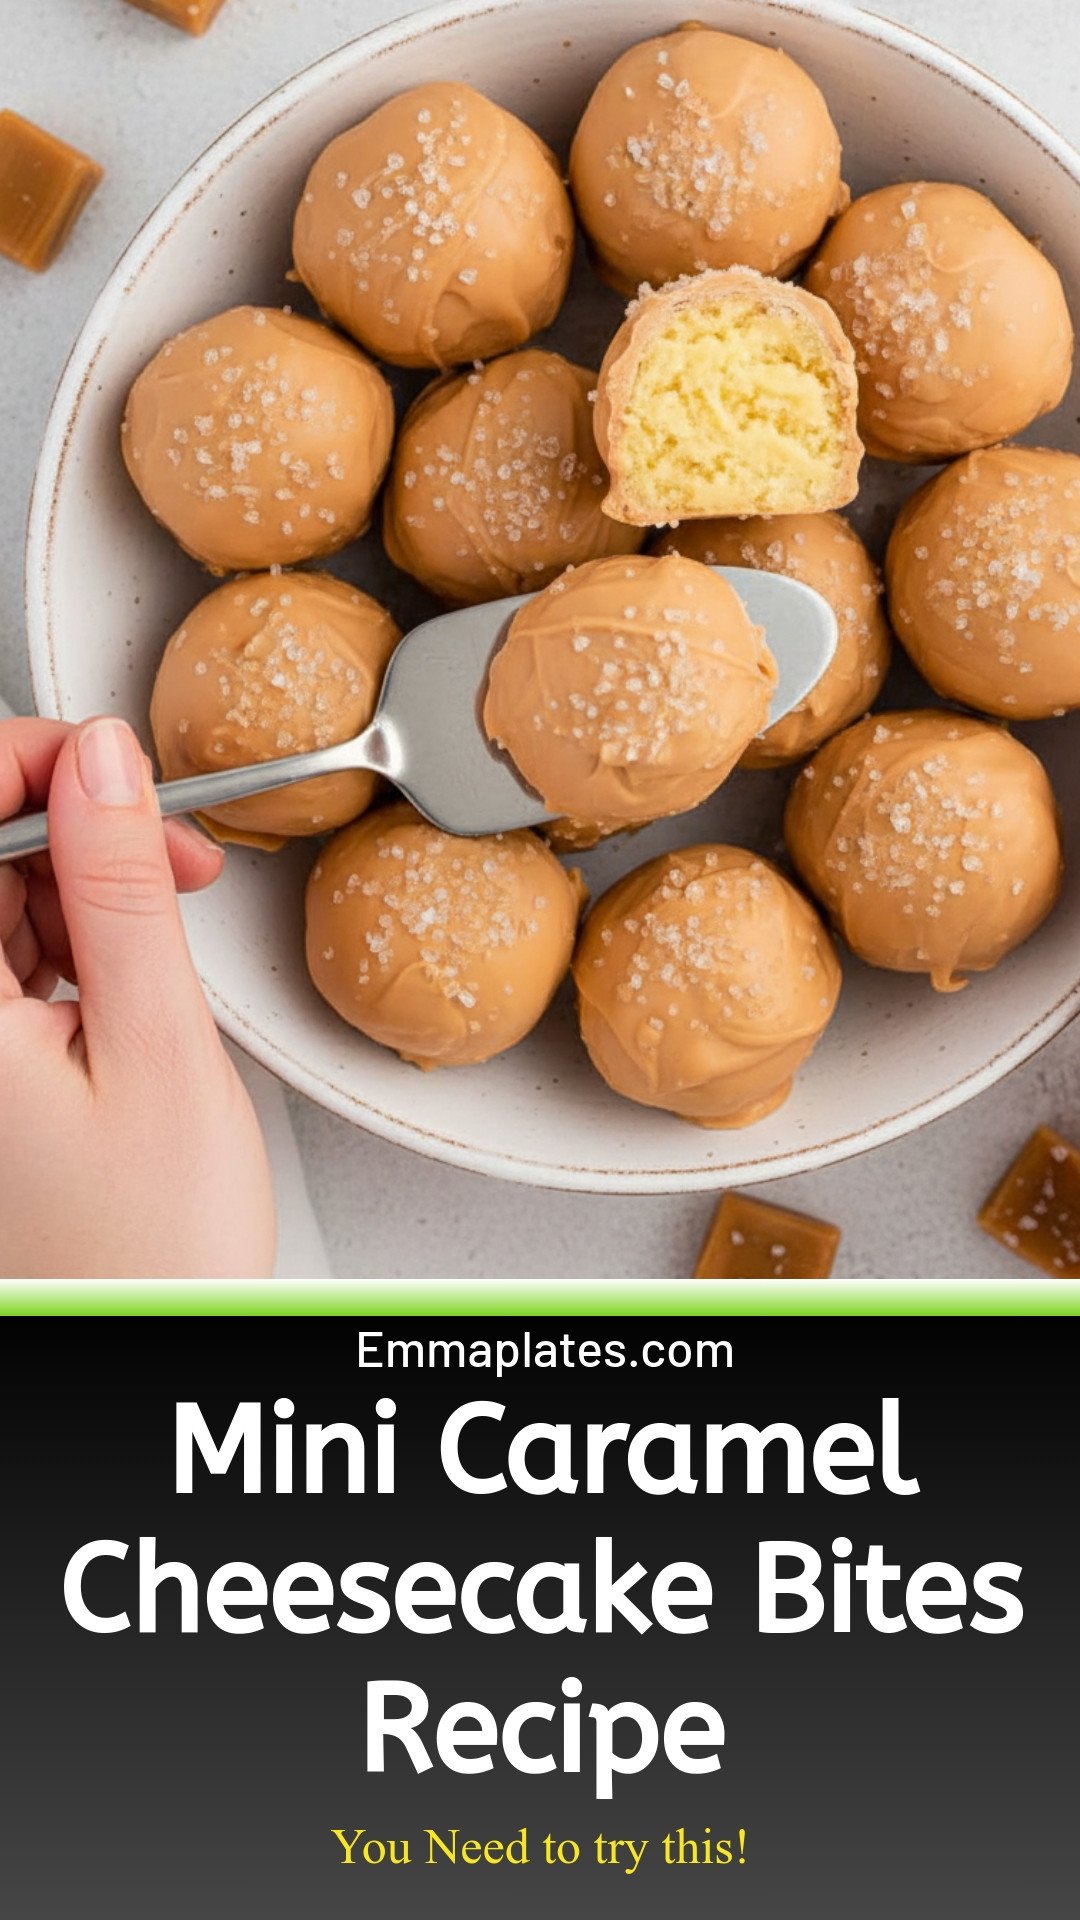
Mini Caramel Cheesecake Delights: Mini Caramel Cheesecake Bites Recipe
Description
Indulge in bite-sized Mini Caramel Cheesecake Delights! The perfect easy dessert for parties, holidays, or a sweet treat. Simple recipe with a creamy, decadent caramel swirl.
Ingredients
Instructions
- It is important to heat treat the dry cake mix before adding it to the cream cheese. Add the dry cake mix into a heat-safe medium-size mixing bowl. Microwave the dry cake mix in two 30-second intervals, stirring after each interval. Allow the cake mix to cool completely before mixing it into the cream cheese.
- Using a medium-sized mixing bowl and a handheld mixer on medium-high speed, beat the cream cheese and caramel flavoring for 1½ to 2 minutes until completely smooth.
- Sprinkle the completely cooled, dry cake mix over the cream cheese mixture just until well incorporated.
- Tightly cover the cheesecake dough and chill in the refrigerator for 2 hours.
- Line a baking sheet with parchment paper and set it aside.
- Use a 1-tablespoon cookie scoop to scoop the cheesecake dough. Roll the scooped dough into a ball and place it onto the prepared baking sheet. Repeat the steps.
- Using a heat-safe medium-size mixing bowl, microwave the salted caramel candy melts in 30-second intervals, stirring well after each interval until completely melted and smooth.
- Roll the cheesecake bites in the melted candy melts. Place the coated bite onto a fork. Gently tap any excess coating off. You can use a spoon to pour the coating over any bare spots. Use a toothpick to gently push the coated cheesecake bite onto the prepared baking sheet. Allow the cheesecake bites to harden completely before serving.
Notes
- For best results, ensure the cake mix is completely cool before adding to the cream cheese. Store leftovers in an airtight container in the refrigerator.


Leave a Reply