
My First Jar of Sunshine
I first made these for my grandson’s school picnic. The whole cheesecake was too messy. So I thought, why not put it in a jar? It was a big hit. The kids loved having their own little dessert. I still laugh at that.
This matters because food is about sharing joy. A personal jar feels like a gift just for you. It makes any day a little more special. What’s your favorite picnic dessert? Tell me in the comments.
Let’s Make the Crust
Start with your graham crackers. Crush them up fine. I use a rolling pin and a bag. It’s fun to get out the wiggles. Mix the crumbs with melted butter and sugar.
Press the mix into the jar bottoms. Don’t pack it too hard. A gentle press is all you need. Fun fact: Graham crackers were invented for a healthy diet! Isn’t that funny? Now we use them for sweet treats.
The Cloud-Like Filling
Now for the creamy part. Beat the soft cream cheese with powdered sugar and vanilla. Doesn’t that smell amazing? In another bowl, whip the heavy cream. Watch it turn fluffy like a cloud.
Gently fold the whipped cream into the cheese mix. This matters. Folding keeps the air in. It makes the filling light and dreamy. Do you like your cheesecake dense or fluffy? I’m team fluffy.
Building Your Jar
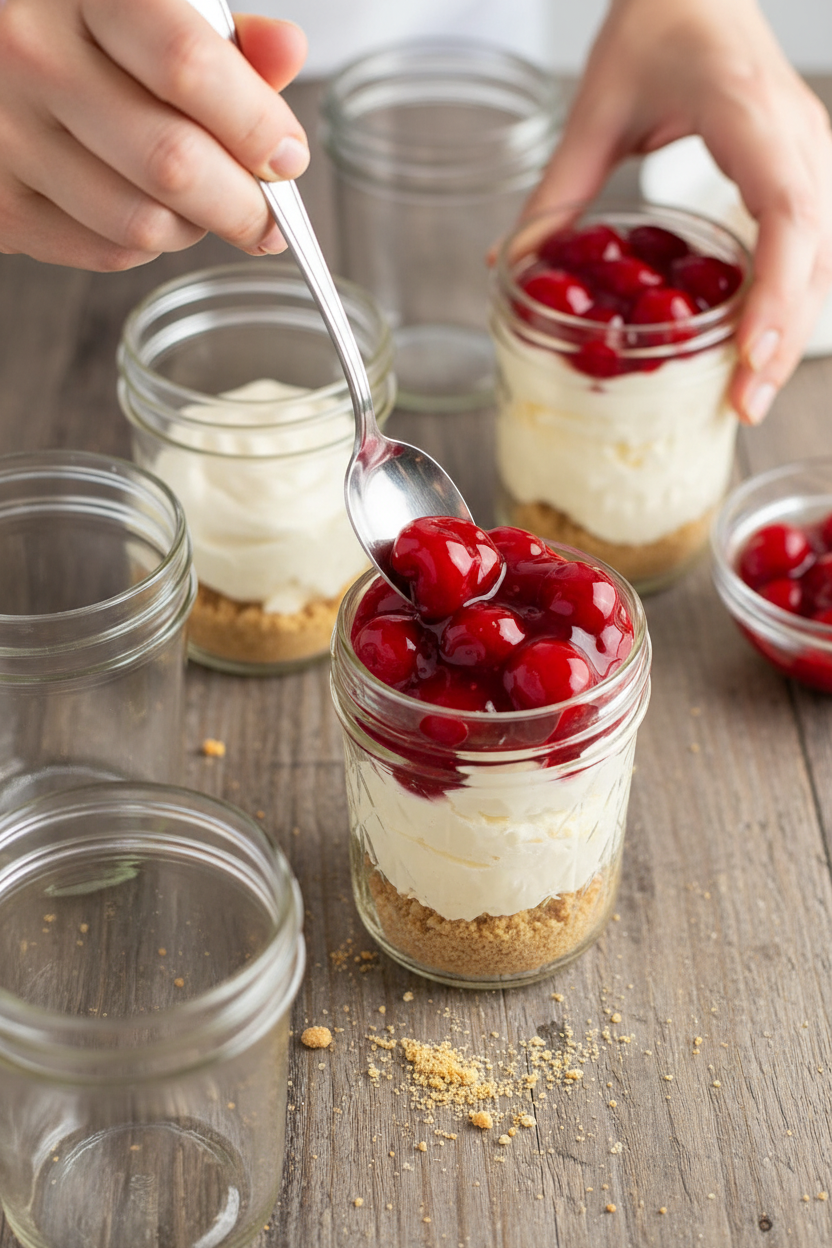
You can spoon the filling in. But a piping bag is easier. It makes pretty swirls. Fill the jars almost to the top. Leave a little room for the cherries.
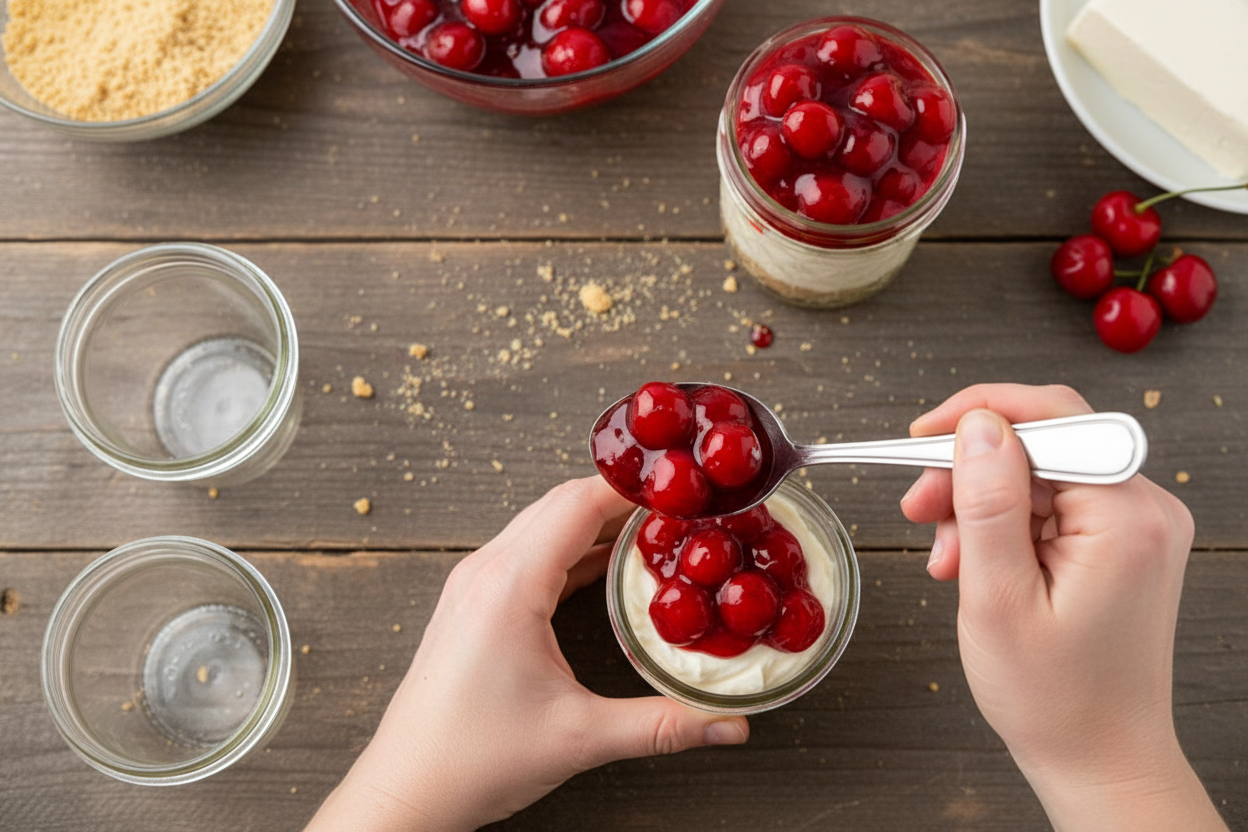
The final touch is the cherry pie filling. Spoon it on generously. That red color just pops. It looks so cheerful. Are you a cherry person, or would you use another fruit?
Why This Recipe Stays
These jars taught me a good lesson. Fancy isn’t always better. Simple, happy food often is. This recipe is easy to share. You can make them ahead for friends.
This matters because cooking is about love. It doesn’t need to be hard. It just needs to be made with a happy heart. Give these jars a try this weekend. Let me know how yours turn out.

Ingredients:
| Ingredient | Amount | Notes |
|---|---|---|
| Graham cracker crumbs | 1¼ cups | |
| Butter | ¼ cup | melted |
| Granulated sugar | ¼ cup | |
| Cream cheese | 8 ounces | softened |
| Confectioners’ sugar | ½ cup | |
| Vanilla extract | 1 teaspoon | |
| Heavy cream | 1 cup | |
| Cherry pie filling | 21 ounces |
Cheesecake in a Jar: A Little Sunshine for Your Pocket
Hello, my dear! Let’s make some happiness today. These little cheesecake jars always make me smile. They remind me of picnics with my grandchildren. We would pack them up and head to the park. Doesn’t that sound lovely? The best part is, no slicing needed! Everyone gets their own perfect jar. Let’s begin our kitchen adventure together.
Step 1: First, make your crunchy crust. Mix the graham crumbs, melted butter, and sugar in a bowl. It should feel like damp sand. Press it gently into the bottom of six jars. I use the bottom of a small spoon to press it flat. (A hard-learned tip: If you press too hard, the crust gets tough. Be gentle!).
Step 2: Now for the creamy heart. Beat the soft cream cheese, powdered sugar, and vanilla. Keep mixing until it’s perfectly smooth. No lumps allowed! I once forgot to soften the cream cheese first. My arm got so tired from mixing! So learn from my mistake, please.
Step 3: Time for the fluffy cloud! Pour the heavy cream into a big, cold bowl. Whip it on high until it forms soft peaks. This means it will hold a gentle shape. Doesn’t that smell amazing? Fresh cream is one of life’s simple joys.
Step 4: Let’s bring the cloud and the creamy heart together. Gently fold the whipped cream into the cream cheese mixture. Use a big spoon and sweep it around the bowl. We want to keep all that lovely air in there. This makes the filling light as a feather.
Step 5: Here’s the fun part! Spoon your filling into a piping bag. If you don’t have one, a plastic bag with the corner snipped off works. Pipe the filling right over the crust. You can make pretty swirls! Do you prefer neat swirls or a big, fluffy spoonful? Share below!
Step 6: Finally, the ruby-red topping. Spoon the cherry pie filling over each cheesecake layer. I use about three tablespoons per jar. It looks like a beautiful jewel on top. Now, just pop the lids on. These need to chill in the fridge for a few hours to set perfectly.
Cook Time: 4–6 hours (chilling)
Total Time: 4 hours 20 minutes
Yield: 6 servings
Category: Dessert
Three Twists for Your Next Batch
Once you know the basics, you can play! Here are three of my favorite ways to change things up. I still laugh at the time I made the “campfire” version for my grandson. His eyes got so wide!
Campfire S’mores: Use crushed chocolate graham crackers. Add mini chocolate chips to the filling. Top with marshmallow fluff!
Sunshine Lemonade: Add two tablespoons of lemon zest to the filling. Top with fresh blueberries instead of cherries. So bright and fresh!
Cookie Dough Dream: Mix mini chocolate chips and tiny bits of cookie dough into the filling. Use a chocolate sauce drizzle on top. Which one would you try first? Comment below!
Serving with a Smile
These jars are a full celebration on their own. But you can make them extra special. For a party, line them up on a tray with cute spoons tied with ribbon. You could also serve them with a side of buttery shortbread cookies for dipping. A little extra crunch is always nice.
What to drink? For the grown-ups, a small glass of sweet dessert wine is lovely. It sips like honey. For everyone, a frosty glass of cold milk or a fizzy cream soda is perfect. It cuts through the richness just right. Which would you choose tonight?
Keeping Your Jar Cheesecakes Happy
These little cheesecakes love the cold. They keep well in the fridge for three days. Just pop a lid on each jar.
You can freeze them for a sweet treat later. Freeze them without the cherry topping. Thaw in the fridge overnight before serving.
I once made a big batch for a family picnic. Having them ready in jars saved the day. Batch cooking means sweet surprises are always on hand.
This matters because life gets busy. A ready-made dessert brings a little joy. It is a gift to your future self.
Have you ever tried storing it this way? Share below!
Simple Fixes for Common Hiccups
Is your crust too crumbly? Add one more tablespoon of melted butter. This helps the crumbs stick together nicely.
Is your filling too runny? Make sure your cream cheese is very soft. I remember when mine was too cold. The filling was lumpy.
Are your whipped cream peaks too soft? Chill your bowl and beaters first. This helps the cream whip up fluffy and light.
Fixing these small issues builds your kitchen confidence. It also makes your dessert taste just right. Every problem has a simple solution.
Which of these problems have you run into before?
Your Quick Questions, Answered
Q: Can I make this gluten-free?
A: Yes! Use gluten-free graham crackers for the crust. It works perfectly.
Q: How far ahead can I make them?
A: You can assemble them a full day ahead. Add the cherry topping just before you serve.
Q: What can I use instead of cherry pie filling?
A: Any canned pie filling works. Blueberry or strawberry are my other favorites.
Q: Can I make a bigger batch?
A: Absolutely. Just double all the ingredients. You will have twelve happy jars.
Q: Any special tip?
A: A fun fact: A piping bag is just a plastic bag. Snip a corner off for an easy tool.
Which tip will you try first?
From My Kitchen to Yours
I hope you love making these little jars. They are full of sweet, simple joy. Sharing food is how we share love.
I would be thrilled to see your creations. Show me your beautiful layered desserts. Let’s inspire each other.
Have you tried this recipe? Tag us on Pinterest!
Happy cooking!
—Emma Caldwell.
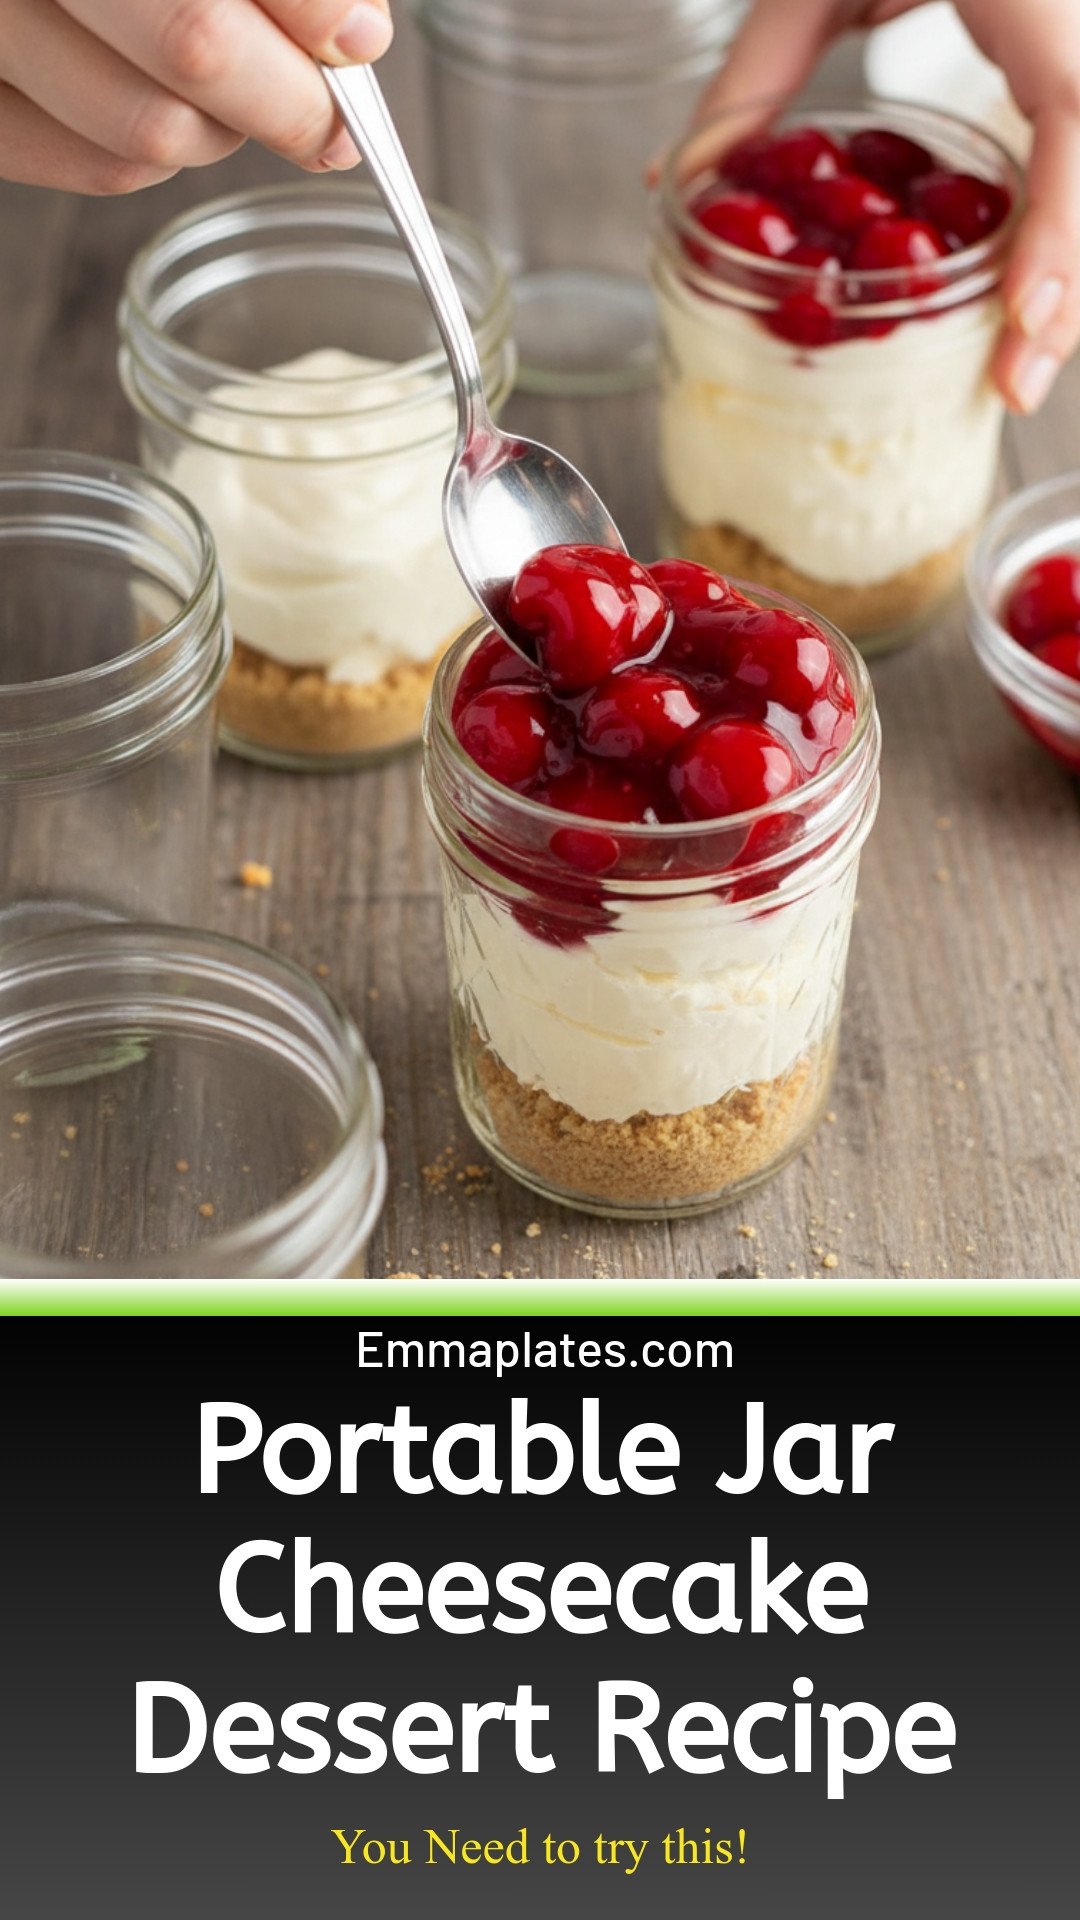
Cheesecake in a Jar: Portable Jar Cheesecake Dessert Recipe
Description
Individual cheesecake perfection! Creamy no-bake layers in portable jars. Easy to make, stunning to share. The ultimate personal dessert for any occasion.
Ingredients
Instructions
- Combine the graham cracker crumbs, butter, and granulated sugar in a medium mixing bowl. Divide the crumb mixture into the bottom of the six jars and gently press the mixture into an even layer.
- Beat the cream cheese, confectioners’ sugar, and vanilla extract until it’s soft and creamy with your mixer on medium-high speed.
- Whip the heavy cream with your mixer on high speed in a large bowl until you get soft peaks.
- Fold the whipped cream into the cream cheese mixture.
- Place the cream cheese filling into a piping bag and pipe the mixture into the jars.
- Top each jar with a few tablespoons of the cherry pie filling.


Leave a Reply