

A Cheesecake That Hugs You Back
Hello, my dear. Come sit. Let’s talk about a happy little cheesecake. This one is a skinny chocolate raspberry version. It feels like a treat, but it’s kinder to your waistline. I love recipes that give you a hug without the guilt. Doesn’t that sound nice?
I made this for my book club last month. My friend Susan took two pieces! She said it tasted rich and creamy. She couldn’t believe it was lighter. I still laugh at that. A happy dessert makes a happy table. That matters more than you think.
The Crust Secret
Every good cheesecake starts from the bottom up. We use chocolate graham crackers here. Crush them up in a bag. It’s a fun job for young hands. Mix the crumbs with a little soft butter.
Press it into your pan with your fingers. Make it even. This crust is thin and simple. It’s just a friendly hello before the main event. Do you like a thick crust or a thin one? I’m a thin crust girl, myself.
The Heart of the Matter
Now, the filling. Use room-temperature cream cheese. It mixes smooth as silk. Add sugar, vanilla, and that secret weapon: fat-free Greek yogurt. It makes the cake so creamy and adds protein. Fun fact: Greek yogurt has been around for thousands of years! People in ancient Greece ate it too.
Beat in the egg whites and flour. Be gentle. Don’t over-beat it. We want it smooth, not fluffy. Pour it over your waiting crust. Doesn’t that smell amazing already? Baking is about patience and care. That’s a good lesson for life, too.
A Little Patience, A Big Reward
Pop it in the oven. It bakes fast, just 25 to 30 minutes. The center should be almost set. Then comes the hard part. You must let it cool. Then chill it for hours. I know, waiting is tough!
But this wait matters. It lets the flavors get to know each other. It lets the cake become firm and perfect. Trust your grandma on this. What’s the hardest dessert for you to wait for? I always want to dig into warm brownies.
The Fancy Finish
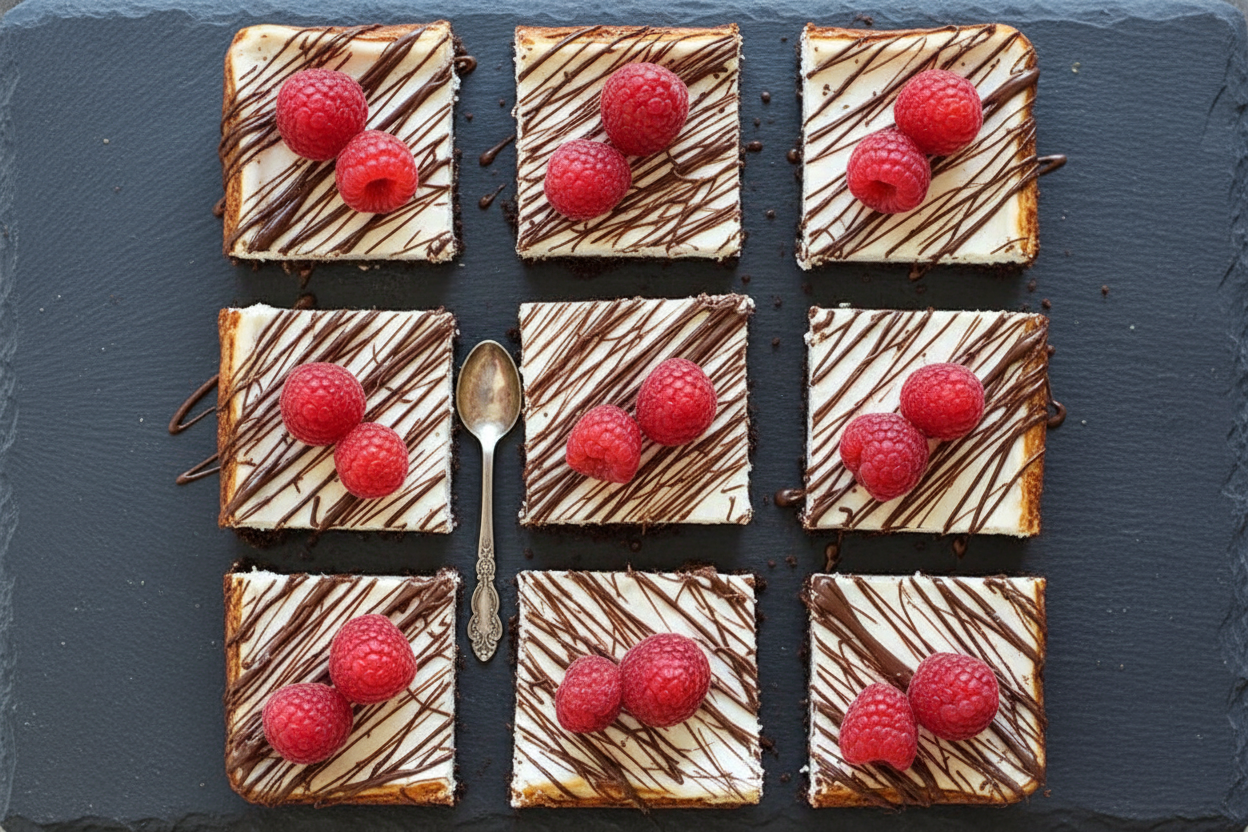
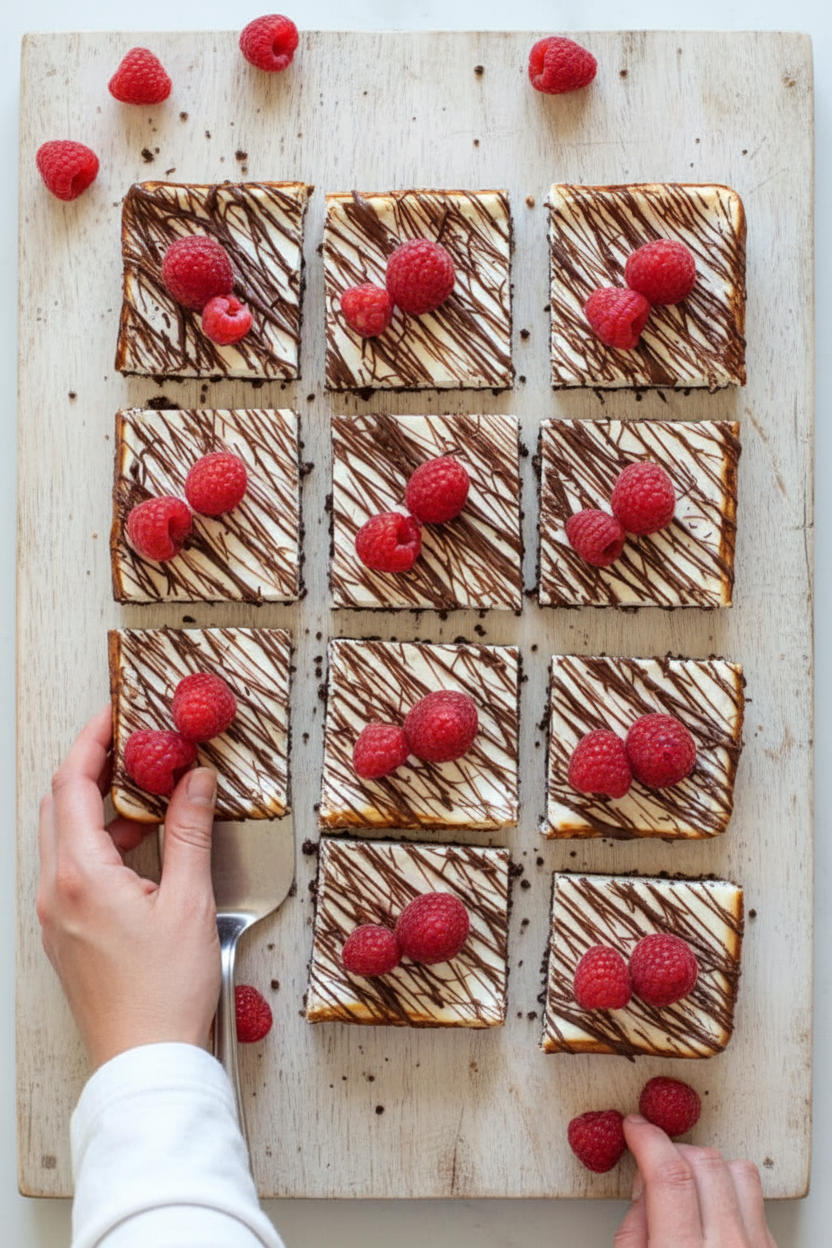
Finally, the fun part! Cut your cake into nine squares. Melt a little chocolate. Drizzle it all over the top like fancy lace. Then, two raspberries on each piece. The red berry looks so pretty on the chocolate.
That final touch makes it special. It shows you cared. Food made with care feeds more than our bodies. It feeds our hearts. Will you use raspberries, or try a different berry? Tell me what you pick.
Ingredients:
| Ingredient | Amount | Notes |
|---|---|---|
| cooking spray | for greasing the pan | |
| chocolate graham cracker crumbs | 1/2 cup (50g) | crushed |
| light butter | 1 tbsp | softened |
| reduced fat cream cheese | 8 oz package | softened |
| sugar (or substitute) | 1/4 cup | |
| fat-free vanilla Greek yogurt | 6 oz | |
| egg whites | 2 large | |
| vanilla extract | 1 tsp | |
| all purpose flour | 1 tbsp | |
| Baker’s semi-sweet dipping chocolate | 1 oz | |
| raspberries | 18 |
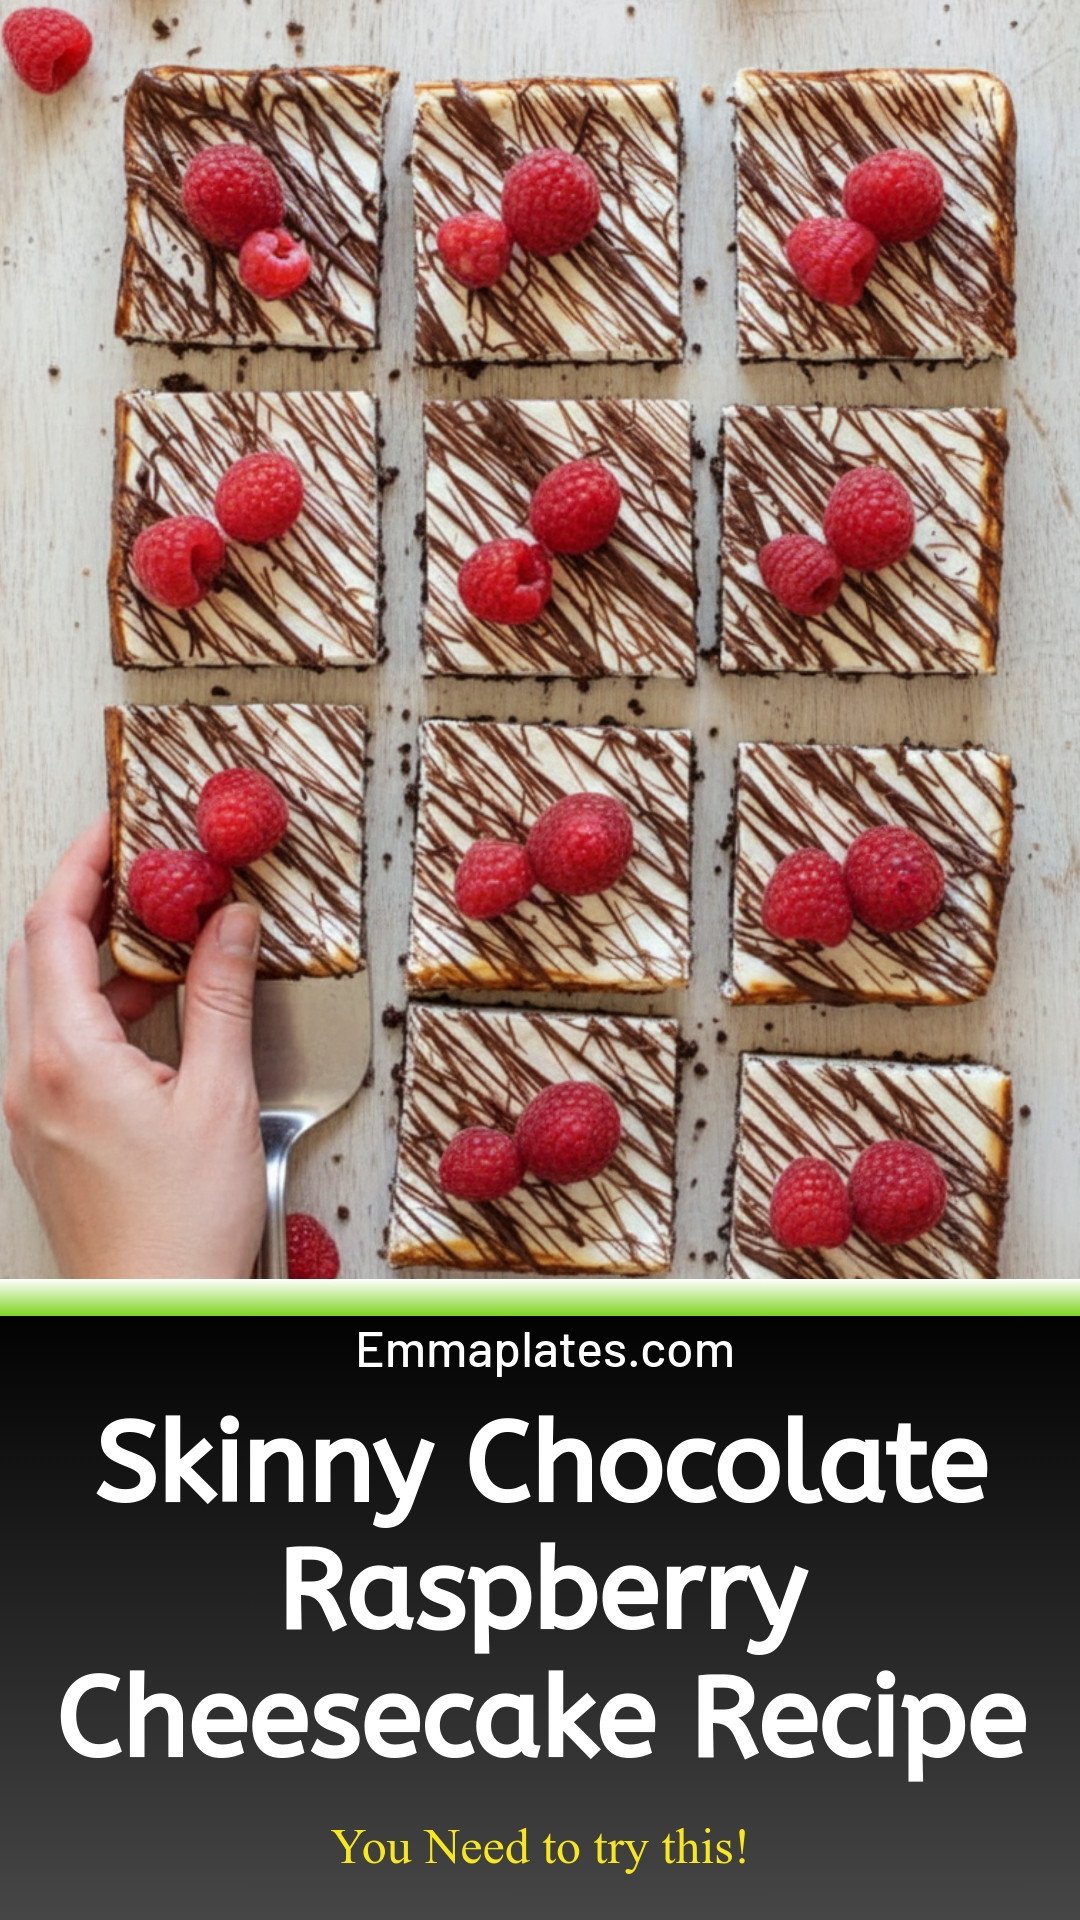
My Skinny Chocolate Raspberry Cheesecake
Hello, my dear! Come sit at the counter. Let’s make a special treat. This cheesecake feels fancy but is quite simple. It reminds me of summer afternoons with my grandkids. We always picked raspberries together. Doesn’t that smell amazing?
This recipe is a lighter version of my old favorite. It still tastes wonderfully rich and creamy. I love how the tart berries pop in your mouth. You won’t believe it’s a “skinny” dessert. I still laugh at that. My grandson once ate three pieces!
Here is how we make it. Just follow these steps. I will share my little secrets with you.
Step 1: First, heat your oven to 350°F. Spray your baking pan lightly. Mix the crumbs and soft butter with a fork. It should feel like damp sand. Press it firmly into the pan. I use a small glass to press it flat. This is your cheesecake’s foundation. Step 2: Now, beat the cream cheese and sugar together. Make sure it’s very smooth. Add the vanilla. That smell is pure happiness. Then, gently beat in the yogurt and egg whites. (A hard-learned tip: don’t over-beat here! Just mix until it’s combined. Too much air makes cracks.) Step 3: Pour your creamy filling over the crust. Smooth the top with your spatula. Place the pan carefully in the oven. Bake for about 25-30 minutes. The center should be almost set, but still a little jiggly. It will firm up as it cools. I always watch through the window. Step 4: Let the cake cool on the counter. Then, it must chill in the fridge. This is the hardest part—waiting! But it’s so important. Later, cut it into nine neat squares. Do you think the waiting is the hardest part of baking? Share below! Step 5: Time for the fun part! Melt the chocolate carefully. Drizzle it all over the cooled cake. It looks so pretty. Top each piece with two bright red raspberries. They look like little jewels. Now, it’s finally time to enjoy our creation. Cook Time: 30 minutes, plus chillingTotal Time: About 4 hours
Yield: 9 servings
Category: Dessert, Cheesecake
Three Fun Twists to Try
This recipe is like a good friend. It’s happy to change its outfit! Here are some playful ideas. They make it new again.
Berry Blast: Use mixed berries instead of just raspberries. Try blueberries and blackberries too. It’s a berry party! Peanut Butter Swirl: Add a spoonful of powdered peanut butter to the batter. Swirl it in before baking. It’s my son’s favorite. Minty Fresh: Add a drop of peppermint extract to the filling. Use dark chocolate for drizzling. It tastes like a cool winter night.Which one would you try first? Comment below! I love reading your ideas.
Serving It Up Just Right
This cheesecake is lovely all on its own. But sometimes, I like to dress it up. It feels like a restaurant dessert at home.
Place a square on a pretty plate. Add a dollop of whipped cream on the side. A few extra raspberries look beautiful. For a fun touch, sprinkle some extra graham cracker crumbs around. It adds a nice little crunch.
What to drink with it? A cup of hot herbal tea is perfect. I love raspberry or chamomile. For a special evening, a small glass of dessert wine pairs wonderfully. The sweetness matches the berries. Which would you choose tonight? I think I’ll have the tea.
Keeping Your Cheesecake Happy
This cheesecake loves the cold. Cover it tightly and keep it in the fridge. It will stay fresh for about four days. You can also freeze it for a sweet treat later. Just wrap individual squares well. They can freeze for up to two months.
Thaw a frozen piece in the fridge overnight. I once tried to rush thawing on the counter. The texture got a bit weepy. Patience is a kitchen virtue. Batch cooking this is simple. Just double the recipe and use a bigger pan.
This matters because a ready-made dessert saves time. It turns a busy day into a sweet one. Have you ever tried storing it this way? Share below!
Cheesecake Troubles? Easy Fixes!
First, a cracked top can happen. Do not overbeat the batter. I remember when my first cheesecake cracked. I was beating it like cake batter. Gentle mixing is key for a smooth top.
Second, a soggy crust is no fun. Make sure your butter is just softened. Press the crumbs firmly into the pan. This creates a solid base. Third, the center might seem too jiggly. It will firm up as it chills. Trust the cooling time.
Fixing these builds your cooking confidence. A perfect slice also tastes better. Which of these problems have you run into before?
Your Cheesecake Questions, Answered
Q: Can I make this gluten-free? A: Yes! Use gluten-free graham crackers for the crust.
Q: Can I make it ahead? A: Absolutely. Make it the day before. The flavor gets even better.
Q: What yogurt can I swap? A: Any fat-free vanilla yogurt works. Greek yogurt makes it extra creamy.
Q: Can I make a bigger batch? A: You can double it. Use a 9×13 inch pan. Bake it a few minutes longer.
Q: Any optional tips? A: Try a fun fact: a little lemon zest in the batter is lovely. It brightens the chocolate flavor. Which tip will you try first?
From My Kitchen to Yours
I hope you love making this skinny treat. It is a little bit of joy on a plate. I would love to see your creation. Sharing food stories connects us all.
Please show me your beautiful cheesecake squares. Have you tried this recipe? Tag us on Pinterest! Use the handle @EmmasCozyKitchen. I will be looking for your photos.
Happy cooking!
—Emma Caldwell.
Skinny Chocolate Raspberry Cheesecake: Skinny Chocolate Raspberry Cheesecake Recipe
Description
Indulge guilt-free with this creamy Skinny Chocolate Raspberry Cheesecake! A decadent, low-calorie dessert that’s surprisingly easy to make and irresistibly delicious.
Ingredients
Instructions
- Heat oven to 350°F. Spray an 8-inch square baking pan with non-stick spray.
- Mix together graham cracker crumbs and butter with a fork until mixed through. Press evenly into bottom of prepared pan.
- Gently beat cream cheese, sugar and vanilla until smooth using an electric mixer.
- Gradually beat in fat free yogurt, egg whites and flour, do not over beat. Pour over graham cracker crust.
- Bake 25 to 30 minutes or until center is almost set.
- Cool to room temperature then chill a few hours in the refrigerator.
- Cut the cake into 9 slices.
- Melt the chocolate in the microwave, 30 seconds at a time until melted, careful not to burn.
- Use a spatula to drizzle the chocolate all over the top of the cheesecake. Top each piece with 2 raspberries and enjoy!


Leave a Reply