
The Best Kind of Messy
My kitchen counter is my favorite place. It is often a wonderful mess. This recipe is perfect for a messy counter. You mix everything in one big bowl. I still laugh at the first time I made these. I got cream cheese all over my apron.
It is okay if your wraps are not perfect. The mess means you are creating something delicious. The flavors get happy when they are all mixed up. That is why this matters. Good food does not have to be perfect. What is your favorite thing to cook on a busy day?
A Little Secret for Big Flavor
Let me tell you a secret. The star of this show is the cream cheese. You must let it get soft first. This makes it so easy to stir. Doesn’t that smell amazing? The chili powder and garlic salt wake it all up.
*Fun fact*: Cream cheese was invented in New York in 1872. I love that a little history can be in our wraps. Mixing it well is the most important step. This creates a creamy glue that holds all the good stuff together. That is why this matters. A good base makes a great meal.
A Story About a Jalapeño
Be very careful with the jalapeño. I learned this the hard way. I once chopped one and then rubbed my eye. Oh my, that was a mistake. My eye stung for an hour. Now I wash my hands right away with soap.
You can decide how much jalapeño to use. Start with just a little. You can always add more spice later. Do you like your food very spicy or just a little warm?
The Magic of Waiting
This is the hardest part. After you roll your wraps, you must wait. You put them in the fridge for an hour. I know, it is so tempting to eat them right away. But trust your grandma Emma.
The waiting time is magic. It lets the flavors become best friends. The wrap also gets firm, so it does not fall apart when you slice it. This little wait makes all the difference. It turns a simple wrap into something special.
Time to Share and Eat
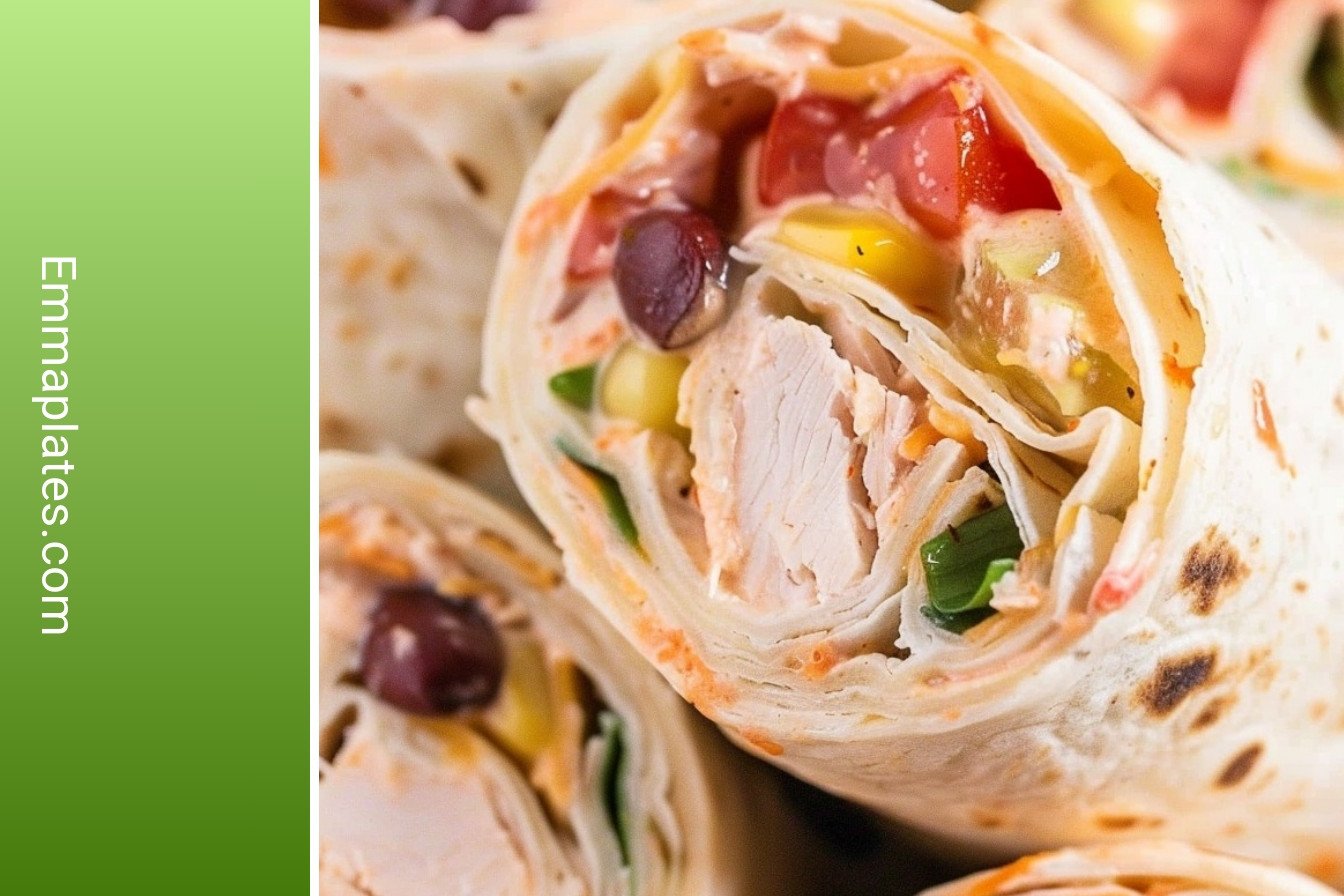
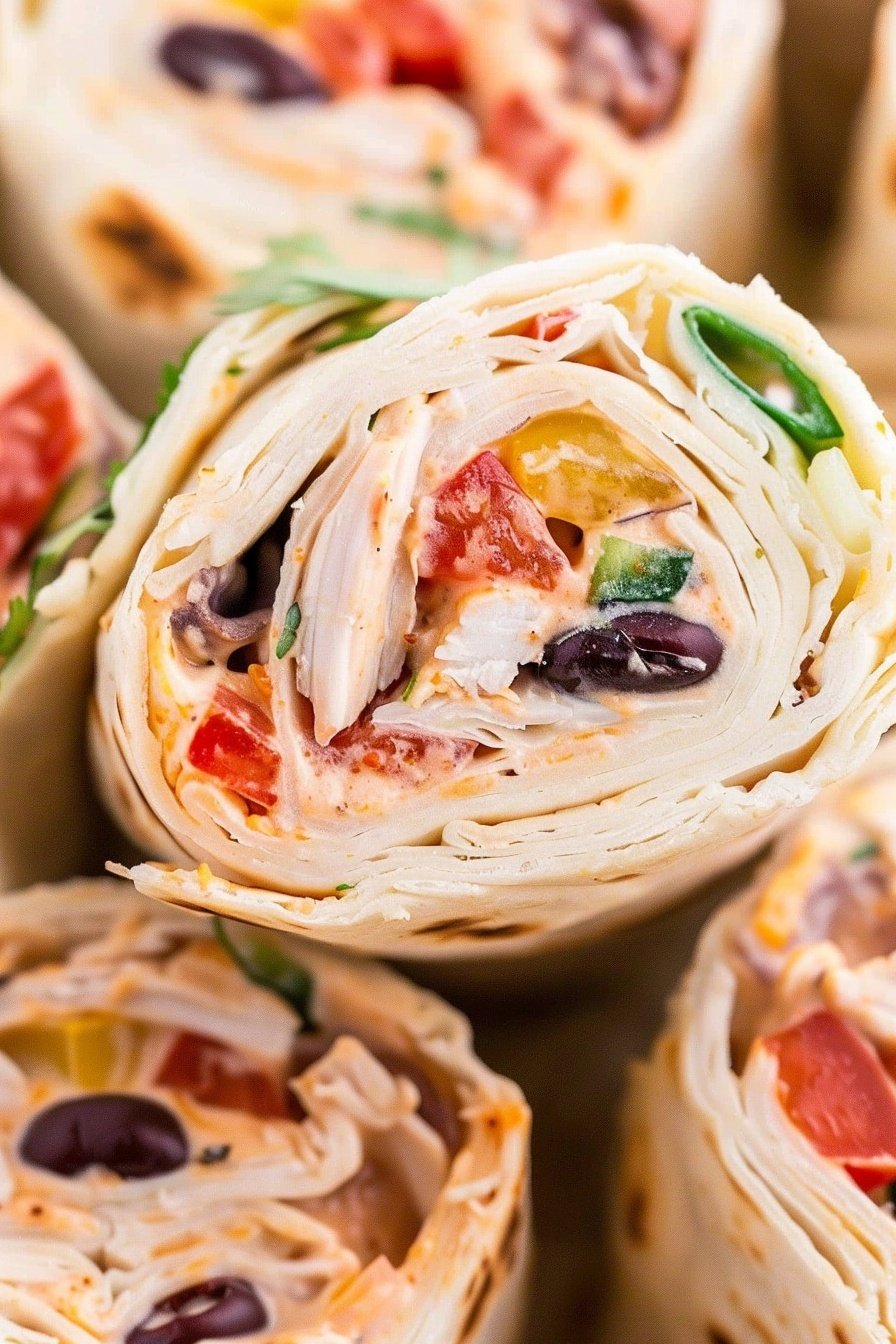
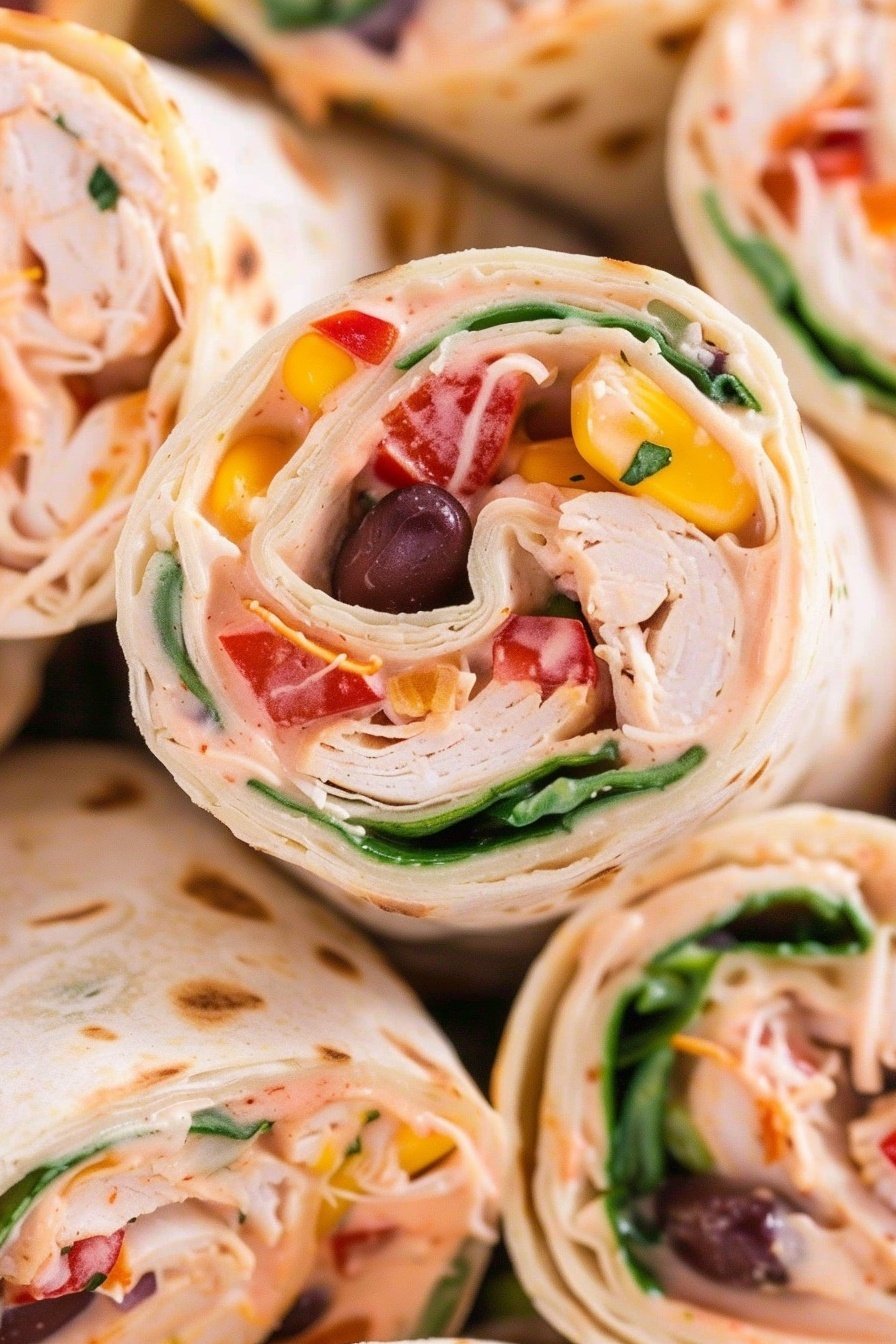
Now for the fun part. Take your wraps out of the fridge. Unwrap them and get a sharp knife. Slice them into pretty little pinwheels. You can see all the colorful bits inside. It looks so pretty on a plate.
These are perfect for sharing with friends and family. They are great for a lunch box, too. What other fillings would you try in a tortilla wrap? I would love to hear your ideas. Making food is about sharing and trying new things.
Ingredients:
| Ingredient | Amount | Notes |
|---|---|---|
| cream cheese, softened | 1 package (8-ounce) | |
| sour cream | ¼ cup | |
| coarse black pepper | ½ teaspoon | |
| chili powder | ½ teaspoon | |
| garlic salt | ½ teaspoon | |
| sliced green onions, green parts | ¼ cup | |
| grated cheddar cheese | 1 cup | |
| diced, cooked chicken | 2 cups | rotisserie meat, diced very small |
| Rotel | 1 can (10-ounce) | loosely drained, a bit of the juice is fine |
| finely diced jalapeño | 1-2 tablespoons | seeds and core removed, more or less to taste |
| canned black beans | 1 cup | drained and rinsed |
| burrito size flour tortillas | 4 |
My Spicy Chicken Tortilla Wraps
Hello, my dear! Come sit with me in the kitchen. I want to share a recipe my grandkids go crazy for. These wraps are crispy, cheesy, and have just the right little kick. They are perfect for an after-school snack or an easy lunch. I love how you can make them ahead of time. That makes busy days so much simpler, don’t you think?
Let’s get everything ready. First, take your cream cheese out of the fridge. It needs to get soft on the counter. This makes it so much easier to stir. (A hard-learned tip: if you forget, you can soften it in the microwave for just 10 seconds). Now, be very careful with the jalapeño. I always wear little gloves to dice it. It stings so badly if you touch your eyes!
Step 1: Grab a big mixing bowl. Put the soft cream cheese and sour cream inside. Add the black pepper, chili powder, and garlic salt. Now, use a hand mixer or a strong wooden spoon. Mix it all until it’s smooth and creamy. Doesn’t that smell amazing already? It reminds me of my favorite taco nights.
Step 2: Time to add all the good stuff! Toss in the green onions, cheddar cheese, and your cooked chicken. I use a rotisserie chicken to save time. Then add the Rotel, your diced jalapeño, and the black beans. Gently stir it all together. Make sure everything gets a nice coat of that creamy mixture. Do you think the black beans or the chicken is the best part? Share below!
Step 3: Lay a tortilla on a piece of plastic wrap. Spread about one cup of the filling all over it. Go right to the edges! Now, roll it up as tightly as you can. The first time I did this, it was a bit messy. I still laugh at that. Then, wrap the plastic wrap around it tightly. This helps it hold its perfect round shape.
Step 4: Pop all your wrapped rolls into the fridge. They need to chill for at least one hour. This is the secret step. It makes the flavors become best friends. It also makes the rolls firm so they slice beautifully. When you’re ready, unwrap them and slice into little pinwheels. Each slice is a little burst of flavor.
Cook Time: 1 hour (chilling)
Total Time: 1 hour 20 minutes
Yield: 4 wraps (about 32 pinwheels)
Category: Lunch, Appetizer
Three Fun Twists to Try
The best part about cooking is making a recipe your own. You can change these wraps so easily. Here are a few ideas I’ve tried for my friends and family. They are all simple and delicious.
The Veggie Lover: Leave out the chicken. Add a whole cup of cooked corn and some diced bell peppers instead.
The Heat Seeker: Use pepper jack cheese instead of cheddar. And keep some of the jalapeño seeds for an extra spicy punch!
The Breakfast Swap: Imagine this for brunch! Use scrambled eggs and crumbled bacon instead of the chicken and beans.
Which one would you try first? Comment below!
Serving Your Masterpiece
Now, how should we serve these lovely pinwheels? I think they look beautiful on a big platter. You can arrange them in a sunny circle. I always add a small bowl of salsa for dipping. A little dollop of cool sour cream on the side is nice, too. It balances the spice perfectly.
For a drink, a tall glass of homemade lemonade is my go-to. The sweet and tart taste is so refreshing. For the grown-ups, a cold Mexican lager beer is a wonderful pairing. It cleanses the palate between each delicious bite. Which would you choose tonight?
Keeping Your Wraps Fresh and Tasty
These wraps are perfect for making ahead. You can keep them in the fridge for two days. Just wrap them tightly in plastic wrap so they do not dry out.
I once tried to freeze a wrap without wrapping it well. It got freezer burn and tasted funny. Now I wrap each one twice in plastic before freezing. They last a month that way.
Batch cooking saves you time on a busy week. It means a good meal is always ready for you. This makes your day feel a little easier and more special.
Let them thaw in the fridge overnight before you slice them. Have you ever tried storing it this way? Share below!
Easy Fixes for Wrap Troubles
Is your filling falling out? You might be adding too much. Use just one cup of filling per tortilla. Roll it up as tightly as you can.
I remember when my first wrap was too soggy. I did not drain the Rotel well enough. A good squeeze makes all the difference for a crisp roll.
Getting the roll right builds your cooking confidence. A tight roll also makes every slice look beautiful. This matters because we eat with our eyes first.
If your tortilla cracks, it might be too cold. Let them sit out for ten minutes before you roll. Which of these problems have you run into before?
Your Wrap Questions Answered
Q: Can I make these gluten-free? A: Yes! Just use your favorite gluten-free tortillas. They work just as well.
Q: How far ahead can I make them? A: You can assemble them two days before. They are perfect for parties.
Q: What can I use instead of chicken? A: Canned, drained tuna works in a pinch. It is still very tasty.
Q: Can I double the recipe? A: Of course! It is a great way to feed a crowd.
Q: Any other tips? A: Let the cream cheese get soft first. It mixes much easier. Which tip will you try first?
*Fun fact: The first tortillas were made by ancient Aztec and Mayan people thousands of years ago.*
From My Kitchen to Yours
I hope you love making these spicy wraps. They always remind me of my grandkids visiting. We make a big batch together for lunch.
I would love to see your kitchen creations. Your photos always make my day. Have you tried this recipe? Tag us on Pinterest!
Thank you for cooking with me today. I cannot wait to hear all your stories.
Happy cooking!
—Emma Caldwell.
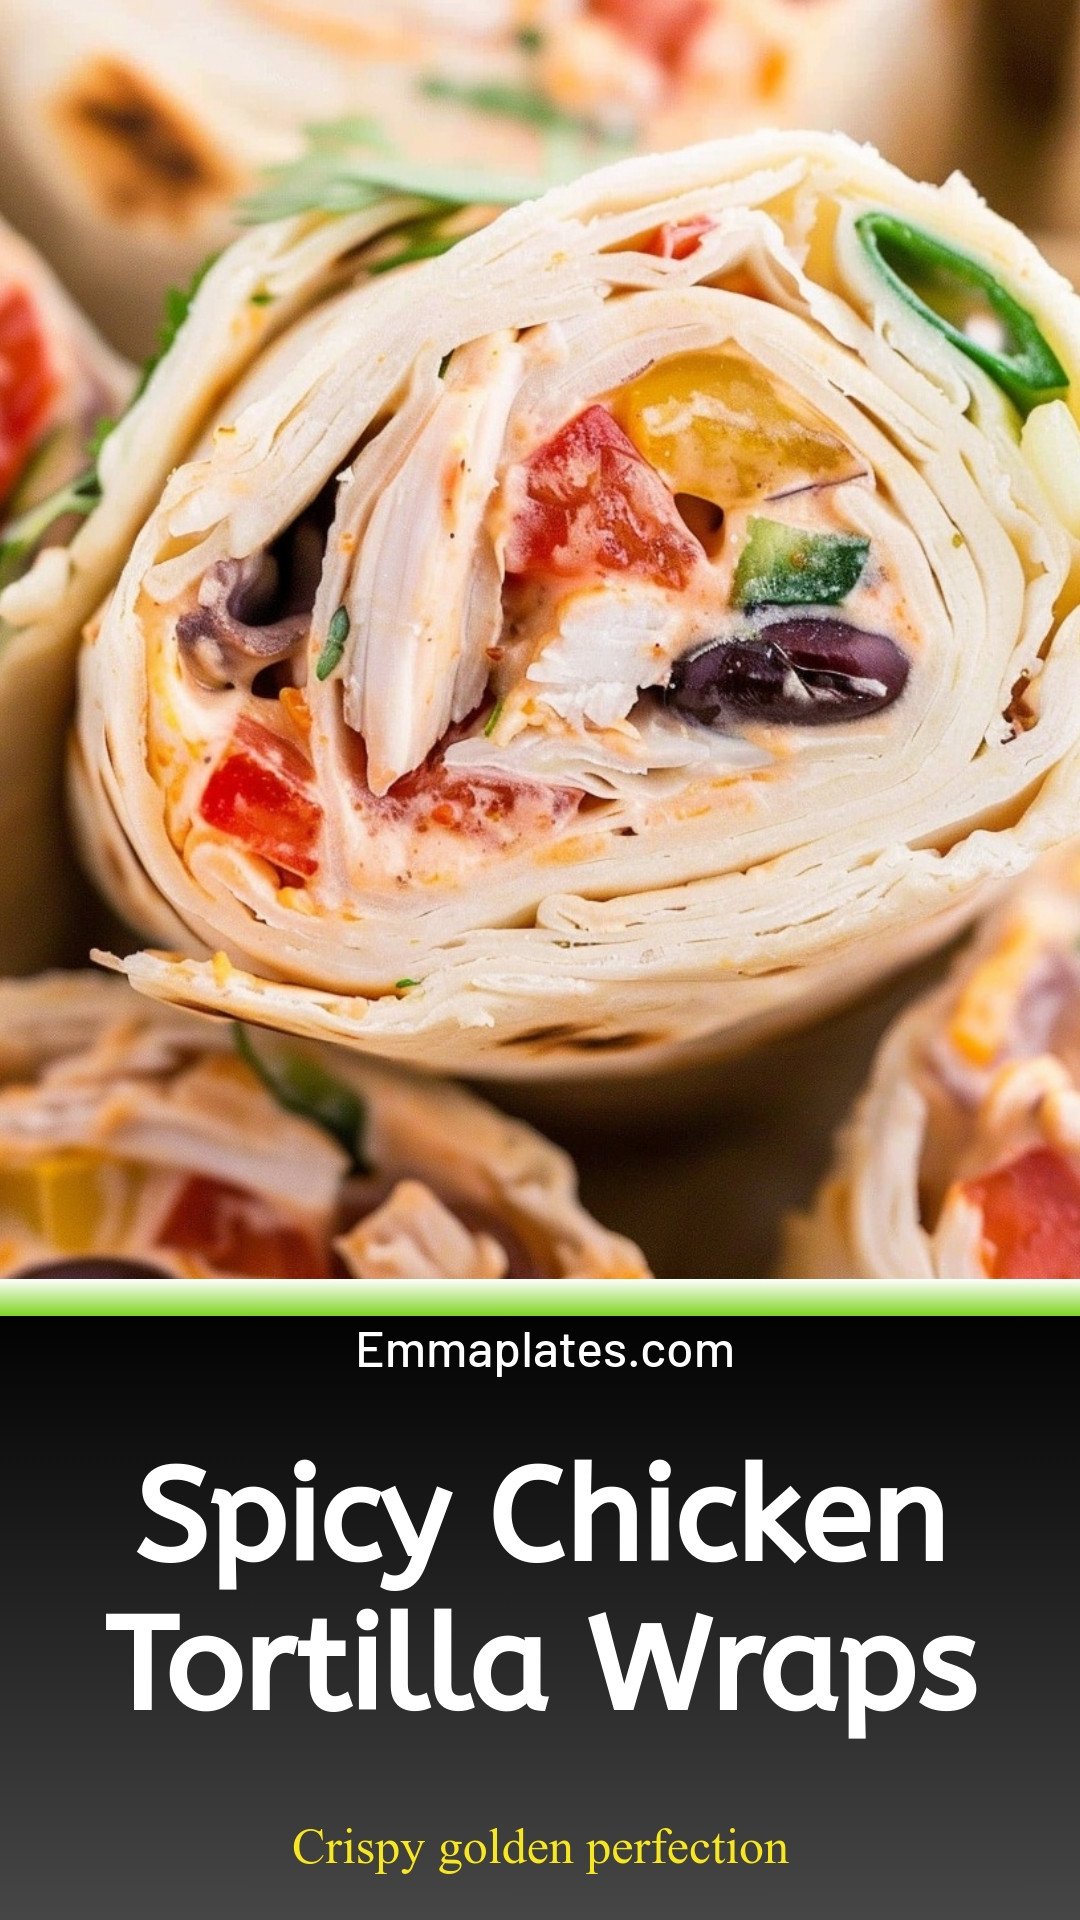
Spicy Chicken Tortilla Wraps: Crispy golden perfection
Description
Spicy chicken tortilla wraps are the perfect easy lunch or dinner! Ready in minutes and packed with flavor, this recipe is a guaranteed crowd-pleaser.
Ingredients
Instructions
- PREP:Make sure your cream cheese is at room temperature before starting to make it easiest to mix.Carefully dice your jalapeno, being careful to not touch your face until thoroughly washing your hands.Drain the Rotel and black beans before starting as well.
- In a mixing bowl, use a hand mixer or wooden spoon to beat together cream cheese, sour cream, pepper, chili powder, and garlic salt.
- Use a wooden spoon or rubber spatula to gently mix in green onions, cheddar cheese, chicken, Rotel, jalapeño, and black beans. Stir until evenly mixed.
- Place each tortilla on a sheet of plastic wrap.
- Spread about 1 cup of the mixture over the face of each tortilla. Roll the tortilla up tightly and wrap the plastic wrap around it to hold the shape.
- Refrigerate for a minimum of one hour to allow the flavors to combine and to firm up the tortilla and mixture for slicing into pinwheels.
- Slice the tortillas into ¾-1” sections. Serve.
Notes
- For easier slicing, ensure the wraps are well-chilled. You can make these a day ahead for a quick and easy meal or snack.


Leave a Reply