
My Trail Mix Secret
I always keep a bag of trail mix in my pantry. You never know when a hike might happen. Or when you need a cookie.
One rainy afternoon, my grandson wanted cookies. We had no chocolate chips. But we had that trail mix. We decided to try it. The result was a happy accident. I still laugh at that.
Why The Dough Needs a Nap
After you mix everything, let the dough rest. Twenty minutes is perfect. I know, you want to bake right away. I do too.
But this rest matters. It lets the flour drink up the wet ingredients. This gives you a soft, chewy cookie. Not a flat, crunchy one. Trust this kitchen grandma.
What’s your biggest baking impatience? Do you skip resting times too?
The Heart of the Cookie
Creaming the butter and sugars is magic. Mix them until they look fluffy and light. This puts tiny air pockets in your dough. Those pockets make the cookie tender.
Use the peanut butter from the jar, not the natural kind. It holds everything together better. *Fun fact: The salt in your trail mix and the flaky salt on top are different. The finishing salt gives you a little salty crunch in every bite. Doesn’t that sound amazing?
Baking With Your Eyes
Watch the clock, but trust your eyes more. Bake for about 10 minutes. The edges will be light gold. The center will still look a bit soft and gooey.
This is good. They keep baking on the hot tray after you take them out. This matters because it makes the cookie perfectly chewy. If you bake them until they look done in the oven, they’ll be too hard later.
Do you like your cookies soft or crispy? Tell me your favorite.
Make Them Your Own
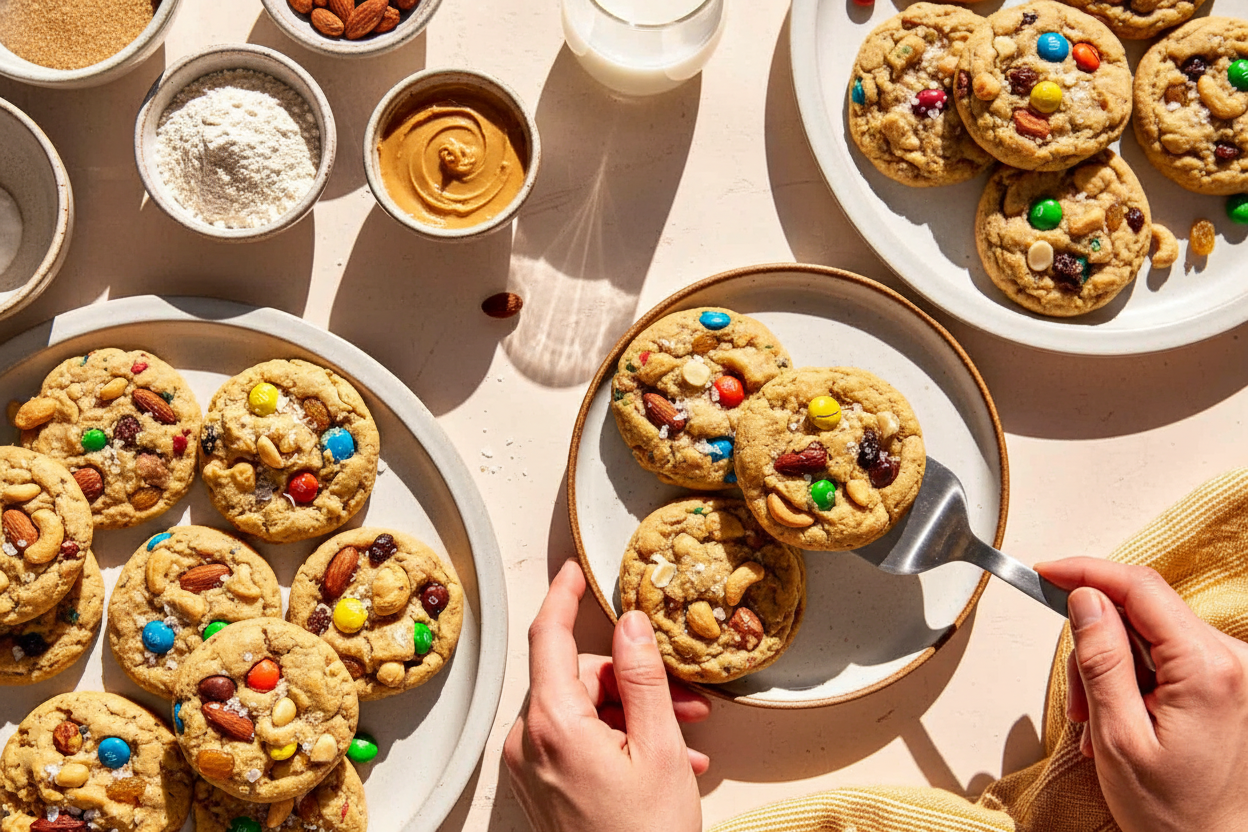
The best part is the trail mix. Use your favorite kind. I like one with raisins, nuts, and little chocolate candies. Every bite is a surprise.
Folding it in last keeps the goodies whole. You want to find them in your cookie. These cookies feel like an adventure. They are sweet, salty, and full of texture.
What would you put in your dream trail mix cookie? I’d love to hear your ideas.

Ingredients:
| Ingredient | Amount | Notes |
|---|---|---|
| all purpose flour | 1 1/3 cups | spooned and leveled |
| quick oats | 1 cup | |
| baking soda | 1 tsp. | |
| kosher salt | 3/4 tsp. | |
| unsalted butter | 1/2 cup | softened to room temperature |
| creamy peanut butter | 1/2 cup | like Skippy or Jif, not a natural peanut butter |
| light brown sugar | 3/4 cup | packed |
| granulated sugar | 1/2 cup | |
| large egg | 1 | room temperature |
| large egg yolk | 1 | room temperature |
| whole milk | 1 Tbsp. | |
| vanilla extract | 2 tsp. | |
| trail mix | 2 cups | e.g., Mountain Trail Mix |
| flaky sea salt | for finishing |
My Sweet & Salty Trail Mix Cookies
Hello, dear! Come sit at the counter. Let’s bake my trail mix cookies. They are my favorite hiking snack, but in cookie form. I dreamed them up after a long walk in the woods. My pockets were full of trail mix leftovers. Doesn’t that smell amazing already? The peanut butter and oats make them so cozy. And the salty bits are a happy surprise. I still laugh at that first batch. I was so excited, I forgot the baking soda! They were like little sweet rocks. We learn by doing, don’t we?
Step 1: First, line your baking sheets with parchment paper. Now, grab a medium bowl. Whisk your flour, quick oats, baking soda, and salt together. Just a gentle mix is perfect. Set this bowl aside. It’s like making a little dry ingredient nest.
Step 2: Time for the good stuff! Use your mixer for this. Cream the softened butter, peanut butter, and both sugars. Mix on medium-high for 3-4 minutes. It will get light and fluffy. Scrape the bowl sides with a spatula. (A hard-learned tip: if your butter is too cold, it won’t cream right. It should give softly when you press it.)
Step 3: Add the whole egg, the extra yolk, milk, and vanilla. Mix again until it’s all combined. That extra yolk makes the cookie so tender. Scrape the bowl once more. See how rich and golden it looks now?
Step 4: Slowly add your dry ingredient nest to the wet mix. Mix just until you see no more flour. The dough will be soft and airy. Now, gently fold in your two cups of trail mix. I use my trusty wooden spoon for this. What’s your must-have trail mix ingredient? Share below!
Step 5: Let the dough rest for 20 minutes. I know, waiting is hard! But this helps the flour drink up the moisture. It makes the cookie chewy. Preheat your oven to 350°F while you wait. You can scoop the dough now. Use a big spoon or a cookie scoop.
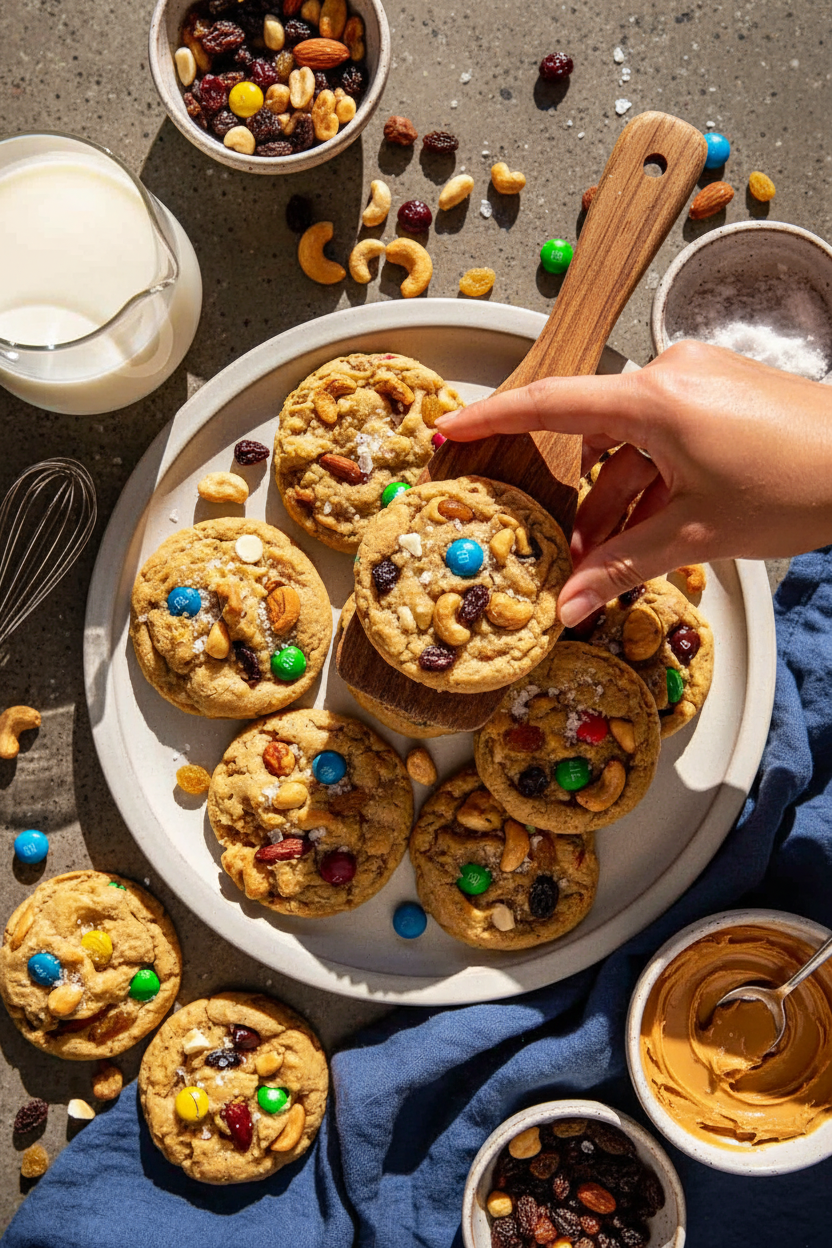
Step 6: Place dough balls on your sheets. Press a few extra trail mix bits on top if you like. Bake for 9-11 minutes. The edges will be light gold. The centers will look a little gooey. They keep baking on the hot sheet. Let them rest there for 5 minutes. Then move them to a rack. Sprinkle with a tiny pinch of flaky sea salt. It makes all the flavors sing.
Cook Time: 10 minutes per batch
Total Time: About 1 hour
Yield: About 2 dozen cookies
Category: Dessert, Snack
Three Fun Twists to Try
This dough is a wonderful friend. You can send it on so many adventures. Here are three ideas I love. They make the kitchen feel new again.
Birthday Cake: Use a “party mix” with yogurt candies and sprinkles. It’s a celebration cookie!
Tropical Escape: Try a trail mix with coconut, dried pineapple, and macadamia nuts. It tastes like sunshine.
Chocolate Lover’s Dream: Fold in extra chocolate chips and use a mix with chocolate candies. So rich and happy.
Which one would you try first? Comment below!
Serving Them Up Right
These cookies are perfect just as they are. But I love making a moment special. For a real treat, serve one warm with a scoop of vanilla ice cream. The salty-sweet mix is magic. Or pack two in a napkin for a friend’s lunchbox. It’s a little hug from your kitchen.
For drinks, a cold glass of milk is the classic choice. It always has been. For the grown-ups, a creamy stout beer pairs beautifully. The roasted notes love the peanuts and chocolate. Which would you choose tonight?
Keeping Your Trail Mix Cookies Perfect
Let’s keep these cookies tasting fresh. Cool them completely first. Store them in a tin at room temperature for five days. They will stay soft and chewy.
You can freeze the dough or baked cookies. I freeze dough balls on a tray. Then I pop them into a bag. This lets you bake just a few at a time. My grandkids love warm cookies after school.
Batch cooking saves so much time. Double the recipe and freeze half the dough. Future you will be so thankful on a busy day. This matters because good food should be easy to share.
Have you ever tried storing cookie dough this way? Share below!
Cookie Troubles? Easy Fixes Right Here
Is your cookie dough too sticky? Just let it rest. The twenty-minute wait is magic. It lets the flour soak up moisture. Your dough will be perfect to scoop.
Cookies spreading too much? Your butter was likely too soft. I once used melted butter by mistake. My cookies turned into one big sheet! Chilling the dough fixes this.
Are they coming out dry? You probably over-baked them. Take them out when the centers look soft. They keep cooking on the hot tray. This matters for a wonderfully chewy bite.
Fixing small problems builds kitchen confidence. You learn how ingredients work together. Which of these problems have you run into before?
Your Quick Cookie Questions Answered
Q: Can I make these gluten-free? A: Yes! Use a good gluten-free flour blend. Also use certified gluten-free oats.
Q: How far ahead can I make the dough? A: You can make it three days ahead. Keep it covered in the fridge.
Q: What if I don’t have trail mix? A: Use a cup of pretzels and a cup of chocolate chips. It will still be sweet and salty.
Q: Can I double the recipe? A: Absolutely. Just mix in a very large bowl. *Fun fact: Doubling is called “scaling up” in baking.*
Q: Is the flaky salt necessary? A: It adds a lovely finish. But your cookies will still be delicious without it. Which tip will you try first?
From My Kitchen to Yours
I hope you love baking these cookies. They are full of happy surprises in every bite. Sharing food is one of life’s great joys.
I would love to see your creations. Show me your cookie trays. Have you tried this recipe? Tag us on Pinterest! You can find me at @EmmasCozyKitchen.
Thank you for baking with me today. Happy cooking!
—Emma Caldwell.

Sweet and Salty Trail Mix Cookies: Sweet and Salty Trail Mix Cookie Recipe
Description
Sweet and salty trail mix cookies packed with chocolate, nuts, and dried fruit. The perfect easy, chewy treat for hikes, lunchboxes, or a quick energy boost!
Ingredients
Instructions
- Line 2 baking sheets with parchment paper or silpat baking mats.
- Whisk together the dry ingredients in a medium sized mixing bowl and set aside.
- In a stand mixer fitted with the paddle attachment, cream together the butter, peanut butter, brown sugar, and granulated sugar on medium-high speed until light and fluffy, ~3-4 minutes, scraping down the sides of the mixing bowl as needed.
- Add in the egg and yolk, milk and vanilla, mix again until combined, once again scraping down sides of the bowl as needed.
- Slowly add in the dry ingredients, mixing just until combined. The dough will be really light/fluffy/airy but shouldn’t be overly sticky.
- Add in the trail mix and fold in with a spatula, being careful not to over mix.
- Let the dough rest at room temperature for 20 minutes or in fridge is OK too! This brief rest period will allow the flour to hydrate the dough and help us get a soft and chewy cookie.
- Preheat the oven to 350°F. Scoop the cookie dough with a 2 Tbsp. scoop (should yield ~22-24 cookies).
- Place on prepared baking sheets and top the cookies with a little more trail mix if desired.
- Bake for 9-11 minutes (I like to go slightly underbaked for a delicious chewy cookie, the edges should be a light golden brown and centers still a little gooey looking, they will continue to bake on baking sheet when removed from oven). Swirl a cup around the cookies when still warm if needed to make perfect circles.
- Let them rest on the cookie sheet for a few minutes then transfer to a wire rack to cool completely. Garnish with flaky sea salt and enjoy.


Leave a Reply