

The Best Kind of Mix-Up
I once made a wonderful mistake. I was baking an apple crisp. My ice cream was churning nearby. A big spoonful of apples tumbled right into the cream! I still laugh at that. But you know what? It was delicious. That happy accident is now this recipe.
This matters because cooking should be fun. It is not about being perfect. It is about creating something good. Have you ever had a kitchen mistake turn out great? I would love to hear your story!
Why We Start with a Custard
Let’s talk about the custard base. It sounds fancy, but it is simple. We cook eggs and milk gently. This makes the ice cream wonderfully smooth. It keeps it from turning into a hard block in your freezer.
Whisking the warm milk into the eggs slowly is key. This is called “tempering.” It keeps the eggs from scrambling. Just go slow and steady. You will see it turn a lovely pale yellow. Doesn’t that smell amazing? That is the smell of patience paying off.
The Heart of the Scoop
The apple filling is the heart of this treat. I use Granny Smith apples. They are tart and hold their shape. The spices are cozy. Just a tiny pinch of cloves and nutmeg. It makes the kitchen smell like autumn.
*Fun fact: The cornstarch mixed with water is called a “slurry.” It thickens the apple juices into a glossy sauce. This matters because it stops icy bits in your ice cream. Every bite will be soft and full of flavor.
A Little Crunch for Fun
Now for the crisp topping! Baking it first is my secret. It stays wonderfully crunchy. You mix it with your fingers. It is a bit messy and very fun. I like to add chopped pecans for extra crunch.
This crunchy part matters. It gives you a surprise in every bite. Texture makes food exciting. Do you prefer your ice cream with mix-ins, or smooth and plain? Tell me your favorite way!
Putting It All Together
When your custard is cold, stir in the vanilla and cream. Use real vanilla bean paste if you can. You will see all those lovely little black specks. Then let your ice cream maker do its magic.
Near the end, fold in your cooled apples and crisp. Be gentle. You want lovely swirls. I always save some topping to sprinkle on top in the container. It makes it look so pretty. Are you a soft-serve fan, or do you like it frozen solid?
Ingredients:
| Ingredient | Amount | Notes |
|---|---|---|
| Ice Cream Base | ||
| Egg yolks | 4 | room temperature |
| Granulated sugar | ½ cup | |
| Vanilla bean paste | 3 tsp | |
| Heavy cream | 1 ⅓ cups | |
| Whole milk | 1 cup | |
| Apple Pie Filling | ||
| Granny Smith apples | 5 cups | peeled and sliced thin |
| Lemon juice | ½ lemon | juiced |
| Sugar | 1 cup | |
| Salt | Pinch | |
| Ground cinnamon | 1 tsp | |
| Ground cloves | 1/16 tsp | |
| Ground nutmeg | 1/16 tsp | |
| Water | ½ cup | |
| Cornstarch + Water | 2 tbsp + 3 tbsp | |
| Crisp Topping | ||
| Rolled oats | ½ cup | |
| Cinnamon | ½ tsp | |
| Butter | 4 tbsp | melted and cooled |
| All-purpose or gluten-free 1.1 flour | ½ cup | |
| Salt | Pinch | |
| Pecans or walnuts (optional) | ¼ cup | chopped |
My Apple Crisp Ice Cream Adventure
Hello, my dear. Pull up a chair. Let’s make a memory in a bowl. This recipe is like autumn in your freezer. It has cozy apple pie filling and a crunchy oat topping. I think it’s pure happiness with a spoon. My grandson calls it “pie cream.” I still laugh at that. Making ice cream is a little project. But every step is worth it. The smell of baking crisp topping is amazing. It makes the whole kitchen feel warm.
We will make three parts. First, a sweet custard base. Then, a spiced apple filling. Finally, that wonderful crisp crumble. (My hard-learned tip: let everything get completely cold. Warm mix-ins make icy ice cream.) Ready? Let’s begin our sweet adventure together.
Step 1: Make the custard base. Beat the egg yolks and sugar until they’re pale and fluffy. This takes about three minutes. It looks like sunshine in a bowl. Now, warm the milk in a pan. Don’t let it boil! Just steam a little at the edges.
Step 2: This step is called “tempering.” It keeps the eggs from scrambling. Slowly whisk a little warm milk into your egg mixture. Go slowly now. Then whisk in the rest. Pour it all back into the pan.
Step 3: Cook this on low heat. Whisk it the whole time. You want it to thicken just a bit. It should coat the back of a spoon. Then pour it into a bowl and chill it. Patience is a kitchen virtue, my dear.
Step 4: Let’s make the apple pie filling. Toss your thin apple slices with lemon juice. This keeps them from turning brown. Put them in a pot with sugar, spices, and water. Cook until the apples get nice and soft.
Step 5: Mix cornstarch with a little water. Stir this slurry into the apples. It will thicken the juices into a glossy sauce. Let this cool completely too. What’s your favorite apple for baking? Share below!
Step 6: Time for the crisp topping! Mix your dry ingredients in a bowl. Add the melted, cooled butter. Use your fingers to make lovely crumbs. Bake them until golden and smelling like cookies. Let them cool. They get extra crunchy.
Step 7: The fun part! Whisk vanilla bean paste and cream into your cold custard. See those lovely little vanilla specks? Pour it into your ice cream machine. Let it churn until it looks like soft-serve.
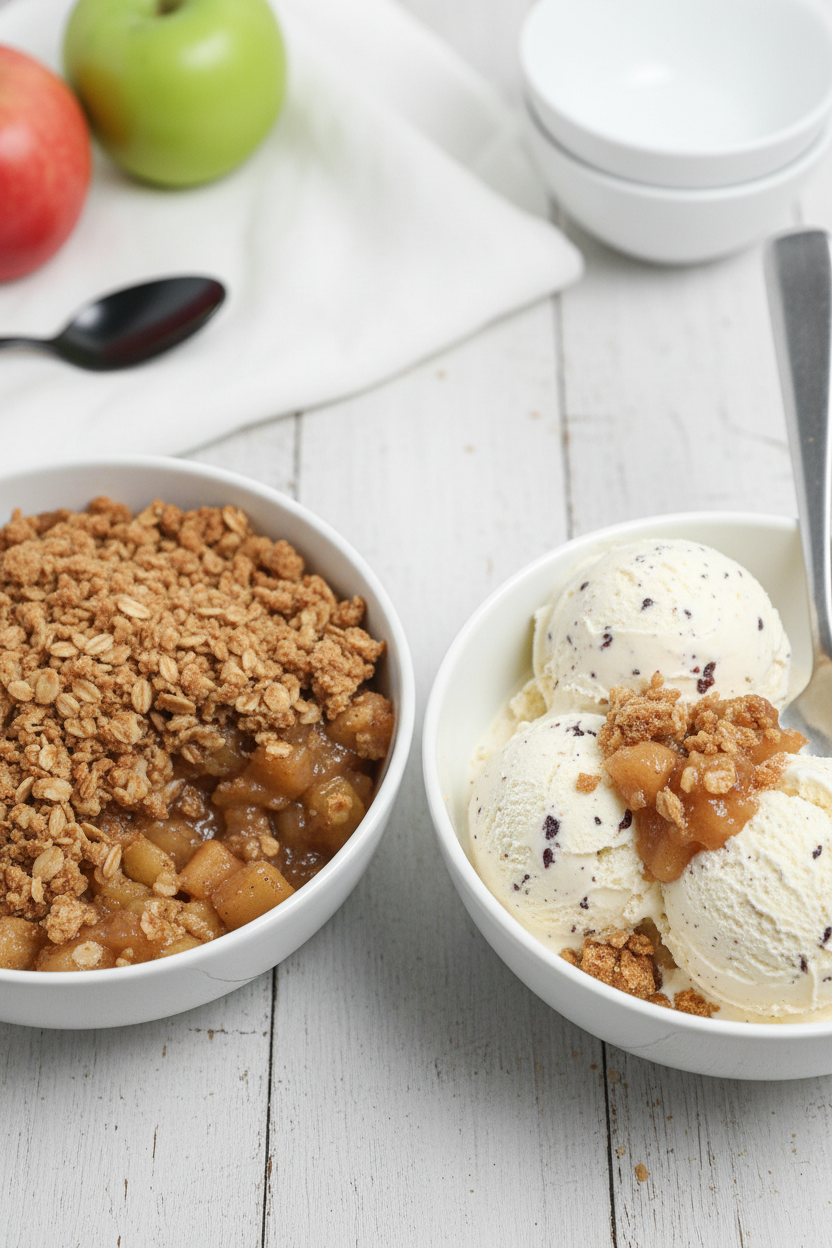
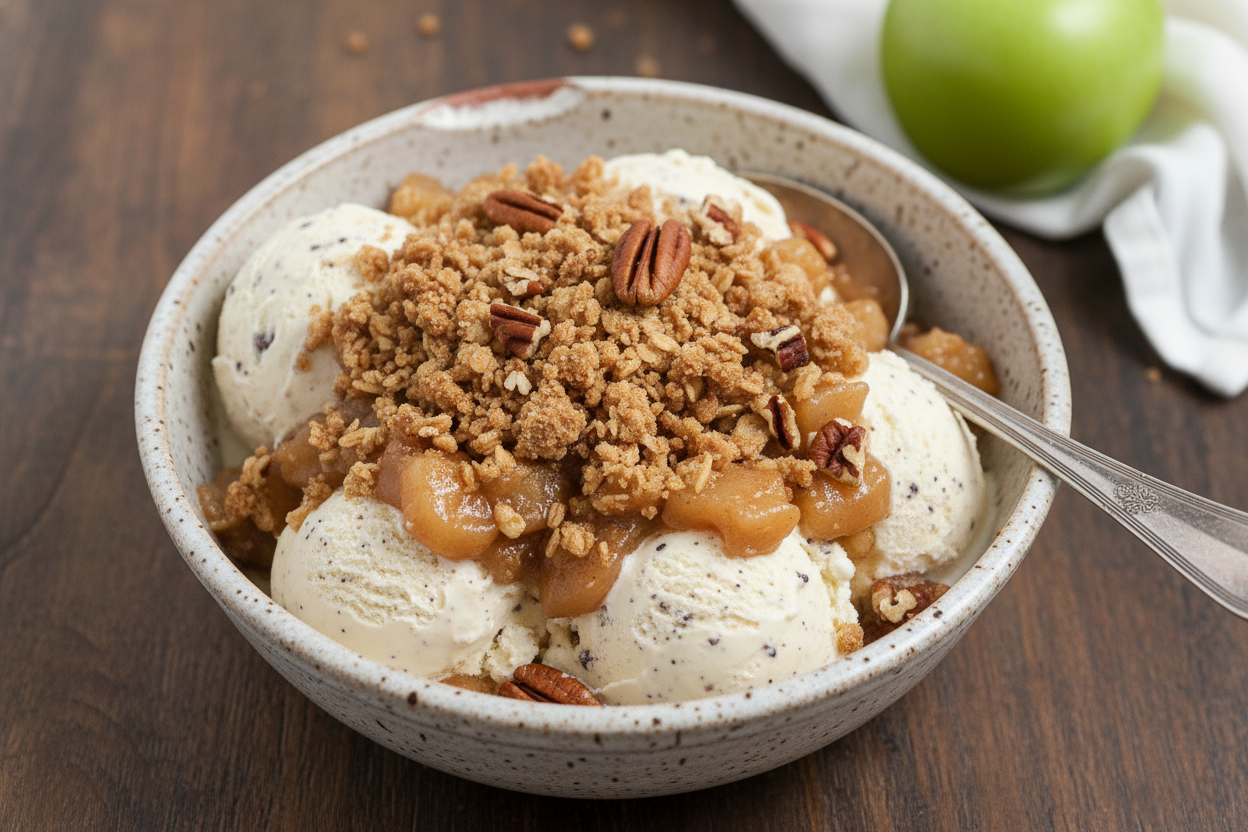
Step 8: When the machine is almost done, add one cup of apple filling. Add a half-cup of crisp topping too. Let it swirl just a little. You can eat it soft now. Or freeze it for a firmer treat. I like to layer more filling and crisp on top.
Cook Time: 1–1.5 hours
Total Time: 4–6 hours (includes chilling & freezing)
Yield: About 8 servings
Category: Dessert, Ice Cream
Three Tasty Twists to Try
This recipe is like a favorite sweater. You can dress it up for different occasions. Here are three fun ideas. They make it feel new again.
Pear & Ginger Twist: Use ripe pears instead of apples. Add a teaspoon of fresh grated ginger to the filling. It’s so bright and zingy.
Salty Caramel Swirl: Skip the apple filling. Let the ice cream churn plain. Then swirl in a half-cup of good salted caramel sauce. Divine!
Berry Crisp Version: In summer, use mixed berries. Cook them just like the apples. Use a little less water. The color is just gorgeous.
Which one would you try first? Comment below!
Serving It Up Just Right
This ice cream is a star all by itself. But a little presentation is nice. Serve it in a small bowl or a pretty glass. Crumble a little extra baked crisp on top. A tiny sprinkle of cinnamon looks lovely. For a real treat, serve it warm. Place a scoop on a small, warm piece of real apple crisp. The contrasts are wonderful.
What to drink with it? A hot cup of spiced chai tea is perfect. The spices dance together. For a grown-up pairing, a small glass of sweet sherry is nice. It tastes like a holiday. Which would you choose tonight?
Keeping Your Apple Crisp Happy
Let’s talk about storing your dessert. The ice cream needs a freezer-safe container. Press plastic wrap right on its surface. This stops ice crystals from forming.
The apple crisp topping stays crunchiest stored alone. Keep it in a jar on the counter. The apple filling is happy in a bowl in the fridge.
You can make all the parts ahead of time. Assemble them just before serving. This is perfect for having friends over.
I once stored the topping with the filling. It turned soggy by morning. Now I keep them separate. It makes all the difference.
Batch cooking saves time and creates joy. You can enjoy a sweet treat any night. It turns a regular Tuesday into something special. Have you ever tried storing it this way? Share below!
Simple Fixes for Common Hiccups
First, your custard might look scrambled. This happens if the heat is too high. Just pour it through a fine strainer. It will be smooth again.
Second, your apple filling could be too runny. Make sure your cornstarch slurry is well mixed. I remember when mine was lumpy. The filling never got thick.
Third, the crisp topping might burn. Ovens can be tricky friends. Check it at 15 minutes. Give the pan a little shake for even color.
Fixing small problems builds your cooking confidence. You learn how ingredients work together. This matters because cooking should feel fun, not scary.
Getting the texture right matters most for flavor. A creamy custard and crunchy topping are perfect. Which of these problems have you run into before?
Your Quick Questions, Answered
Q: Can I make this gluten-free? A: Yes! Use the gluten-free flour listed. It works perfectly for the crisp.
Q: How far ahead can I make parts? A: All parts keep for 2 days. Just assemble before you eat.
Q: What if I don’t have vanilla bean paste? A: Use two teaspoons of good vanilla extract. It will still taste wonderful.
Q: Can I double the recipe? A: You can double the apple and crisp easily. Only make one batch of ice cream at a time.
Q: Are the nuts necessary? A: Not at all. They just add a nice crunch. The recipe is lovely without them. Which tip will you try first?
From My Kitchen to Yours
I hope you love making this dessert. It is full of cozy, happy flavors. *Fun fact: This was my grandson’s most-requested birthday treat!*
I would love to see your creation. Sharing food connects us all. It is my favorite thing about writing.
Have you tried this recipe? Tag us on Pinterest! Let’s fill that board with everyone’s beautiful apple crisps. Thank you for cooking with me today.
Happy cooking!
—Emma Caldwell.
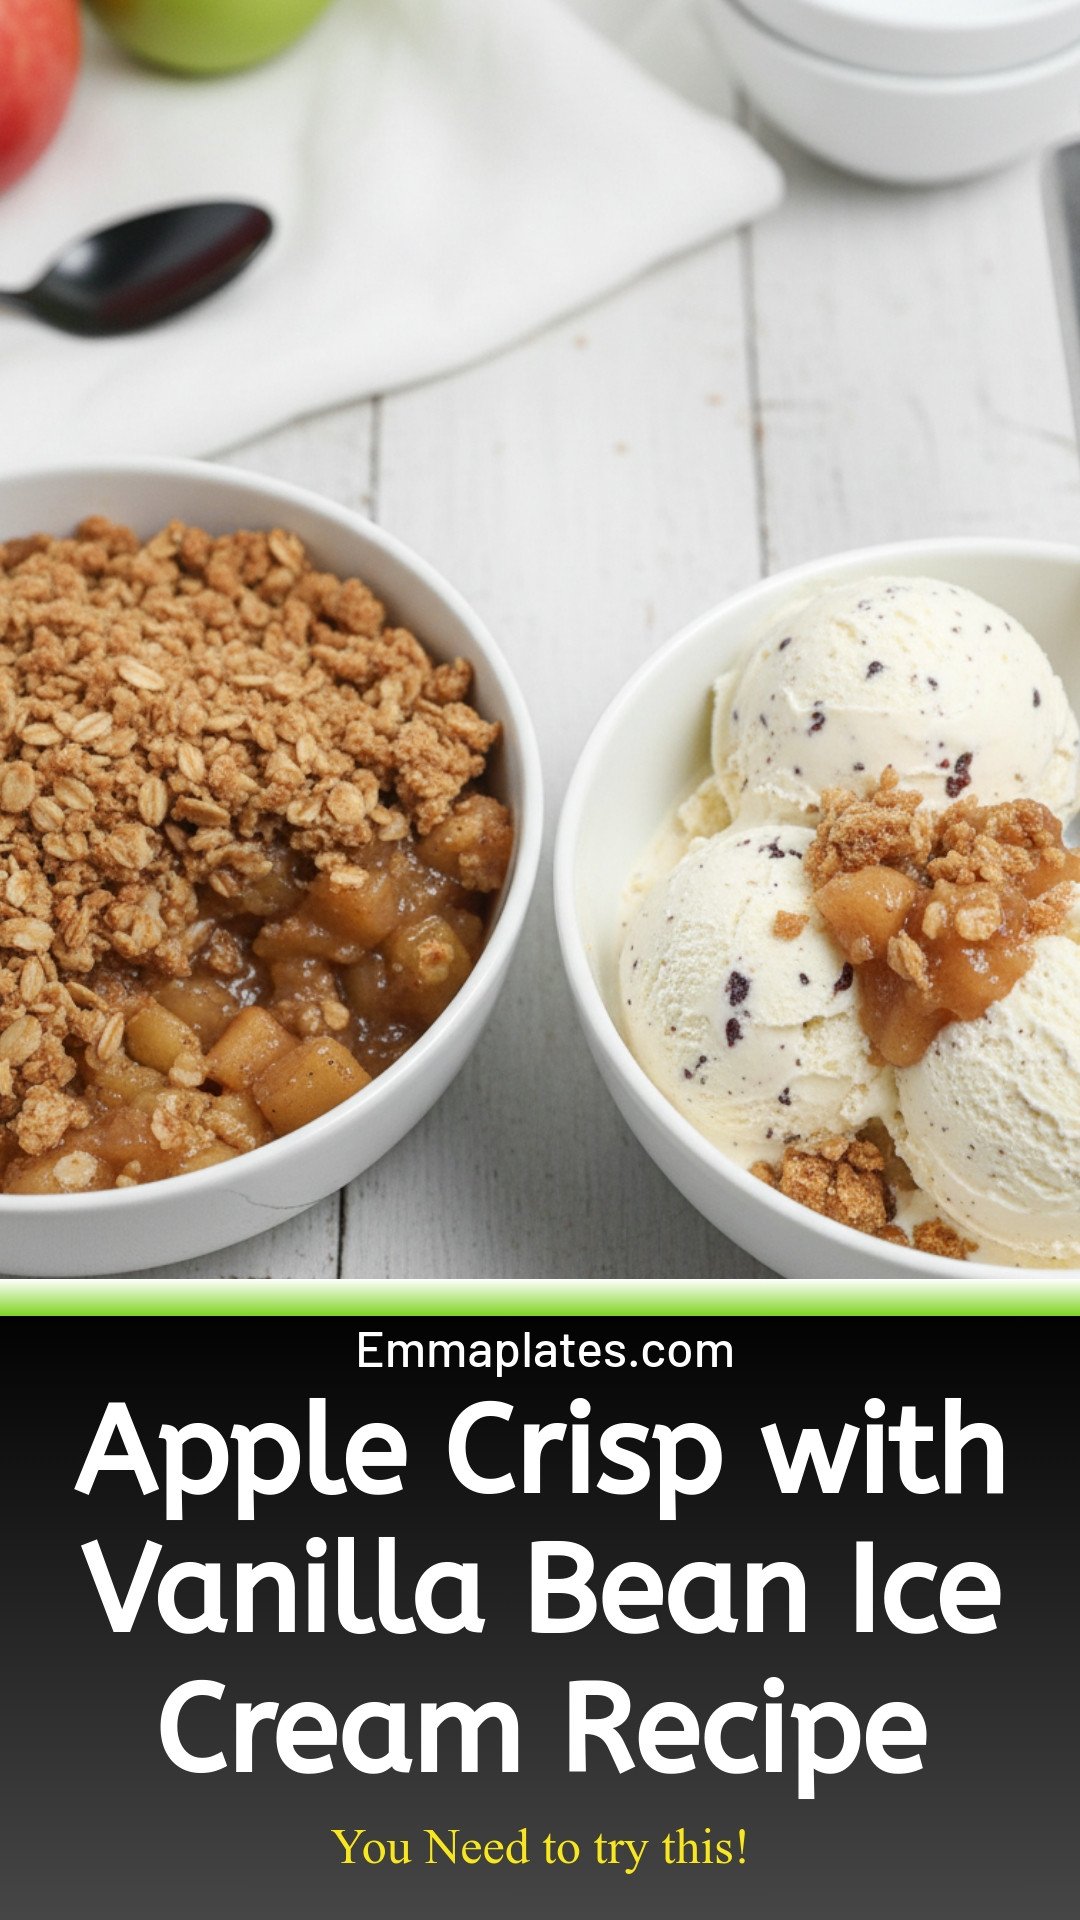
Apple Crisp Vanilla Bean Ice Cream: Apple Crisp with Vanilla Bean Ice Cream Recipe
Description
Homemade apple crisp meets rich vanilla bean ice cream. The perfect easy fall dessert recipe that’s cozy and delicious.
Ingredients
Instructions
- Make the Custard Base: In a mixing bowl, beat egg yolks and sugar until light and fluffy (about 3 minutes). In a saucepan, heat the milk over medium-low until steaming at the edges (not boiling). Slowly whisk a little warm milk into the egg mixture to temper. Continue adding milk slowly while whisking. Pour the tempered mixture back into the saucepan. Cook on low heat, whisking constantly, until it reaches 165°F and thickens slightly. Pour into a container and chill completely in the fridge.
- Make the Apple Pie Filling: Add sliced apples, lemon juice, sugar, salt, cinnamon, cloves, nutmeg, and water to a stock pot. Cook over low to medium heat for 15 minutes, until apples are soft. In a bowl, stir together cornstarch and water. Add the slurry to the pot and stir well. Continue cooking until thickened. Remove from heat and cool completely.
- Make the Crisp Topping: Mix oats, cinnamon, flour, salt, and chopped nuts (if using) in a bowl. Add melted butter and work into coarse crumbs with fingers or a fork. Spread onto a baking sheet. Bake at 375°F for 20–30 minutes until golden brown. Cool completely.
- Churn the Ice Cream: Once the custard base is cold, whisk in the vanilla bean paste and heavy cream. Pour into your ice cream maker and churn according to machine instructions. When the machine signals it’s ready for mix-ins, fold in 1 cup cooled apple pie filling and ½ cup crisp topping.
- Serve or Freeze: Serve soft or transfer to a freezer-safe container. For extra texture, layer more apple filling and crisp on top before freezing.
Notes
- #dessertinspo


Leave a Reply